Arduino avec plusieurs boutons

Ce tutoriel vous apprend à programmer un Arduino pour utiliser plusieurs boutons simultanément sans utiliser la fonction delay(). Le tutoriel fournit le code de deux manières :

Nous utiliserons cinq boutons comme exemples. Vous pouvez facilement le modifier pour l'adapter à deux boutons, quatre boutons ou même plus.

Préparation du matériel

1×Arduino Uno
1×USB 2.0 cable type A/B
1×PCB-mount Button
1×Panel-mount Button
1×Breadboard
1×Jumper Wires
1×(Optional) 9V Power Adapter for Arduino
1×(Recommended) Screw Terminal Block Shield for Arduino Uno
1×(Optional) Transparent Acrylic Enclosure For Arduino Uno

Or you can buy the following sensor kits:

1×DIYables Sensor Kit (30 sensors/displays)
1×DIYables Sensor Kit (18 sensors/displays)
Divulgation : Certains des liens fournis dans cette section sont des liens affiliés Amazon. Nous pouvons recevoir une commission pour tout achat effectué via ces liens, sans coût supplémentaire pour vous. Nous vous remercions de votre soutien.

À propos du bouton

Nous disposons d'un tutoriel détaillé sur les boutons incluant le schéma des broches du matériel, le principe de fonctionnement, le câblage Arduino et les instructions de code. Apprenez-en plus ici :

Diagramme de câblage
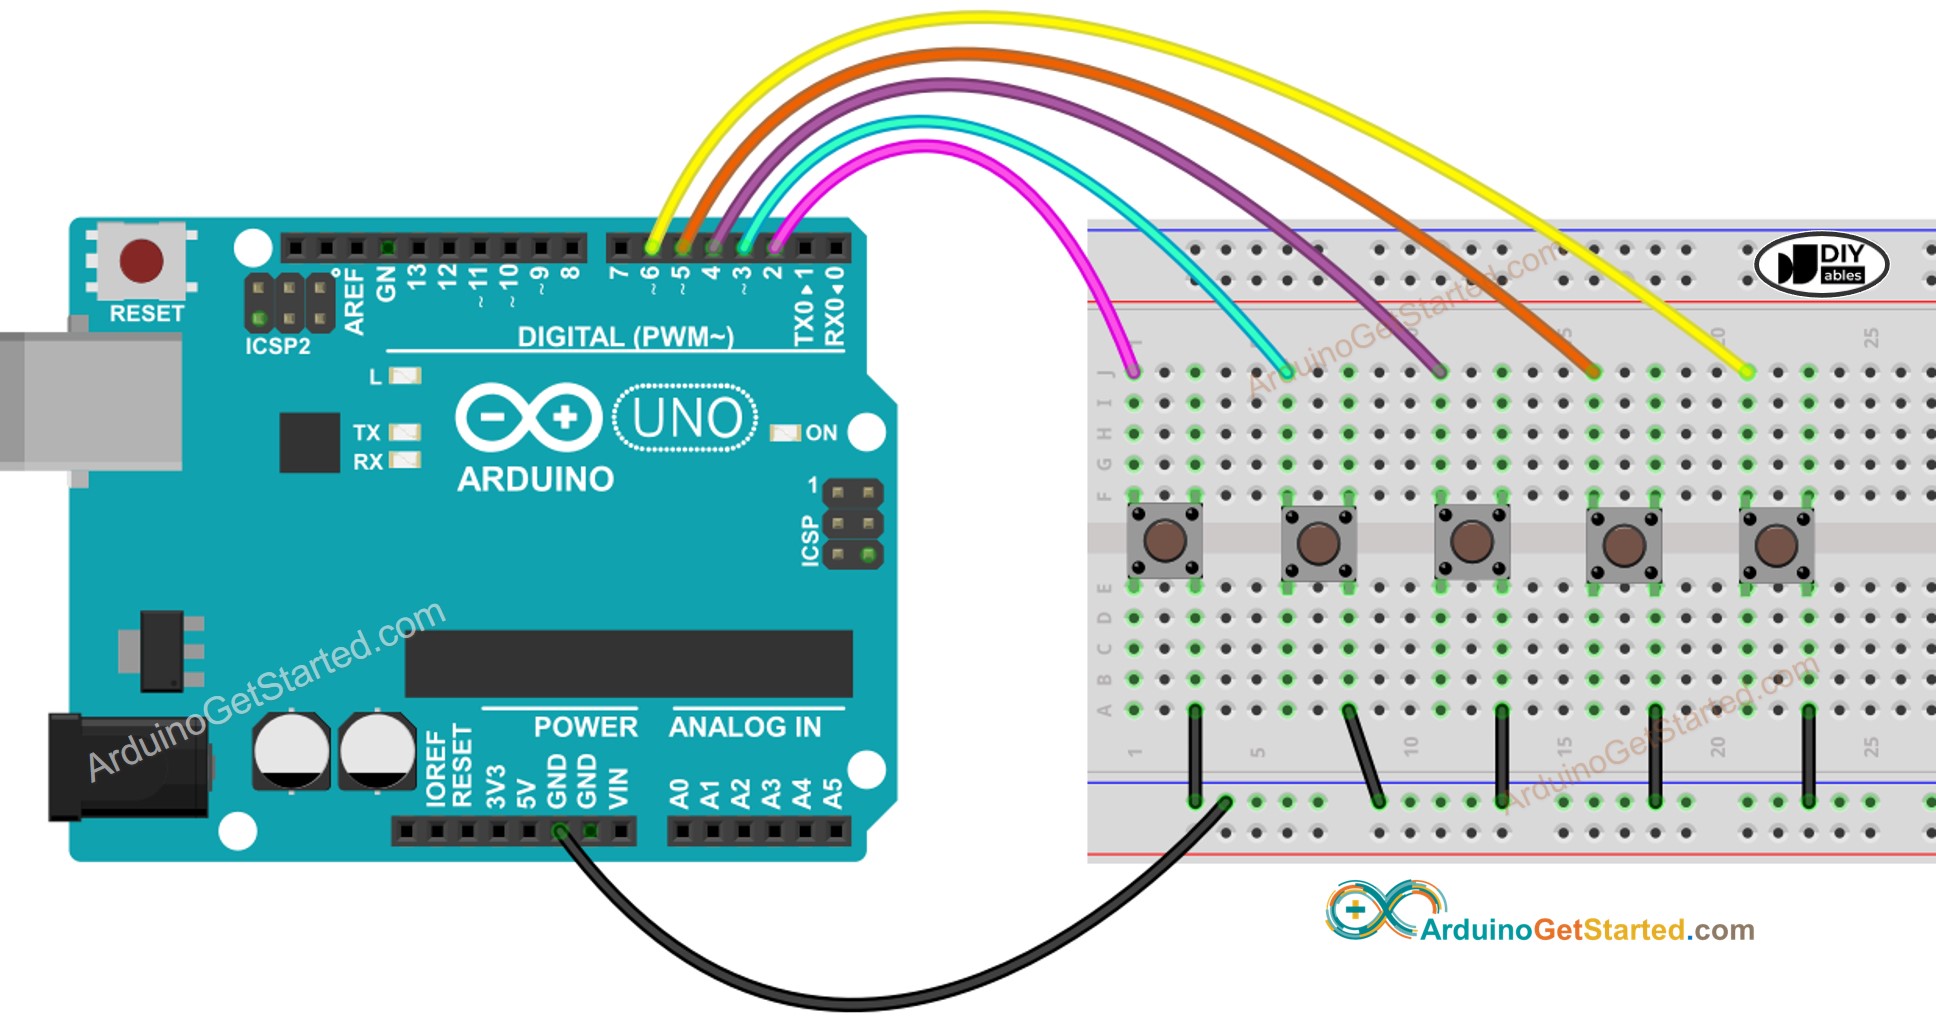
Schéma de câblage de plusieurs boutons Arduino

This image is created using Fritzing. Click to enlarge image

Code Arduino - Plusieurs Boutons avec anti-rebond

Lorsque vous utilisez plusieurs boutons, les choses peuvent se compliquer dans certains scénarios :

Heureusement, la bibliothèque ezButton simplifie ce processus en gérant en interne le rebond et les événements des boutons. Cela soulage les utilisateurs de la tâche de gestion des horodatages et des variables lors de l'utilisation de la bibliothèque. De plus, l'utilisation d'un tableau de boutons peut améliorer la clarté et la concision du code.

/* * Ce code Arduino a été développé par newbiely.fr * Ce code Arduino est mis à disposition du public sans aucune restriction. * Pour des instructions complètes et des schémas de câblage, veuillez visiter: * https://newbiely.fr/tutorials/arduino/arduino-multiple-button */ #include <ezButton.h> #define BUTTON_NUM 5 // the number of buttons #define BUTTON_PIN_1 2 // The Arduino pin connected to the button 1 #define BUTTON_PIN_2 3 // The Arduino pin connected to the button 2 #define BUTTON_PIN_3 4 // The Arduino pin connected to the button 3 #define BUTTON_PIN_4 5 // The Arduino pin connected to the button 4 #define BUTTON_PIN_5 6 // The Arduino pin connected to the button 5 ezButton button1(BUTTON_PIN_1); // create ezButton object for button 1 ezButton button2(BUTTON_PIN_2); // create ezButton object for button 2 ezButton button3(BUTTON_PIN_3); // create ezButton object for button 3 ezButton button4(BUTTON_PIN_4); // create ezButton object for button 4 ezButton button5(BUTTON_PIN_5); // create ezButton object for button 5 void setup() { Serial.begin(9600); button1.setDebounceTime(100); // set debounce time to 100 milliseconds button2.setDebounceTime(100); // set debounce time to 100 milliseconds button3.setDebounceTime(100); // set debounce time to 100 milliseconds button4.setDebounceTime(100); // set debounce time to 100 milliseconds button5.setDebounceTime(100); // set debounce time to 100 milliseconds } void loop() { button1.loop(); // MUST call the loop() function first button2.loop(); // MUST call the loop() function first button3.loop(); // MUST call the loop() function first button4.loop(); // MUST call the loop() function first button5.loop(); // MUST call the loop() function first // get button state after debounce int button1_state = button1.getState(); // the state after debounce int button2_state = button2.getState(); // the state after debounce int button3_state = button3.getState(); // the state after debounce int button4_state = button4.getState(); // the state after debounce int button5_state = button5.getState(); // the state after debounce /* Serial.print("The button 1 state: "); Serial.println(button1_state); Serial.print("The button 2 state: "); Serial.println(button2_state); Serial.print("The button 3 state: "); Serial.println(button3_state); Serial.print("The button 4 state: "); Serial.println(button4_state); Serial.print("The button 5 state: "); Serial.println(button5_state); */ if (button1.isPressed()) Serial.println("The button 1 is pressed"); if (button1.isReleased()) Serial.println("The button 1 is released"); if (button2.isPressed()) Serial.println("The button 2 is pressed"); if (button2.isReleased()) Serial.println("The button 2 is released"); if (button3.isPressed()) Serial.println("The button 3 is pressed"); if (button3.isReleased()) Serial.println("The button 3 is released"); if (button4.isPressed()) Serial.println("The button 4 is pressed"); if (button4.isReleased()) Serial.println("The button 4 is released"); if (button5.isPressed()) Serial.println("The button 5 is pressed"); if (button5.isReleased()) Serial.println("The button 5 is released"); }

Étapes rapides

  • Effectuez le câblage comme sur l'image ci-dessus.
  • Connectez la carte Arduino à votre PC via un câble USB.
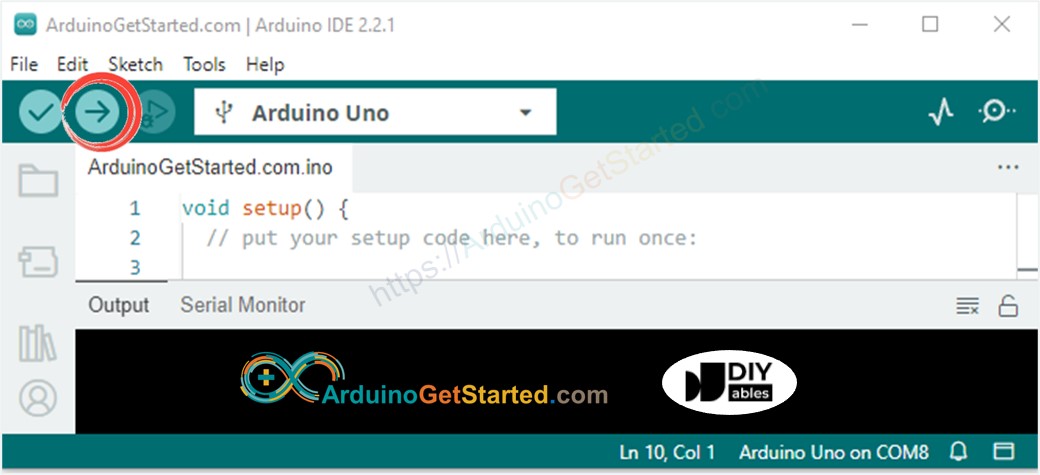
  • Ouvrez l'Arduino IDE sur votre PC.
  • Sélectionnez la bonne carte Arduino (par exemple, Arduino Uno) et le port COM.
  • Cliquez sur l'icône des bibliothèques à la barre latérale gauche de l'Arduino IDE.
  • Recherchez "ezButton", puis trouvez la bibliothèque de boutons par ArduinoGetStarted.
  • Cliquez sur le bouton Installer pour installer la bibliothèque ezButton.
Bibliothèque de bouton Arduino
  • Copiez le code ci-dessus et collez-le dans l'IDE Arduino.
  • Compilez et téléchargez le code sur la carte Arduino en cliquant sur le bouton Upload de l'IDE Arduino.
Comment télécharger un code Arduino sur Arduino IDE
  • Ouvrez le moniteur série sur Arduino IDE
  • Appuyez et relâchez le bouton un par un
COM6
Send
The button 1 is pressed The button 1 is released The button 2 is pressed The button 2 is released The button 3 is pressed The button 3 is released The button 4 is pressed The button 4 is released The button 5 is pressed The button 5 is released
Autoscroll Show timestamp
Clear output
9600 baud  
Newline  

Code Arduino - Plusieurs boutons utilisant un tableau

Nous pouvons améliorer le code ci-dessus en utilisant un tableau de boutons. Le code suivant utilise ce tableau pour gérer les objets bouton.

/* * Ce code Arduino a été développé par newbiely.fr * Ce code Arduino est mis à disposition du public sans aucune restriction. * Pour des instructions complètes et des schémas de câblage, veuillez visiter: * https://newbiely.fr/tutorials/arduino/arduino-multiple-button */ #include <ezButton.h> #define BUTTON_NUM 5 // the number of buttons #define BUTTON_PIN_1 2 // The Arduino pin connected to the button 1 #define BUTTON_PIN_2 3 // The Arduino pin connected to the button 2 #define BUTTON_PIN_3 4 // The Arduino pin connected to the button 3 #define BUTTON_PIN_4 5 // The Arduino pin connected to the button 4 #define BUTTON_PIN_5 6 // The Arduino pin connected to the button 5 ezButton buttonArray[] = { ezButton(BUTTON_PIN_1), ezButton(BUTTON_PIN_2), ezButton(BUTTON_PIN_3), ezButton(BUTTON_PIN_4), ezButton(BUTTON_PIN_5) }; void setup() { Serial.begin(9600); for (byte i = 0; i < BUTTON_NUM; i++) { buttonArray[i].setDebounceTime(100); // set debounce time to 100 milliseconds } } void loop() { for (byte i = 0; i < BUTTON_NUM; i++) buttonArray[i].loop(); // MUST call the loop() function first for (byte i = 0; i < BUTTON_NUM; i++) { // get button state after debounce int button_state = buttonArray[i].getState(); // the state after debounce /* Serial.print("The button "); Serial.print(i + 1); Serial.print(": "); Serial.println(button_state); */ if (buttonArray[i].isPressed()) { Serial.print("The button "); Serial.print(i + 1); Serial.println(" is pressed"); } if (buttonArray[i].isReleased()) { Serial.print("The button "); Serial.print(i + 1); Serial.println(" is released"); } } }

Vidéo

※ OUR MESSAGES

  • Please feel free to share the link of this tutorial. However, Please do not use our content on any other websites. We invested a lot of effort and time to create the content, please respect our work!