Arduino - Afficher la température provenant du capteur LM35 sur un OLED
Dans ce tutoriel, nous allons apprendre à lire la température à partir du capteur LM35 et à l'afficher sur un OLED.
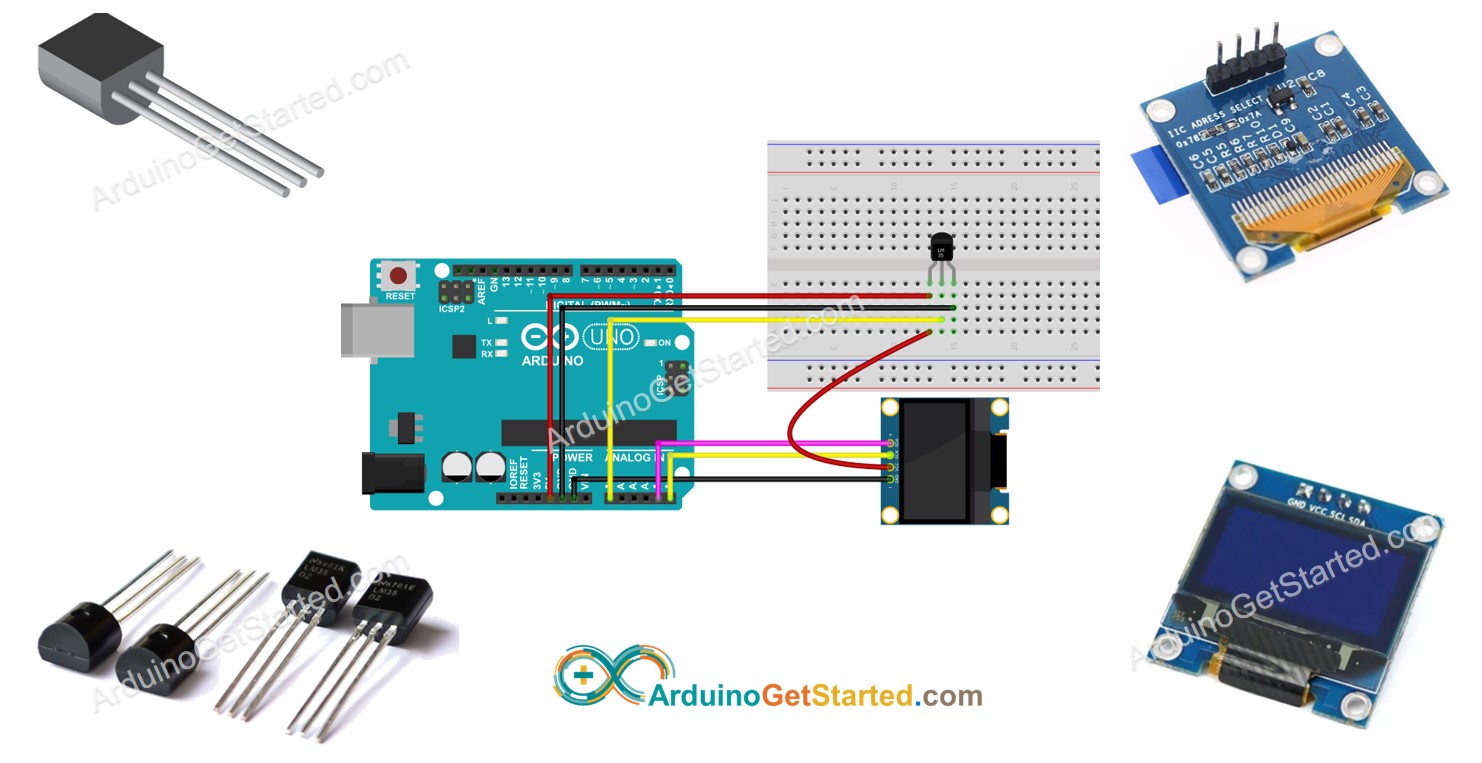
Préparation du matériel
Ou vous pouvez acheter les kits suivants:
| 1 | × | Kit de Démarrage DIYables STEM V3 (Arduino inclus) | |
| 1 | × | Kit de Capteurs DIYables (18 capteurs/écrans) |
Divulgation : Certains des liens fournis dans cette section sont des liens affiliés Amazon. Nous pouvons recevoir une commission pour tout achat effectué via ces liens, sans coût supplémentaire pour vous. Nous vous remercions de votre soutien.
Note d'achat: Si vous souhaitez un écran OLED plus grand, utilisez le Arduino - Écran OLED SSD1309 128×64 | Tutoriel OLED I2C de 2,42 pouces..
À propos de l'OLED et du capteur de température LM35
Si vous ne connaissez pas les OLED et le capteur de température LM35 (brochage, fonctionnement, programmation...), renseignez-vous sur ces sujets dans les tutoriels suivants :
- Arduino - OLED. tutorial
Diagramme de câblage
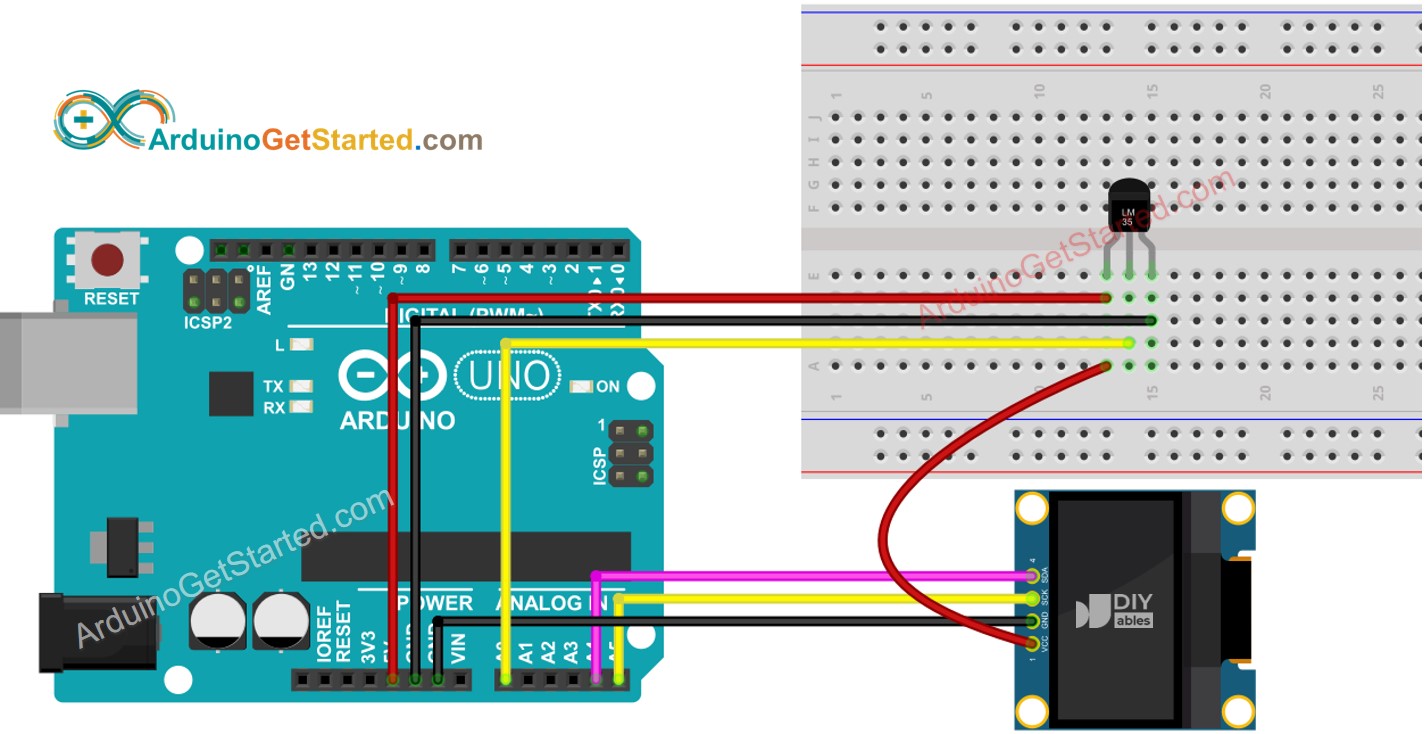
Cette image a été créée avec Fritzing. Cliquez pour agrandir l'image.
Code Arduino - Capteur de Température LM35 - OLED
/*
* Ce code Arduino a été développé par newbiely.fr
* Ce code Arduino est mis à disposition du public sans aucune restriction.
* Pour des instructions complètes et des schémas de câblage, veuillez visiter:
* https://newbiely.fr/tutorials/arduino/arduino-display-temperature-from-lm35-sensor-on-oled
*/
#include <Wire.h>
#include <Adafruit_GFX.h>
#include <Adafruit_SSD1306.h>
#define SCREEN_WIDTH 128 // OLED display width, in pixels
#define SCREEN_HEIGHT 64 // OLED display height, in pixels
#define ADC_VREF_mV 5000.0 // in millivolt
#define ADC_RESOLUTION 1024.0
#define PIN_LM35 A0 // pin connected to LM35 temperature sensor
Adafruit_SSD1306 oled(SCREEN_WIDTH, SCREEN_HEIGHT, &Wire, -1); // create SSD1306 display object connected to I2C
String tempString;
void setup() {
Serial.begin(9600);
// initialize OLED display with address 0x3C for 128x64
if (!oled.begin(SSD1306_SWITCHCAPVCC, 0x3C)) {
Serial.println(F("SSD1306 allocation failed"));
while (true);
}
delay(2000); // wait for initializing
oled.clearDisplay(); // clear display
oled.setTextSize(2); // text size
oled.setTextColor(WHITE); // text color
oled.setCursor(0, 10); // position to display
tempString.reserve(10); // to avoid fragmenting memory when using String
}
void loop() {
// get the ADC value from the LM35 temperature sensor
int adcVal = analogRead(PIN_LM35);
// convert the ADC value to voltage in millivolt
float milliVolt = adcVal * (ADC_VREF_mV / ADC_RESOLUTION);
// convert the voltage to the temperature in Celsius
float tempC = milliVolt / 10;
tempString = String(tempC, 2); // two decimal places
tempString += char(247) + String("C");
Serial.println(tempString); // print the temperature in Celsius to Serial Monitor
oledDisplayCenter(tempString); // display temperature on OLED
}
void oledDisplayCenter(String text) {
int16_t x1;
int16_t y1;
uint16_t width;
uint16_t height;
oled.getTextBounds(text, 0, 0, &x1, &y1, &width, &height);
// display on horizontal and vertical center
oled.clearDisplay(); // clear display
oled.setCursor((SCREEN_WIDTH - width) / 2, (SCREEN_HEIGHT - height) / 2);
oled.println(text); // text to display
oled.display();
}
Étapes rapides
- Ouvrez Arduino IDE sur votre PC.
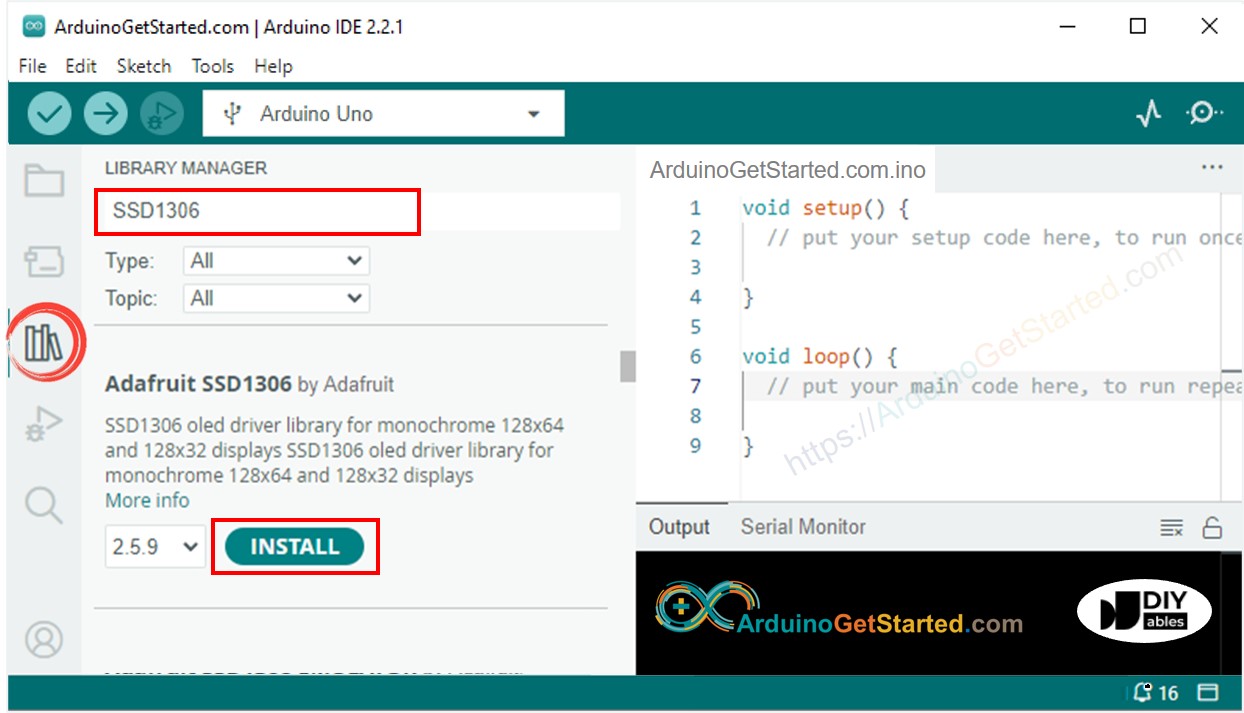
- Rendez-vous sur l'icône Libraries dans la barre latérale gauche de l'Arduino IDE.
- Recherchez "SSD1306", puis trouvez la bibliothèque SSD1306 par Adafruit
- Cliquez sur le bouton Install pour installer la bibliothèque.
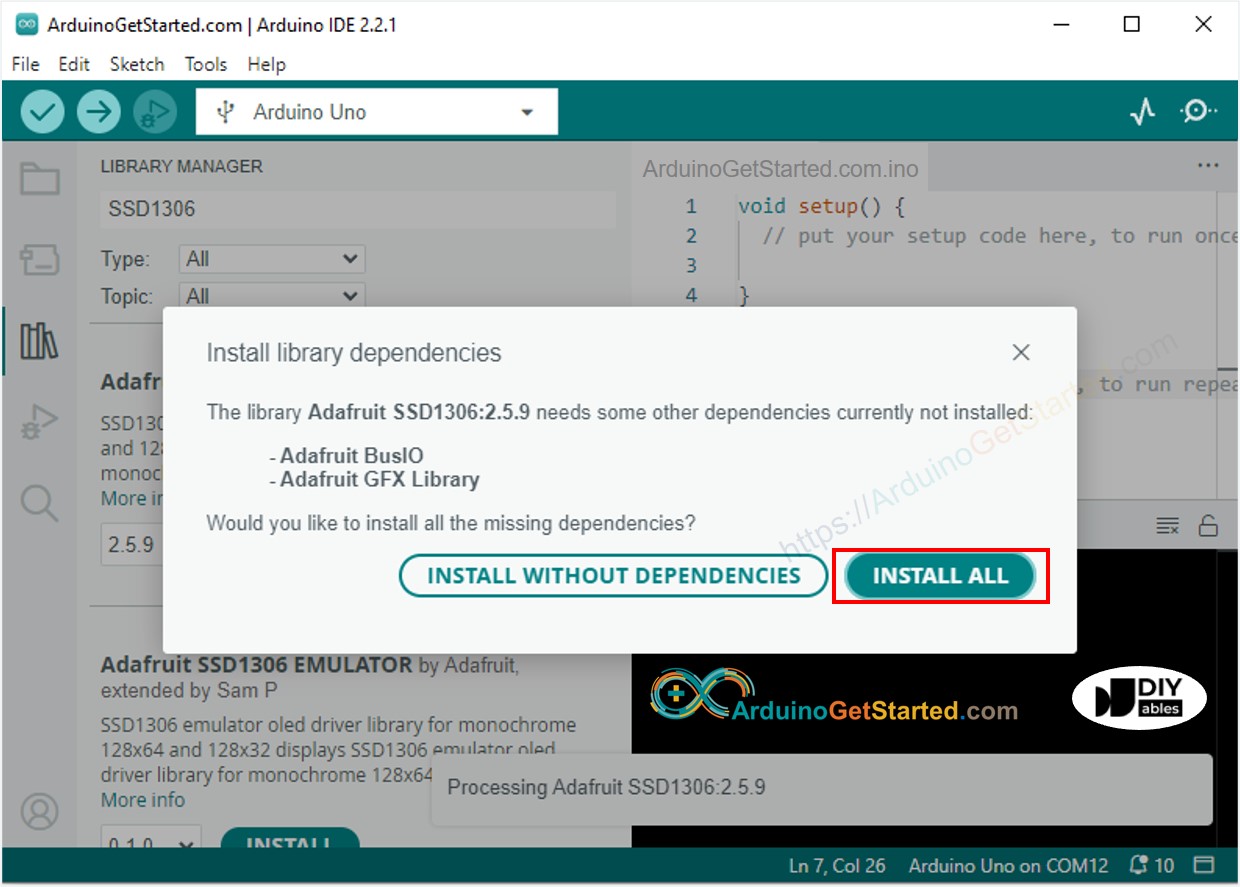
- On vous demandera d'installer d'autres dépendances de bibliothèques
- Cliquez sur le bouton Install All pour installer toutes les dépendances des bibliothèques.
- Copiez le code ci-dessus et ouvrez-le avec l'IDE Arduino
- Cliquez sur le bouton Upload de l'IDE Arduino pour téléverser le code sur Arduino
- Placez le capteur sur de l'eau chaude et froide, ou saisissez le capteur avec votre main
- Observez le résultat sur l'OLED et le moniteur série
※ Note:
Le code ci-dessus centre automatiquement le texte horizontalement et verticalement sur l'affichage OLED.