Arduino Nano ESP32 - OLED

Ce tutoriel fournit des instructions sur comment utiliser Arduino Nano ESP32 avec un affichage OLED. En détail, nous apprendrons :

Préparation du matériel

1×Arduino Nano ESP32
1×USB Cable Type-C
1×SSD1306 I2C OLED Display 128x64
1×Jumper Wires
1×(Optional) 9V Power Adapter for Arduino Nano ESP32
1×(Recommended) Screw Terminal Adapter for Arduino Nano

Or you can buy the following sensor kits:

1×DIYables Sensor Kit (30 sensors/displays)
1×DIYables Sensor Kit (18 sensors/displays)
Divulgation : Certains des liens fournis dans cette section sont des liens affiliés Amazon. Nous pouvons recevoir une commission pour tout achat effectué via ces liens, sans coût supplémentaire pour vous. Nous vous remercions de votre soutien.

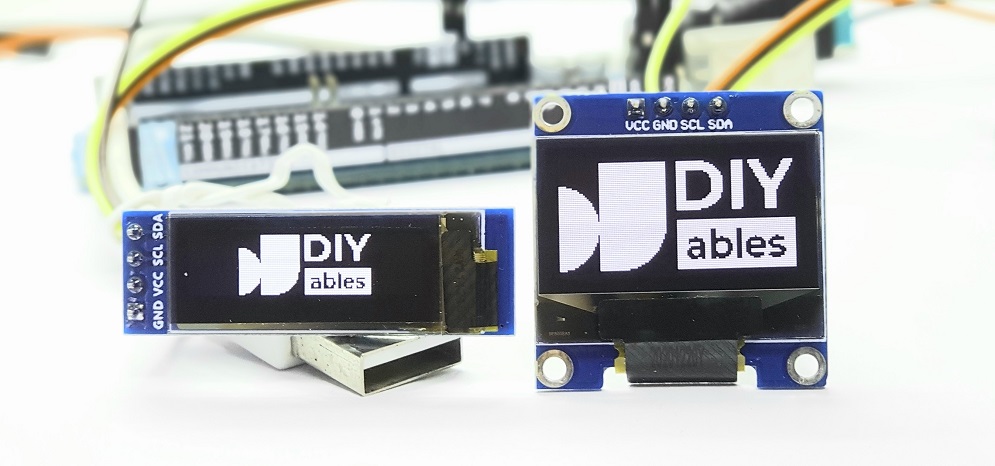
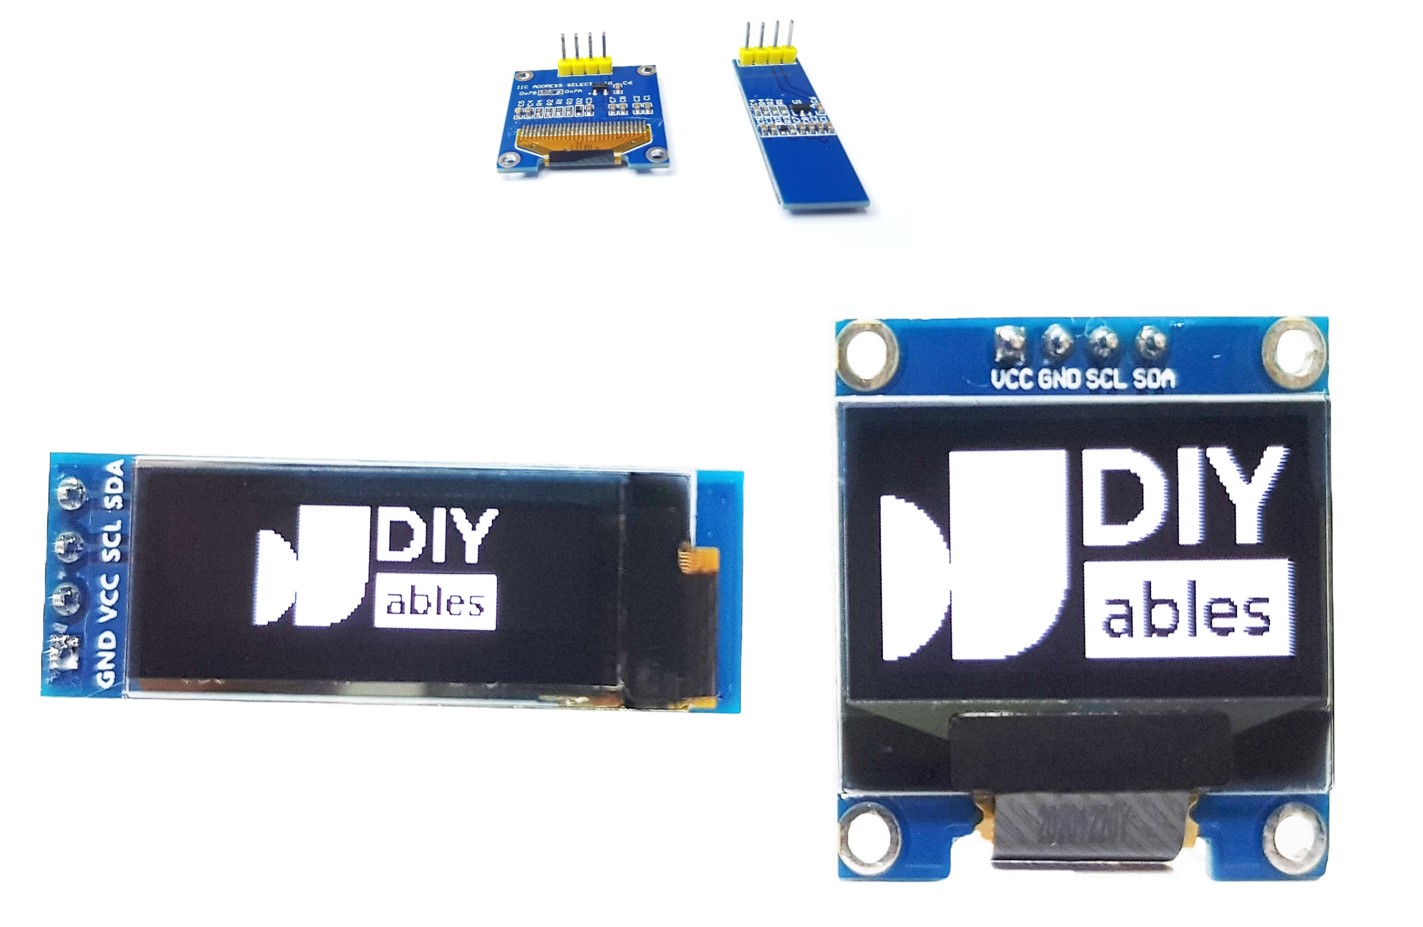
À propos de l'écran OLED

Il existe différents types d'écrans OLED disponibles. L'OLED le plus couramment utilisé avec Arduino Nano ESP32 est l'écran OLED I2C SSD1306 128x64 et 128x32.

Affichage OLED

Brochage de l'affichage OLED I2C

  • Broche GND : Celle-ci doit être connectée à la masse de l'Arduino Nano ESP32.
  • Broche VCC : C'est l'alimentation pour l'affichage qui doit être connectée à 3,3V ou 5V.
  • Broche SCL : C'est une broche d'horloge série pour l'interface I2C.
  • Broche SDA : C'est une broche de données série pour l'interface I2C.
Brochage OLED

※ NOTE THAT:

  • Les broches du module OLED peuvent varier selon le fabricant et le type. Veuillez utiliser les étiquettes imprimées sur le module OLED. Veuillez regarder de près !
  • Ce tutoriel utilise l'écran OLED qui est piloté par le pilote I2C SSD1306. Nous l'avons testé avec l'écran OLED de DIYables et il fonctionne parfaitement.

Diagramme de câblage

  • Schéma de câblage entre Arduino Nano ESP32 et OLED 128x64
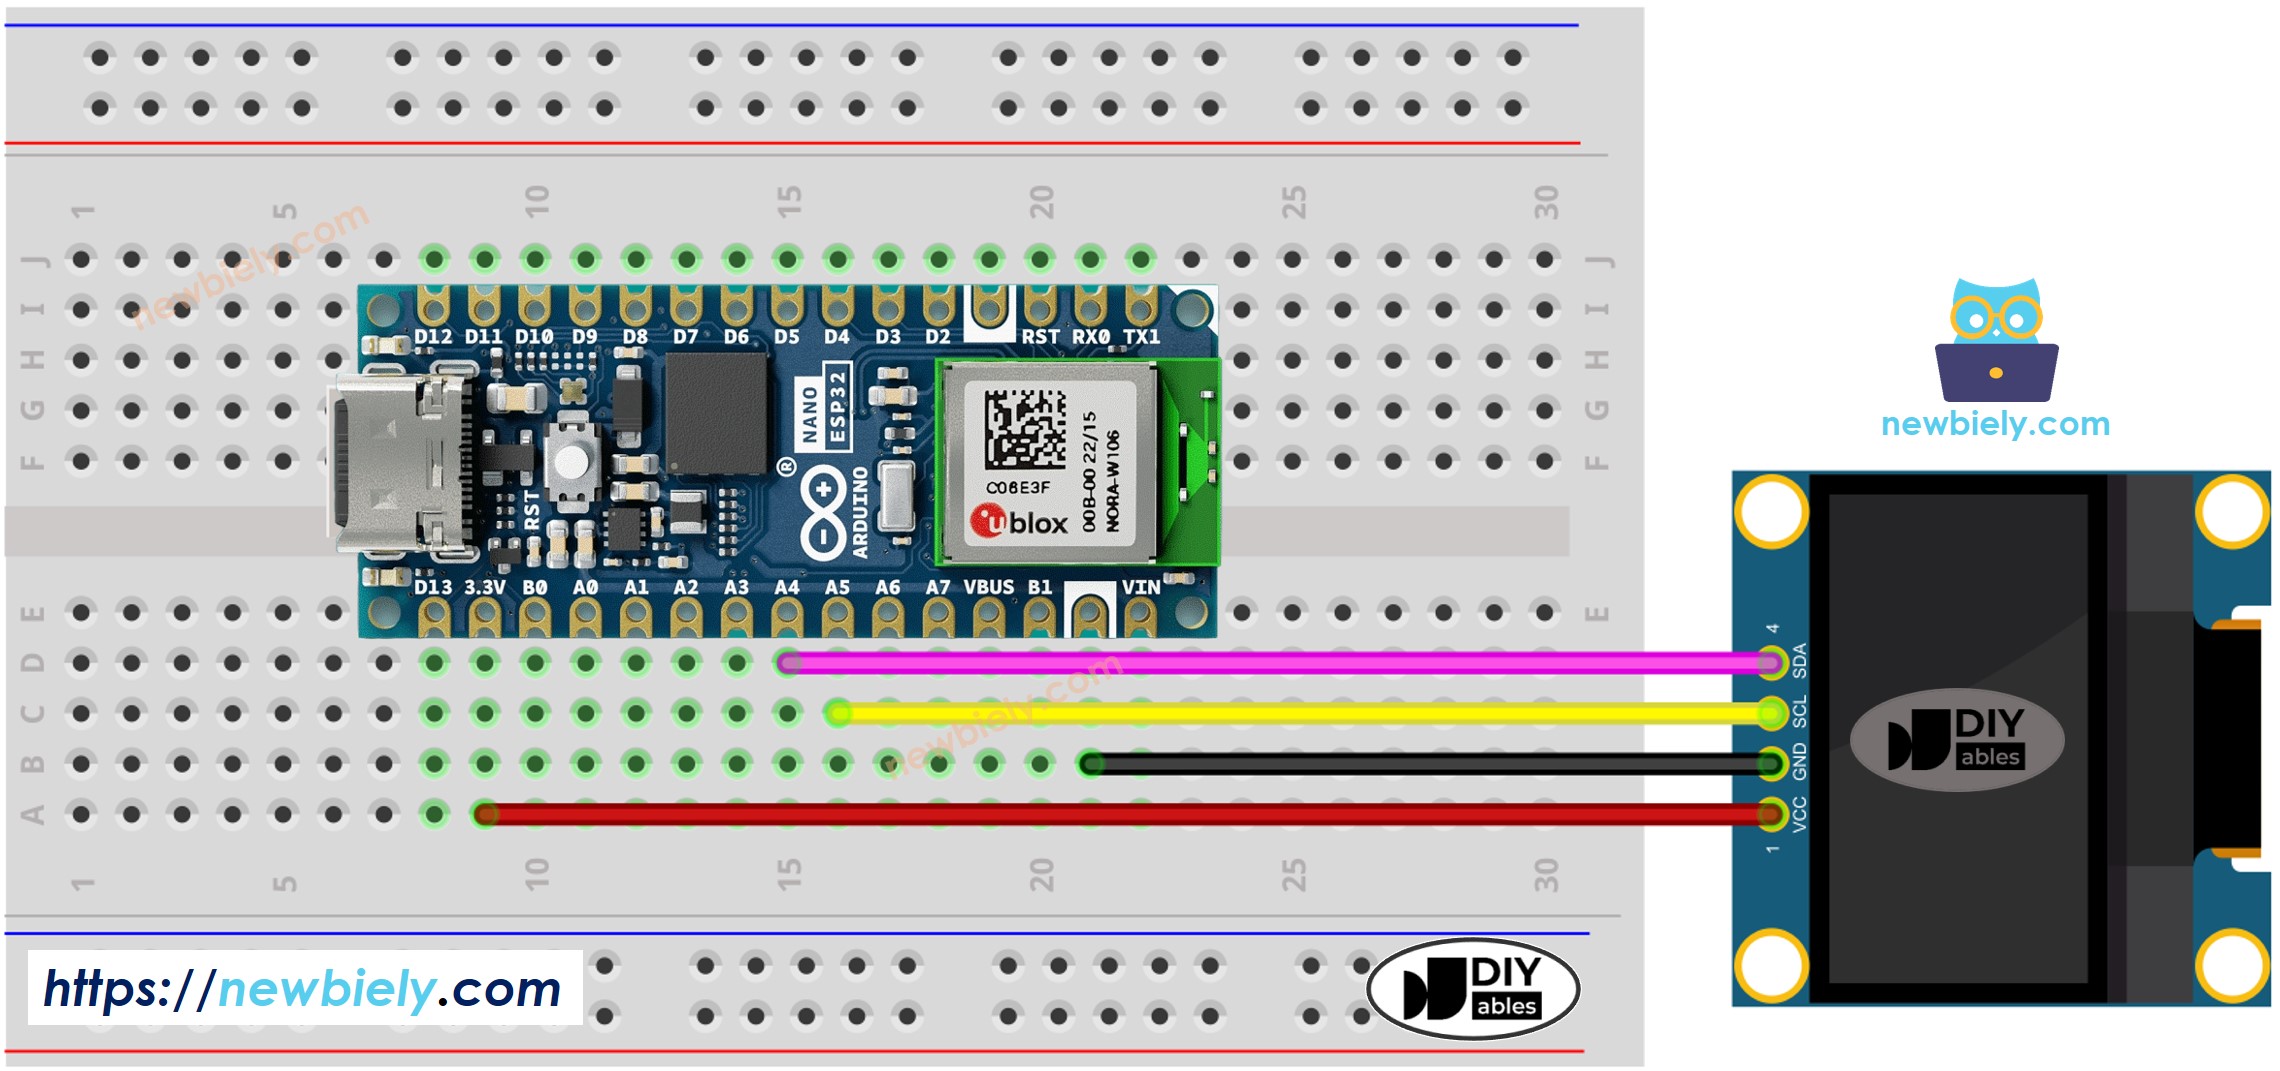
Schéma de câblage Arduino Nano ESP32 OLED

This image is created using Fritzing. Click to enlarge image

  • Schéma de câblage entre Arduino Nano ESP32 et OLED 128x32
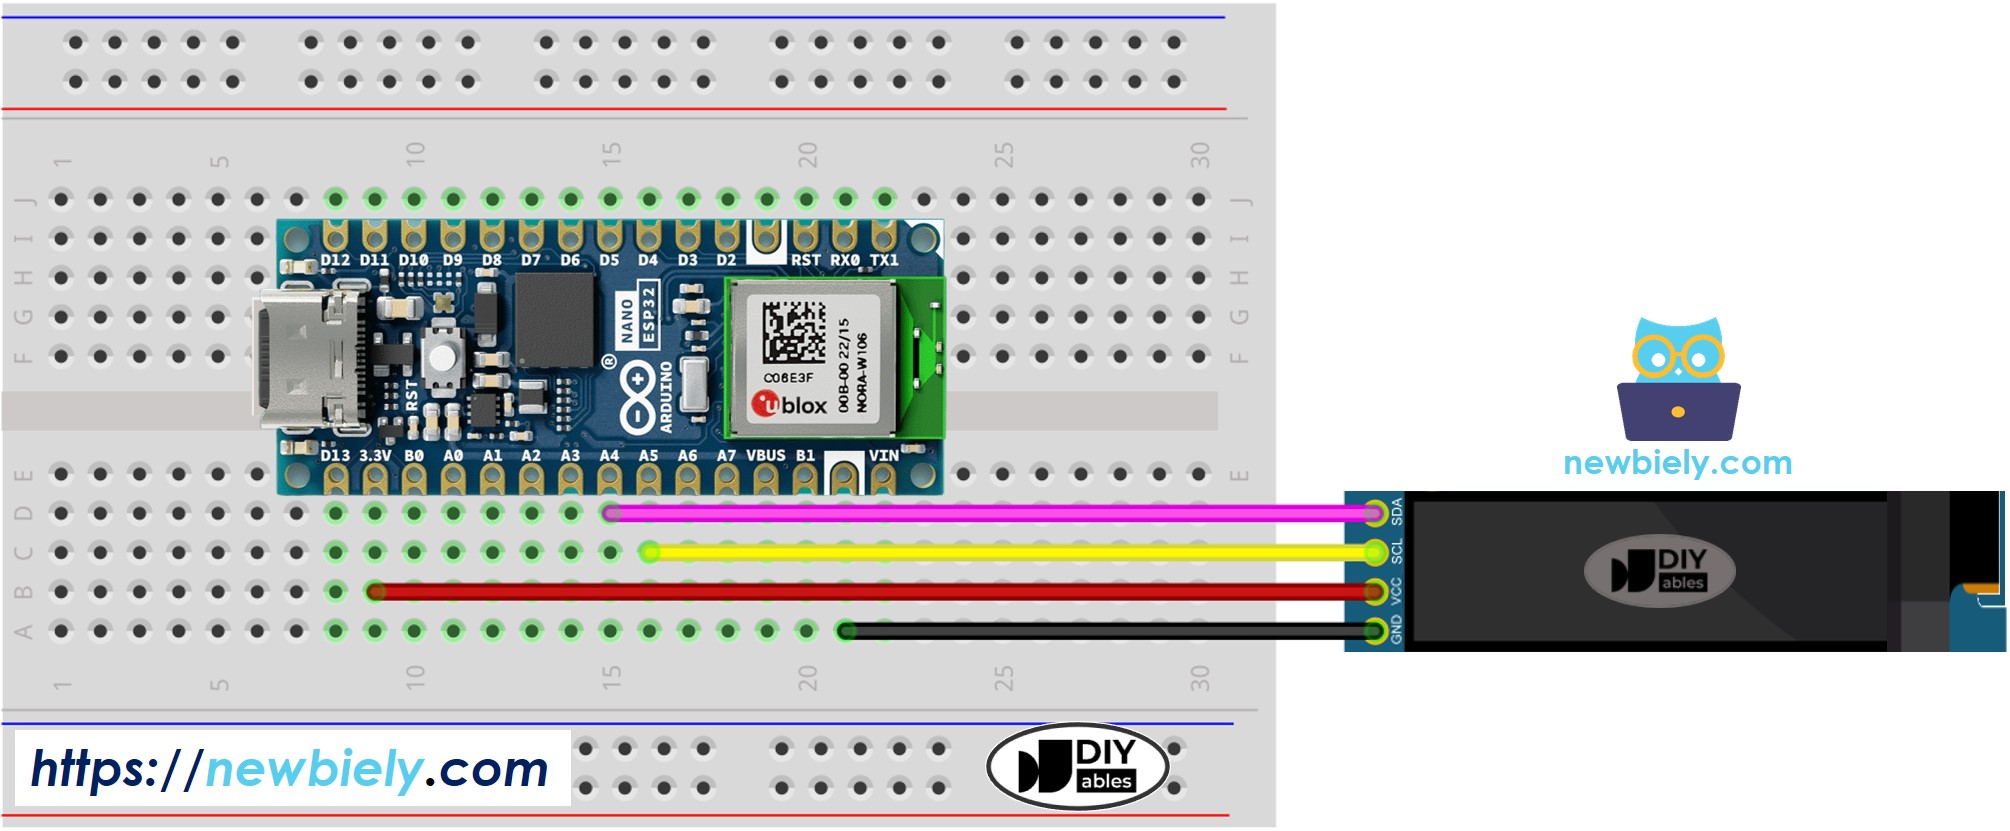
Schéma de câblage Arduino Nano ESP32 OLED 128x32

This image is created using Fritzing. Click to enlarge image

Le tableau de câblage entre Arduino Nano ESP32 et l'écran OLED :

OLED Module Arduino Nano ESP32
Vin 3.3V
GND GND
SDA A4
SCL A5

Comment utiliser OLED avec Arduino Nano ESP32

Installer la bibliothèque SSD1306 OLED

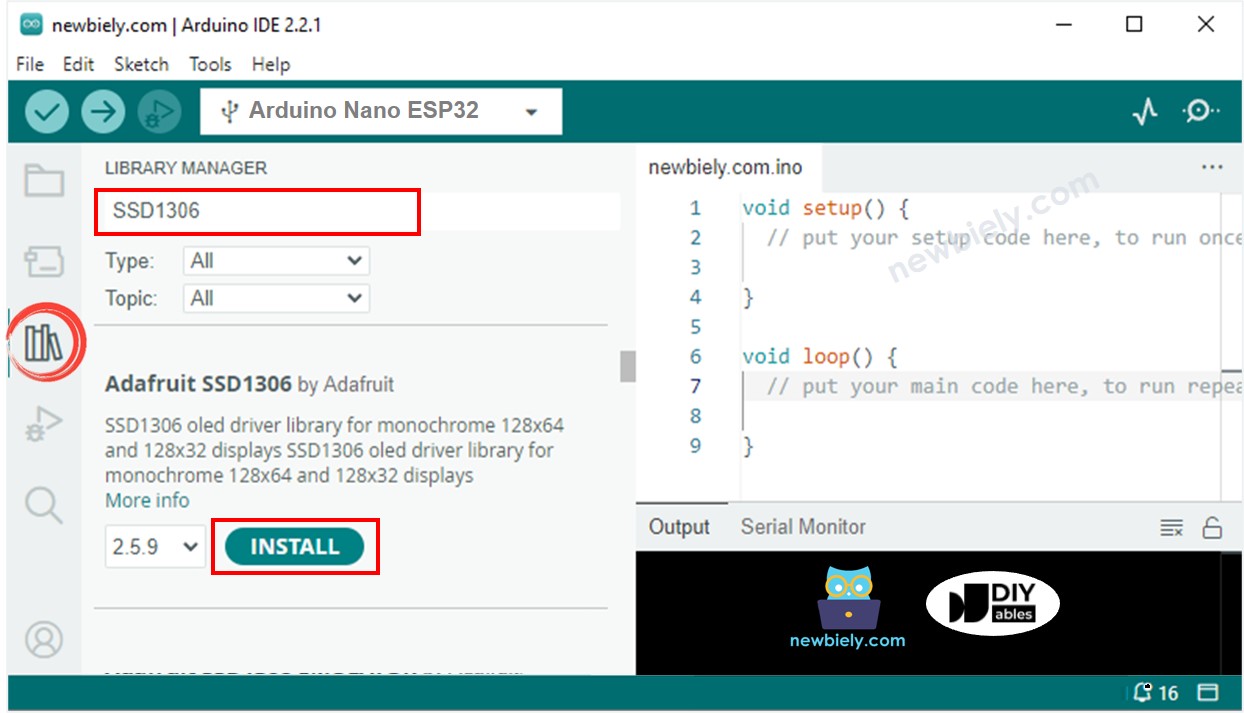
  • Cliquez sur l'icône Libraries située sur la barre de gauche de l'IDE Arduino.
  • Recherchez "SSD1306" et localisez la bibliothèque SSD1306 d'Adafruit.
  • Ensuite, appuyez sur le bouton Install pour terminer l'installation.
Bibliothèque OLED Arduino Nano ESP32
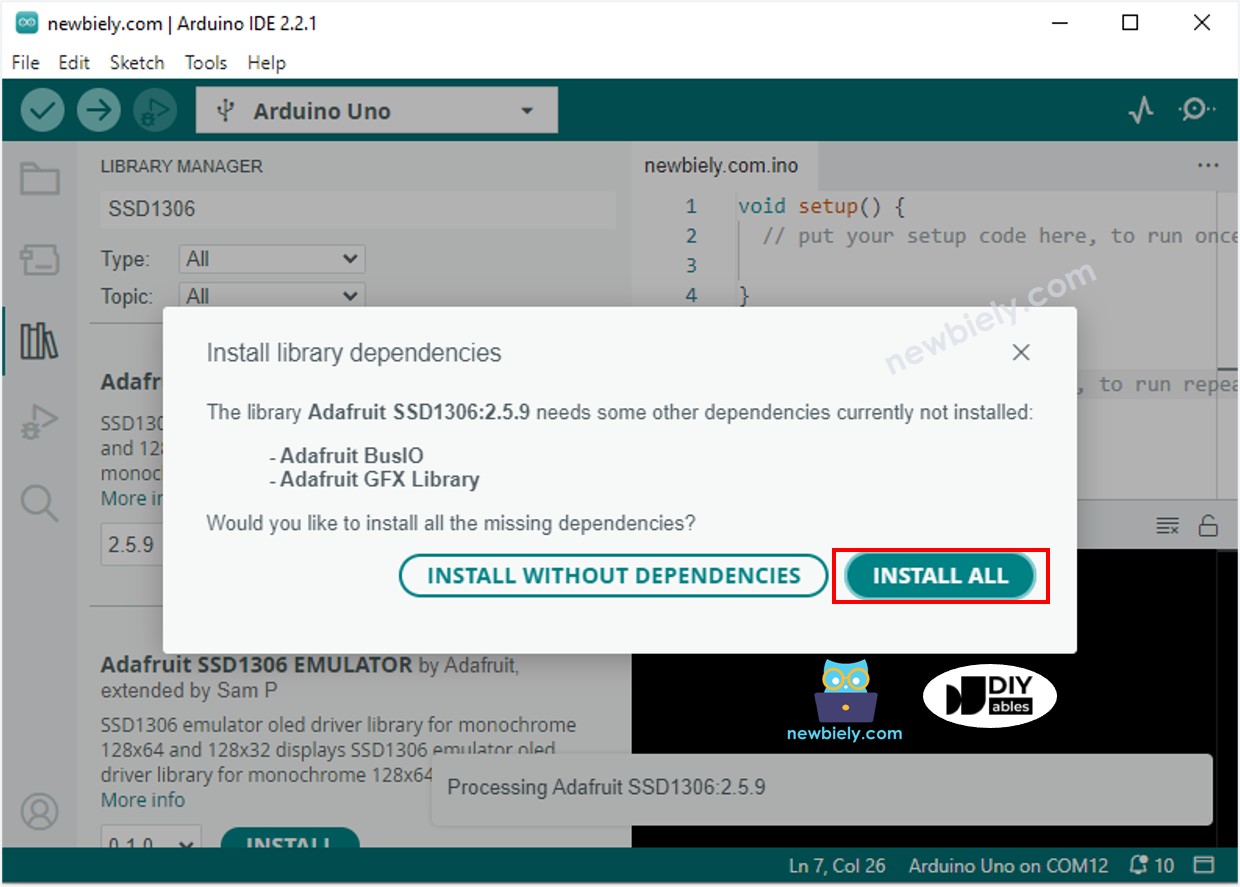
  • Vous serez invité à installer des dépendances de bibliothèque supplémentaires.
  • Pour les installer toutes, cliquez sur le bouton Installer Tout.
Bibliothèque de capteurs Arduino Nano ESP32 Adafruit GFX

Comment programmer pour OLED

  • Inclure la bibliothèque
#include <Wire.h> #include <Adafruit_GFX.h> #include <Adafruit_SSD1306.h>
  • Spécifiez les dimensions de l'écran OLED comme étant de 128 x 64.
#define OLED_WIDTH 128 // Largeur de l'affichage OLED, en pixels #define OLED_HEIGHT 64 // Hauteur de l'affichage OLED, en pixels
  • Ou spécifiez les dimensions d'un écran OLED qui est de 128x32.
#define OLED_WIDTH 128 // Largeur de l'affichage OLED, en pixels #define OLED_HEIGHT 32 // Hauteur de l'affichage OLED, en pixels
  • Créez un objet de type SSD1306 OLED.
// déclarer un objet d'affichage SSD1306 connecté à I2C Adafruit_SSD1306 oled(OLED_WIDTH, OLED_HEIGHT, &Wire, -1);
  • Dans la fonction setup(), initialisez l'affichage OLED.
// initialiser l'écran OLED avec l'adresse 0x3C pour 128x64 if (!oled.begin(SSD1306_SWITCHCAPVCC, 0x3C)) { Serial.println(F("SSD1306 allocation failed")); while (true); }
  • Ensuite, vous pouvez afficher du texte, des images, et tracer une ligne...

À partir de maintenant, tous les codes seront pour OLED 128x64. Cependant, il est facile de les modifier pour OLED 128x32 en modifiant la taille de l'écran et en ajustant les coordonnées si nécessaire.

Code Arduino Nano ESP32 - Afficher du texte sur OLED

/* * Ce code Arduino Nano ESP32 a été développé par newbiely.fr * Ce code Arduino Nano ESP32 est mis à disposition du public sans aucune restriction. * Pour des instructions complètes et des schémas de câblage, veuillez visiter: * https://newbiely.fr/tutorials/arduino-nano-esp32/arduino-nano-esp32-oled */ #include <Wire.h> #include <Adafruit_GFX.h> #include <Adafruit_SSD1306.h> #define OLED_WIDTH 128 // OLED width, in pixels #define OLED_HEIGHT 64 // OLED height, in pixels // create an OLED display object connected to I2C Adafruit_SSD1306 oled(OLED_WIDTH, OLED_HEIGHT, &Wire, -1); void setup() { Serial.begin(9600); // initialize OLED display with I2C address 0x3C if (!oled.begin(SSD1306_SWITCHCAPVCC, 0x3C)) { Serial.println(F("failed to start SSD1306 OLED")); while (1); } delay(2000); // wait two seconds for initializing oled.clearDisplay(); // clear display oled.setTextSize(1); // set text size oled.setTextColor(WHITE); // set text color oled.setCursor(0, 10); // set position to display oled.println("esp32io.com"); // set text oled.display(); // display on OLED } void loop() { }

Voici quelques fonctions qui peuvent être utilisées pour afficher du texte sur l'OLED :

  • oled.clearDisplay(): tous les pixels sont éteints.
  • oled.drawPixel(x,y, couleur): trace un pixel aux coordonnées x, y.
  • oled.setTextSize(n): définit la taille de la police, prend en charge les tailles de 1 à 8.
  • oled.setCursor(x,y): définit les coordonnées pour commencer à écrire du texte.
  • oled.setTextColor(WHITE): définit la couleur du texte.
  • oled.setTextColor(BLACK, WHITE): définit la couleur du texte, couleur de fond.
  • oled.println("message"): imprime les caractères.
  • oled.println(nombre): imprime un nombre.
  • oled.println(nombre, HEX): imprime un nombre au format hexadécimal.
  • oled.display(): appelez cette méthode pour que les modifications prennent effet.
  • oled.startscrollright(start, stop): fait défiler le texte de gauche à droite.
  • oled.startscrollleft(start, stop): fait défiler le texte de droite à gauche.
  • oled.startscrolldiagright(start, stop): fait défiler le texte du coin inférieur gauche au coin supérieur droit.
  • oled.startscrolldiagleft(start, stop): fait défiler le texte du coin inférieur droit au coin supérieur gauche.
  • oled.stopscroll(): arrête le défilement.

Comment centrer verticalement et horizontalement du texte ou des chiffres sur un OLED

Pour des informations sur la façon d'aligner verticalement et horizontalement des textes et des chiffres sur un affichage OLED, veuillez consulter Comment centrer verticalement/horizontalement sur OLED.

Code Arduino Nano ESP32 - Dessin sur OLED

/* * Ce code Arduino Nano ESP32 a été développé par newbiely.fr * Ce code Arduino Nano ESP32 est mis à disposition du public sans aucune restriction. * Pour des instructions complètes et des schémas de câblage, veuillez visiter: * https://newbiely.fr/tutorials/arduino-nano-esp32/arduino-nano-esp32-oled */ #include <Wire.h> #include <Adafruit_GFX.h> #include <Adafruit_SSD1306.h> #define OLED_WIDTH 128 // OLED width, in pixels #define OLED_HEIGHT 64 // OLED height, in pixels // create an OLED display object connected to I2C Adafruit_SSD1306 oled(OLED_WIDTH, OLED_HEIGHT, &Wire, -1); void setup() { Serial.begin(9600); // initialize OLED display with I2C address 0x3C if (!oled.begin(SSD1306_SWITCHCAPVCC, 0x3C)) { Serial.println(F("failed to start SSD1306 OLED")); while (1); } delay(2000); // wait two seconds for initializing oled.setCursor(0, 0); } void loop() { // draw a circle oled.clearDisplay(); oled.drawCircle(20, 35, 20, WHITE); oled.display(); delay(1000); // fill a circle oled.clearDisplay(); oled.fillCircle(20, 35, 20, WHITE); oled.display(); delay(1000); // draw a triangle oled.clearDisplay(); oled.drawTriangle(30, 15, 0, 60, 60, 60, WHITE); oled.display(); delay(1000); // fill a triangle oled.clearDisplay(); oled.fillTriangle(30, 15, 0, 60, 60, 60, WHITE); oled.display(); delay(1000); // draw a rectangle oled.clearDisplay(); oled.drawRect(0, 15, 60, 40, WHITE); oled.display(); delay(1000); // fill a rectangle oled.clearDisplay(); oled.fillRect(0, 15, 60, 40, WHITE); oled.display(); delay(1000); // draw a round rectangle oled.clearDisplay(); oled.drawRoundRect(0, 15, 60, 40, 8, WHITE); oled.display(); delay(1000); // fill a round rectangle oled.clearDisplay(); oled.fillRoundRect(0, 15, 60, 40, 8, WHITE); oled.display(); delay(1000); }

Code Arduino Nano ESP32 – Afficher une image

Afin d'afficher une image sur un OLED, nous devons d'abord convertir l'image (dans n'importe quel format) en un tableau de bitmap. Cela peut être réalisé en utilisant l'outil en ligne. L'image suivante montre comment convertir une image en tableau de bitmap ; j'ai utilisé l'icône Arduino Nano ESP32 comme exemple.

image en tableau de bitmap

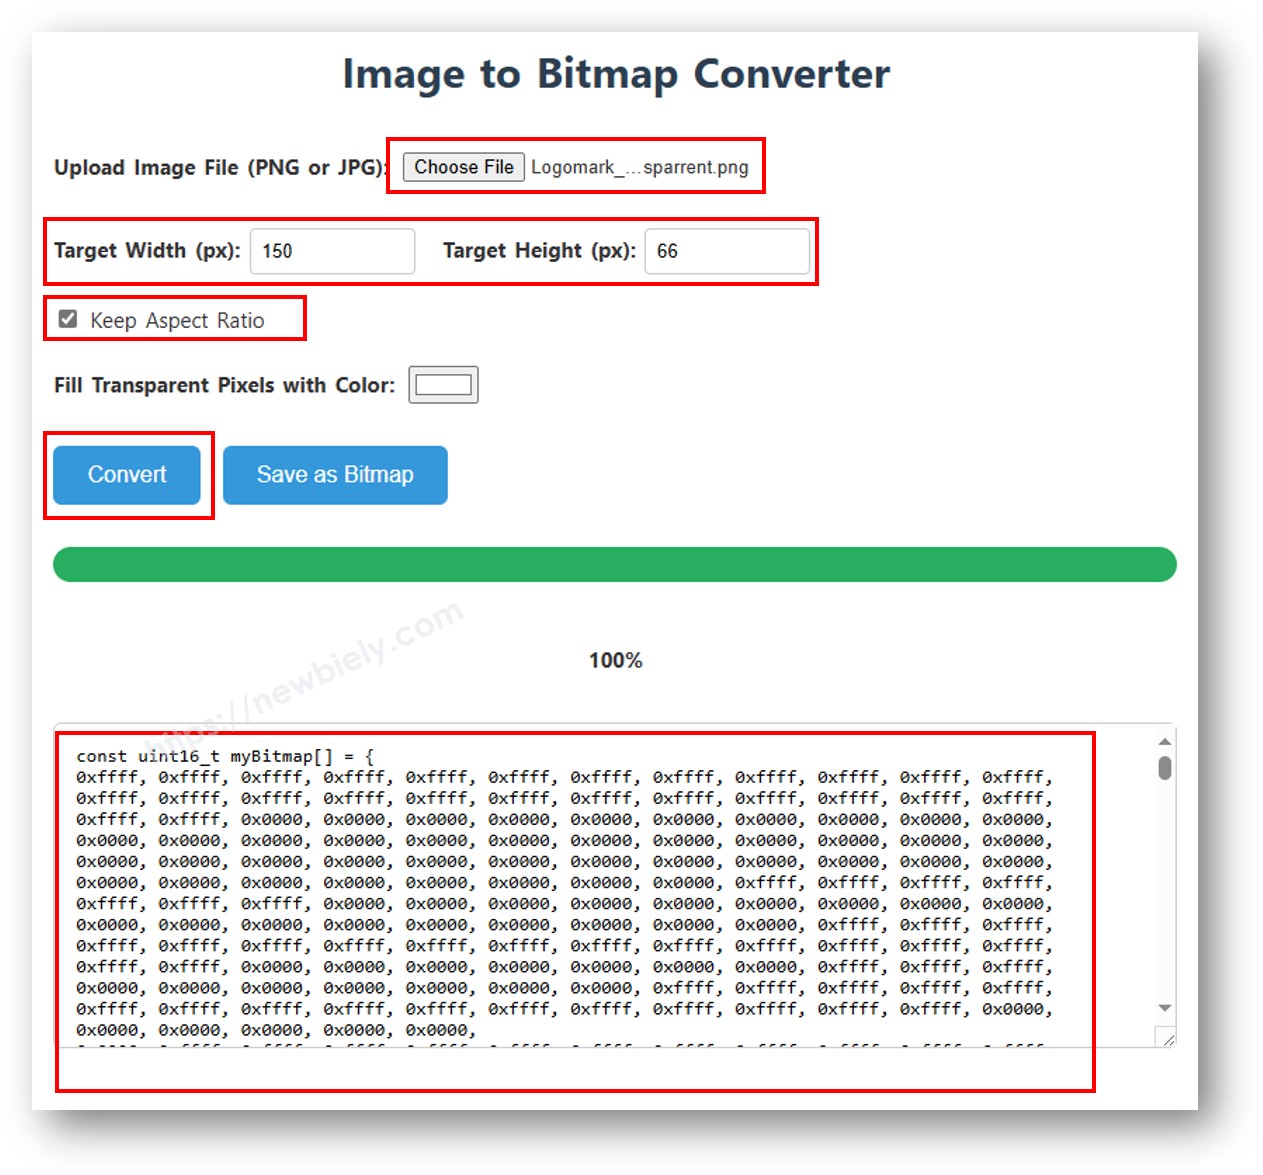
Après la conversion, prenez le code du tableau et mettez-le à la place du tableau ArduinoIcon dans le code ci-dessous.

/* * Ce code Arduino Nano ESP32 a été développé par newbiely.fr * Ce code Arduino Nano ESP32 est mis à disposition du public sans aucune restriction. * Pour des instructions complètes et des schémas de câblage, veuillez visiter: * https://newbiely.fr/tutorials/arduino-nano-esp32/arduino-nano-esp32-oled */ #include <Wire.h> #include <Adafruit_GFX.h> #include <Adafruit_SSD1306.h> #define OLED_WIDTH 128 // OLED width, in pixels #define OLED_HEIGHT 64 // OLED height, in pixels // create an OLED display object connected to I2C Adafruit_SSD1306 oled(OLED_WIDTH, OLED_HEIGHT, &Wire, -1); // bitmap of arduino-icon image const unsigned char arduino_icon [] PROGMEM = { // 'arduino-icon', 128x64px 0xff, 0xff, 0xff, 0xff, 0xff, 0xff, 0xff, 0xff, 0xff, 0xff, 0xff, 0xff, 0xff, 0xff, 0xff, 0xff, 0xff, 0xff, 0xff, 0xff, 0xff, 0xff, 0xff, 0xff, 0xff, 0xff, 0xff, 0xff, 0xff, 0xff, 0xff, 0xff, 0xff, 0xff, 0xfe, 0x00, 0x07, 0xff, 0xff, 0xff, 0xff, 0xff, 0xff, 0x80, 0x01, 0xff, 0xff, 0xff, 0xff, 0xff, 0xe0, 0x00, 0x00, 0xff, 0xff, 0xff, 0xff, 0xff, 0xfc, 0x00, 0x00, 0x3f, 0xff, 0xff, 0xff, 0xff, 0x80, 0x00, 0x00, 0x1f, 0xff, 0xff, 0xff, 0xff, 0xe0, 0x00, 0x00, 0x07, 0xff, 0xff, 0xff, 0xfe, 0x00, 0x00, 0x00, 0x07, 0xff, 0xff, 0xff, 0xff, 0x80, 0x00, 0x00, 0x01, 0xff, 0xff, 0xff, 0xfc, 0x00, 0x00, 0x00, 0x03, 0xff, 0xff, 0xff, 0xff, 0x00, 0x00, 0x00, 0x00, 0xff, 0xff, 0xff, 0xf0, 0x00, 0x00, 0x00, 0x00, 0xff, 0xff, 0xff, 0xfc, 0x00, 0x00, 0x00, 0x00, 0x3f, 0xff, 0xff, 0xe0, 0x00, 0x00, 0x00, 0x00, 0x3f, 0xff, 0xff, 0xf0, 0x00, 0x00, 0x00, 0x00, 0x1f, 0xff, 0xff, 0xc0, 0x00, 0x00, 0x00, 0x00, 0x1f, 0xff, 0xff, 0xe0, 0x00, 0x00, 0x00, 0x00, 0x0f, 0xff, 0xff, 0x80, 0x00, 0x00, 0x00, 0x00, 0x0f, 0xff, 0xff, 0xc0, 0x00, 0x00, 0x00, 0x00, 0x07, 0xff, 0xff, 0x00, 0x00, 0x00, 0x00, 0x00, 0x03, 0xff, 0xff, 0x80, 0x00, 0x00, 0x00, 0x00, 0x03, 0xff, 0xfe, 0x00, 0x00, 0x00, 0x00, 0x00, 0x01, 0xff, 0xfe, 0x00, 0x00, 0x00, 0x00, 0x00, 0x01, 0xff, 0xfc, 0x00, 0x00, 0xff, 0xf0, 0x00, 0x00, 0xff, 0xfc, 0x00, 0x00, 0x3f, 0xfc, 0x00, 0x00, 0xff, 0xfc, 0x00, 0x03, 0xff, 0xfc, 0x00, 0x00, 0x7f, 0xf8, 0x00, 0x00, 0xff, 0xff, 0x00, 0x00, 0xff, 0xf8, 0x00, 0x0f, 0xff, 0xff, 0x00, 0x00, 0x3f, 0xf0, 0x00, 0x03, 0xff, 0xff, 0xc0, 0x00, 0x7f, 0xf0, 0x00, 0x1f, 0xff, 0xff, 0xc0, 0x00, 0x1f, 0xe0, 0x00, 0x0f, 0xff, 0xff, 0xe0, 0x00, 0x7f, 0xf0, 0x00, 0x7f, 0xff, 0xff, 0xe0, 0x00, 0x0f, 0xc0, 0x00, 0x1f, 0xff, 0xff, 0xf8, 0x00, 0x3f, 0xe0, 0x00, 0xff, 0xff, 0xff, 0xf8, 0x00, 0x07, 0x80, 0x00, 0x7f, 0xff, 0xff, 0xfc, 0x00, 0x1f, 0xe0, 0x00, 0xff, 0xff, 0xff, 0xfc, 0x00, 0x03, 0x80, 0x00, 0xff, 0xff, 0xff, 0xfc, 0x00, 0x1f, 0xc0, 0x01, 0xff, 0xff, 0xff, 0xfe, 0x00, 0x03, 0x00, 0x01, 0xff, 0xff, 0xff, 0xfe, 0x00, 0x1f, 0xc0, 0x03, 0xff, 0xff, 0xff, 0xff, 0x00, 0x00, 0x00, 0x03, 0xff, 0xff, 0xff, 0xff, 0x00, 0x0f, 0xc0, 0x03, 0xff, 0xff, 0xff, 0xff, 0x80, 0x00, 0x00, 0x07, 0xff, 0xf0, 0x7f, 0xff, 0x00, 0x0f, 0xc0, 0x07, 0xff, 0xff, 0xff, 0xff, 0xc0, 0x00, 0x00, 0x0f, 0xff, 0xf0, 0x7f, 0xff, 0x80, 0x0f, 0x80, 0x07, 0xff, 0xff, 0xff, 0xff, 0xe0, 0x00, 0x00, 0x1f, 0xff, 0xf0, 0x7f, 0xff, 0x80, 0x07, 0x80, 0x0f, 0xff, 0xff, 0xff, 0xff, 0xf0, 0x00, 0x00, 0x3f, 0xff, 0xf0, 0x7f, 0xff, 0xc0, 0x07, 0x80, 0x0f, 0xff, 0xff, 0xff, 0xff, 0xf8, 0x00, 0x00, 0x7f, 0xff, 0xf0, 0x7f, 0xff, 0xc0, 0x07, 0x80, 0x0f, 0xfe, 0x00, 0x00, 0xff, 0xfc, 0x00, 0x00, 0xff, 0xfc, 0x00, 0x03, 0xff, 0xc0, 0x07, 0x80, 0x0f, 0xfe, 0x00, 0x00, 0xff, 0xfe, 0x00, 0x01, 0xff, 0xfc, 0x00, 0x01, 0xff, 0xc0, 0x07, 0x80, 0x0f, 0xfe, 0x00, 0x00, 0xff, 0xff, 0x00, 0x03, 0xff, 0xfc, 0x00, 0x01, 0xff, 0xc0, 0x07, 0x80, 0x0f, 0xfe, 0x00, 0x00, 0xff, 0xff, 0x00, 0x03, 0xff, 0xfc, 0x00, 0x01, 0xff, 0xc0, 0x07, 0x80, 0x0f, 0xfe, 0x00, 0x00, 0xff, 0xff, 0x00, 0x03, 0xff, 0xfc, 0x00, 0x01, 0xff, 0xc0, 0x07, 0x80, 0x0f, 0xff, 0xff, 0xff, 0xff, 0xfe, 0x00, 0x01, 0xff, 0xff, 0xe0, 0x7f, 0xff, 0xc0, 0x07, 0x80, 0x0f, 0xff, 0xff, 0xff, 0xff, 0xfc, 0x00, 0x00, 0xff, 0xff, 0xf0, 0x7f, 0xff, 0xc0, 0x07, 0x80, 0x0f, 0xff, 0xff, 0xff, 0xff, 0xfc, 0x00, 0x00, 0xff, 0xff, 0xf0, 0x7f, 0xff, 0xc0, 0x07, 0x80, 0x0f, 0xff, 0xff, 0xff, 0xff, 0xf8, 0x00, 0x00, 0x7f, 0xff, 0xf0, 0x7f, 0xff, 0xc0, 0x07, 0x80, 0x0f, 0xff, 0xff, 0xff, 0xff, 0xf0, 0x00, 0x00, 0x3f, 0xff, 0xf0, 0x7f, 0xff, 0x80, 0x07, 0x80, 0x07, 0xff, 0xff, 0xff, 0xff, 0xe0, 0x00, 0x00, 0x1f, 0xff, 0xf0, 0x7f, 0xff, 0x80, 0x07, 0xc0, 0x07, 0xff, 0xff, 0xff, 0xff, 0xc0, 0x00, 0x00, 0x0f, 0xff, 0xff, 0xff, 0xff, 0x80, 0x0f, 0xc0, 0x03, 0xff, 0xff, 0xff, 0xff, 0x80, 0x00, 0x00, 0x07, 0xff, 0xff, 0xff, 0xff, 0x00, 0x0f, 0xc0, 0x03, 0xff, 0xff, 0xff, 0xff, 0x00, 0x00, 0x00, 0x03, 0xff, 0xff, 0xff, 0xff, 0x00, 0x0f, 0xe0, 0x01, 0xff, 0xff, 0xff, 0xfe, 0x00, 0x03, 0x00, 0x01, 0xff, 0xff, 0xff, 0xfe, 0x00, 0x1f, 0xe0, 0x00, 0xff, 0xff, 0xff, 0xfc, 0x00, 0x07, 0x80, 0x00, 0xff, 0xff, 0xff, 0xfc, 0x00, 0x1f, 0xe0, 0x00, 0x7f, 0xff, 0xff, 0xf0, 0x00, 0x0f, 0xc0, 0x00, 0x3f, 0xff, 0xff, 0xf8, 0x00, 0x3f, 0xf0, 0x00, 0x3f, 0xff, 0xff, 0xe0, 0x00, 0x1f, 0xe0, 0x00, 0x1f, 0xff, 0xff, 0xf0, 0x00, 0x3f, 0xf8, 0x00, 0x1f, 0xff, 0xff, 0x80, 0x00, 0x3f, 0xe0, 0x00, 0x07, 0xff, 0xff, 0xe0, 0x00, 0x7f, 0xf8, 0x00, 0x0f, 0xff, 0xff, 0x00, 0x00, 0x7f, 0xf8, 0x00, 0x03, 0xff, 0xff, 0xc0, 0x00, 0x7f, 0xfc, 0x00, 0x03, 0xff, 0xf8, 0x00, 0x00, 0xff, 0xfc, 0x00, 0x00, 0xff, 0xff, 0x00, 0x00, 0xff, 0xfe, 0x00, 0x00, 0x7f, 0xe0, 0x00, 0x01, 0xff, 0xfe, 0x00, 0x00, 0x1f, 0xf8, 0x00, 0x01, 0xff, 0xfe, 0x00, 0x00, 0x00, 0x00, 0x00, 0x03, 0xff, 0xff, 0x00, 0x00, 0x00, 0x00, 0x00, 0x03, 0xff, 0xff, 0x00, 0x00, 0x00, 0x00, 0x00, 0x07, 0xff, 0xff, 0x80, 0x00, 0x00, 0x00, 0x00, 0x03, 0xff, 0xff, 0x80, 0x00, 0x00, 0x00, 0x00, 0x0f, 0xff, 0xff, 0xc0, 0x00, 0x00, 0x00, 0x00, 0x07, 0xff, 0xff, 0xc0, 0x00, 0x00, 0x00, 0x00, 0x1f, 0xff, 0xff, 0xe0, 0x00, 0x00, 0x00, 0x00, 0x0f, 0xff, 0xff, 0xe0, 0x00, 0x00, 0x00, 0x00, 0x7f, 0xff, 0xff, 0xf8, 0x00, 0x00, 0x00, 0x00, 0x3f, 0xff, 0xff, 0xf8, 0x00, 0x00, 0x00, 0x01, 0xff, 0xff, 0xff, 0xfe, 0x00, 0x00, 0x00, 0x00, 0x7f, 0xff, 0xff, 0xfc, 0x00, 0x00, 0x00, 0x03, 0xff, 0xff, 0xff, 0xff, 0x00, 0x00, 0x00, 0x00, 0xff, 0xff, 0xff, 0xff, 0x00, 0x00, 0x00, 0x0f, 0xff, 0xff, 0xff, 0xff, 0xc0, 0x00, 0x00, 0x03, 0xff, 0xff, 0xff, 0xff, 0xc0, 0x00, 0x00, 0x3f, 0xff, 0xff, 0xff, 0xff, 0xf0, 0x00, 0x00, 0x0f, 0xff, 0xff, 0xff, 0xff, 0xf0, 0x00, 0x01, 0xff, 0xff, 0xff, 0xff, 0xff, 0xfe, 0x00, 0x00, 0x3f, 0xff, 0xff, 0xff, 0xff, 0xff, 0x00, 0x0f, 0xff, 0xff, 0xff, 0xff, 0xff, 0xff, 0xc0, 0x03, 0xff, 0xff, 0xff, 0xff, 0xff, 0xff, 0xff, 0xff, 0xff, 0xff, 0xff, 0xff, 0xff, 0xff, 0xff, 0xff, 0xff, 0xff, 0xff, 0xff, 0xff, 0xff, 0xff, 0xff, 0xff, 0xff, 0xff, 0xff, 0xff, 0xff, 0xff, 0xff, 0xff, 0xff, 0xff, 0xff, 0xff, 0xff, 0xff, 0xff, 0xff, 0xff, 0xff, 0xff, 0xff, 0xff, 0xff, 0xff, 0xff, 0xff, 0xff, 0xff, 0xff, 0xff, 0xff, 0xff, 0xff, 0xff, 0xff, 0xff, 0xff, 0xff, 0xff, 0xff, 0xff, 0xff, 0xff }; void setup() { Serial.begin(9600); // initialize OLED display with I2C address 0x3C if (!oled.begin(SSD1306_SWITCHCAPVCC, 0x3C)) { Serial.println(F("failed to start SSD1306 OLED")); while (1); } delay(2000); // wait two seconds for initializing oled.setCursor(0, 0); } void loop() { oled.clearDisplay(); // display bitmap oled.drawBitmap(0, 0, arduino_icon, 128, 64, WHITE); oled.display(); delay(1000); // invert display oled.invertDisplay(1); delay(1000); }

※ NOTE THAT:

  • La taille de l'image ne doit pas être plus grande que celle de l'écran.
  • Si vous souhaitez utiliser le code pour un OLED 128x32, vous devez redimensionner l'image et ajuster les paramètres de largeur et de hauteur dans la fonction oled.drawBitmap();.

#Dépannage OLED

Vérifiez que l'OLED fonctionne correctement en procédant comme suit :

  • Assurez-vous que votre câblage est correct.
  • Confirmez que votre OLED utilise le pilote SSD1306.
  • Utilisez le code Scanner d'adresse I2C sur Arduino Nano ESP32 pour vérifier l'adresse I2C de l'OLED.
// I2C address scanner program #include <Wire.h> void setup() { Wire.begin(); Serial.begin(9600); Serial.println("I2C Scanner"); } void loop() { byte error, address; int nDevices; Serial.println("Scanning..."); nDevices = 0; for (address = 1; address < 127; address++ ) { Wire.beginTransmission(address); error = Wire.endTransmission(); if (error == 0) { Serial.print("I2C device found at address 0x"); if (address < 16) Serial.print("0"); Serial.print(address, HEX); Serial.println(" !"); nDevices++; } else if (error == 4) { Serial.print("Unknown error at address 0x"); if (address < 16) Serial.print("0"); Serial.println(address, HEX); } } if (nDevices == 0) Serial.println("No I2C devices found"); else Serial.println("done"); delay(5000); // wait 5 seconds for next scan }

La sortie affichée sur le moniteur série est la suivante :

COM6
Send
Scanning... I2C device found at address 0x3C ! done Scanning... I2C device found at address 0x3C ! done
Autoscroll Show timestamp
Clear output
9600 baud  
Newline  

※ OUR MESSAGES

  • Please feel free to share the link of this tutorial. However, Please do not use our content on any other websites. We invested a lot of effort and time to create the content, please respect our work!