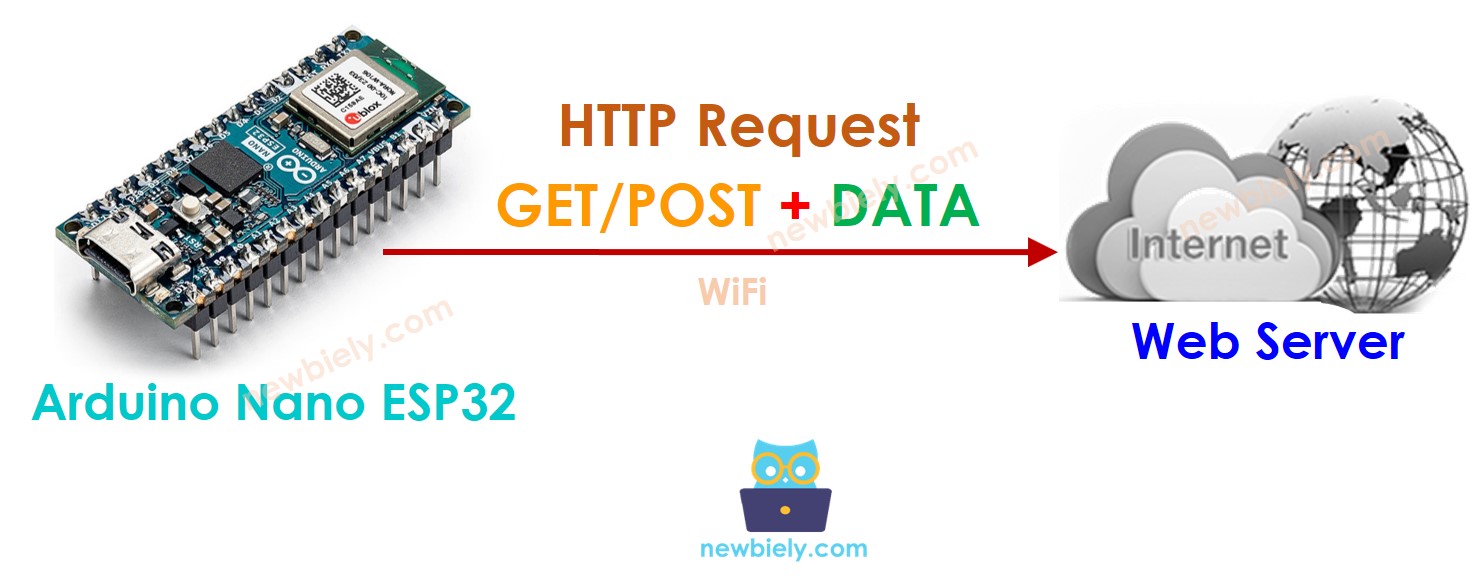
Arduino Nano ESP32 - Requête HTTP

Ce tutoriel fournit des instructions sur comment utiliser l'Arduino Nano ESP32 pour effectuer une requête HTTP à un serveur web, une API ou un service Web. En détail, vous apprendrez :

Client web Arduino Nano ESP32

Préparation du matériel

1×Arduino Nano ESP32
1×USB Cable Type-C
1×Breadboard
1×Jumper Wires
1×(Optional) DC Power Jack
1×(Recommended) Screw Terminal Adapter for Arduino Nano

Or you can buy the following sensor kits:

1×DIYables Sensor Kit (30 sensors/displays)
1×DIYables Sensor Kit (18 sensors/displays)
Divulgation : Certains des liens fournis dans cette section sont des liens affiliés Amazon. Nous pouvons recevoir une commission pour tout achat effectué via ces liens, sans coût supplémentaire pour vous. Nous vous remercions de votre soutien.

Concepts de base du client Web et du serveur Web

Il existe quelques concepts de base du web tels que : adresse web (URL), nom d'hôte, chemin d'accès, chaîne de requête, requête HTTP... Vous pouvez en apprendre davantage à leur sujet dans le tutoriel HTTP

Comment effectuer une requête HTTP

  • Inclure des bibliothèques
#include <WiFi.h> #include <HTTPClient.h>
  • Déclarer le SSID et le mot de passe du WiFi
const char WIFI_SSID[] = "YOUR_WIFI_SSID"; // CHANGEZ-LE const char WIFI_PASSWORD[] = "YOUR_WIFI_PASSWORD"; // CHANGEZ-LE
  • Déclarer hostname, pathname, chaîne de requête
String HOST_NAME = "http://YOUR_DOMAIN.com"; // CHANGEZ-LE String PATH_NAME = "/products/arduino"; // CHANGEZ-LE //String PATH_NAME = "/products/arduino.php"; // CHANGEZ-LE String queryString = "temperature=26&humidity=70"; // FACULTATIF
  • Déclarer un objet client HTTP
HTTPClient http;
  • Si connecté au serveur, et envoyer une requête HTTP. Par exemple, HTTP GET.
http.begin(HOST_NAME + PATH_NAME); //HTTP int httpCode = http.GET(); //HTTP
  • Lisez les données de réponse du serveur web.
// httpCode sera négatif en cas d'erreur if (httpCode > 0) { // fichier trouvé sur le serveur if (httpCode == HTTP_CODE_OK) { String payload = http.getString(); Serial.println(payload); } else { // L'en-tête HTTP a été envoyé et l'en-tête de réponse du serveur a été traité Serial.printf("[HTTP] GET... code: %d\n", httpCode); } } else { Serial.printf("[HTTP] GET... échoué, erreur: %s\n", http.errorToString(httpCode).c_str()); } http.end();

Comment inclure des données dans une requête HTTP

Nous pouvons envoyer des données au serveur web en incluant des données dans la requête HTTP. Le format des données dépend de la méthode de requête HTTP :

  • Pour une requête HTTP GET
    • Les données peuvent être envoyées uniquement dans la chaîne de requête du chemin.
  • Requête HTTP POST
    • Les données peuvent être envoyées NON SEULEMENT dans le format de la chaîne de requête MAIS AUSSI dans tout autre format tel que Json, XML, image...
    • Les données sont placées dans le corps de la requête HTTP.

    Apprenons à envoyer des données au format de chaîne de requête pour les méthodes HTTP GET et POST.

    • Créer une chaîne de requête
    int temp = // du capteur int humi = // du capteur String queryString = String("temperature=") + String(temp) + String("&humidity=") + String(humi);
    • HTTP GET : ajoutez chaîne de requête au chemin d'accès
    http.begin(HOST_NAME + PATH_NAME + "?" + queryString); http.addHeader("Content-Type", "application/x-www-form-urlencoded"); int httpCode = http.GET();
    • POST HTTP : mettre la chaîne de requête dans le corps HTTP
    http.begin(HOST_NAME + PATH_NAME); http.addHeader("Content-Type", "application/x-www-form-urlencoded"); int httpCode = http.POST(queryString);
    • Pour les méthodes GET et POST, lire les données de réponse du serveur web.
    // httpCode sera négatif en cas d'erreur if (httpCode > 0) { // fichier trouvé sur le serveur if (httpCode == HTTP_CODE_OK) { String payload = http.getString(); Serial.println(payload); } else { // L'en-tête HTTP a été envoyé et l'en-tête de réponse du serveur a été traité Serial.printf("[HTTP] GET/POST... code: %d\n", httpCode); } } else { Serial.printf("[HTTP] GET/POST... a échoué, erreur: %s\n", http.errorToString(httpCode).c_str()); } http.end();

Code Arduino Nano ESP32 complet pour effectuer une requête HTTP

Le code Arduino Nano ESP32 complet pour effectuer une requête HTTP GET/POST est le suivant :

/* * Ce code Arduino Nano ESP32 a été développé par newbiely.fr * Ce code Arduino Nano ESP32 est mis à disposition du public sans aucune restriction. * Pour des instructions complètes et des schémas de câblage, veuillez visiter: * https://newbiely.fr/tutorials/arduino-nano-esp32/arduino-nano-esp32-http-request */ #include <WiFi.h> #include <HTTPClient.h> const char WIFI_SSID[] = "YOUR_WIFI_SSID"; // CHANGE IT // CHANGE IT const char WIFI_PASSWORD[] = "YOUR_WIFI_PASSWORD"; // CHANGE IT String HOST_NAME = "http://YOUR_DOMAIN.com"; // CHANGE IT String HOST_NAME = "http://YOUR_DOMAIN.com"; // CHANGE IT //String PATH_NAME = "/products/arduino.php"; // CHANGE IT void setup() { Serial.begin(9600); WiFi.begin(WIFI_SSID, WIFI_PASSWORD); Serial.println("Connecting"); while(WiFi.status() != WL_CONNECTED) { delay(500); Serial.print("."); } Serial.println(""); Serial.print("Connected to WiFi network with IP Address: "); Serial.println(WiFi.localIP()); HTTPClient http; http.begin(HOST_NAME + PATH_NAME); //HTTP int httpCode = http.GET(); // httpCode will be negative on error if(httpCode > 0) { // file found at server if(httpCode == HTTP_CODE_OK) { String payload = http.getString(); Serial.println(payload); } else { // HTTP header has been send and Server response header has been handled Serial.printf("[HTTP] GET... code: %d\n", httpCode); } } else { Serial.printf("[HTTP] GET... failed, error: %s\n", http.errorToString(httpCode).c_str()); } http.end(); } void loop() { }

Code complet d'Arduino Nano ESP32 pour réaliser une requête HTTP GET avec des données

/* * Ce code Arduino Nano ESP32 a été développé par newbiely.fr * Ce code Arduino Nano ESP32 est mis à disposition du public sans aucune restriction. * Pour des instructions complètes et des schémas de câblage, veuillez visiter: * https://newbiely.fr/tutorials/arduino-nano-esp32/arduino-nano-esp32-http-request */ #include <WiFi.h> #include <HTTPClient.h> const char WIFI_SSID[] = "YOUR_WIFI_SSID"; // CHANGE IT const char WIFI_PASSWORD[] = "YOUR_WIFI_PASSWORD"; // CHANGE IT String HOST_NAME = "http://YOUR_DOMAIN.com"; // CHANGE IT String PATH_NAME = "/products/arduino"; // CHANGE IT //String PATH_NAME = "/products/arduino.php"; // CHANGE IT String queryString = "temperature=26&humidity=70"; void setup() { Serial.begin(9600); WiFi.begin(WIFI_SSID, WIFI_PASSWORD); Serial.println("Connecting"); while (WiFi.status() != WL_CONNECTED) { delay(500); Serial.print("."); } Serial.println(""); Serial.print("Connected to WiFi network with IP Address: "); Serial.println(WiFi.localIP()); HTTPClient http; http.begin(HOST_NAME + PATH_NAME + "?" + queryString); http.addHeader("Content-Type", "application/x-www-form-urlencoded"); int httpCode = http.GET(); // httpCode will be negative on error if (httpCode > 0) { // file found at server if (httpCode == HTTP_CODE_OK) { String payload = http.getString(); Serial.println(payload); } else { // HTTP header has been send and Server response header has been handled Serial.printf("[HTTP] GET... code: %d\n", httpCode); } } else { Serial.printf("[HTTP] GET... failed, error: %s\n", http.errorToString(httpCode).c_str()); } http.end(); } void loop() { }

Code complet Arduino Nano ESP32 pour effectuer une requête HTTP POST avec des données.

/* * Ce code Arduino Nano ESP32 a été développé par newbiely.fr * Ce code Arduino Nano ESP32 est mis à disposition du public sans aucune restriction. * Pour des instructions complètes et des schémas de câblage, veuillez visiter: * https://newbiely.fr/tutorials/arduino-nano-esp32/arduino-nano-esp32-http-request */ #include <WiFi.h> #include <HTTPClient.h> const char WIFI_SSID[] = "YOUR_WIFI_SSID"; // CHANGE IT const char WIFI_PASSWORD[] = "YOUR_WIFI_PASSWORD"; // CHANGE IT String HOST_NAME = "http://YOUR_DOMAIN.com"; // CHANGE IT String PATH_NAME = "/products/arduino"; // CHANGE IT //String PATH_NAME = "/products/arduino.php"; // CHANGE IT String queryString = "temperature=26&humidity=70"; void setup() { Serial.begin(9600); WiFi.begin(WIFI_SSID, WIFI_PASSWORD); Serial.println("Connecting"); while (WiFi.status() != WL_CONNECTED) { delay(500); Serial.print("."); } Serial.println(""); Serial.print("Connected to WiFi network with IP Address: "); Serial.println(WiFi.localIP()); HTTPClient http; http.begin(HOST_NAME + PATH_NAME); http.addHeader("Content-Type", "application/x-www-form-urlencoded"); int httpCode = http.POST(queryString); // httpCode will be negative on error if (httpCode > 0) { // file found at server if (httpCode == HTTP_CODE_OK) { String payload = http.getString(); Serial.println(payload); } else { // HTTP header has been send and Server response header has been handled Serial.printf("[HTTP] POST... code: %d\n", httpCode); } } else { Serial.printf("[HTTP] POST... failed, error: %s\n", http.errorToString(httpCode).c_str()); } http.end(); } void loop() { }

※ OUR MESSAGES

  • Please feel free to share the link of this tutorial. However, Please do not use our content on any other websites. We invested a lot of effort and time to create the content, please respect our work!