Arduino Nano ESP32 - Ethernet
Ce guide vous montre comment connecter l'Arduino Nano ESP32 à Internet ou à votre réseau local en utilisant le module Ethernet W55010. Vous apprendrez les éléments suivants :
- Comment connecter l'Arduino Nano ESP32 au module Ethernet W5500
- Comment programmer l'Arduino Nano ESP32 pour les requêtes HTTP via Ethernet
- Comment créer un simple serveur Web sur l'Arduino Nano ESP32 avec Ethernet
Préparation du matériel
Ou vous pouvez acheter les kits suivants:
| 1 | × | Kit de Capteurs DIYables (18 capteurs/écrans) |
Divulgation : Certains des liens fournis dans cette section sont des liens affiliés Amazon. Nous pouvons recevoir une commission pour tout achat effectué via ces liens, sans coût supplémentaire pour vous. Nous vous remercions de votre soutien.
À propos du module Ethernet W5500
Le module Ethernet W550io dispose de deux types de connexions :
- Interface RJ45 : Connectez ceci à un routeur ou un commutateur à l'aide d'un câble Ethernet.
- Interface SPI : Utilisez ceci pour vous connecter à une carte Arduino Nano ESP32. Il comprend 10 broches :
- Broche NC : Laissez cette broche non connectée.
- Broche INT : Laissez cette broche non connectée.
- Broche RST : C'est la broche de réinitialisation ; connectez-la à la broche EN de l'Arduino Nano ESP32.
- Broche GND : Connectez ceci à la broche GND de l'Arduino Nano ESP32.
- Broche 5V : Ne connectez pas cette broche.
- Broche 3.3V : Connectez-la à la broche 3.3V de l'Arduino Nano ESP32.
- Broche MISO : Connectez cela à la broche SPI MISO de l'Arduino Nano ESP32.
- Broche MOSI : Connectez cela à la broche SPI MOSI de l'Arduino Nano ESP32.
- Broche SCS : Connectez cela à la broche SPI CS de l'Arduino Nano ESP32.
- Broche SCLK : Connectez cela à la broche SPI SCK de l'Arduino Nano ESP32.
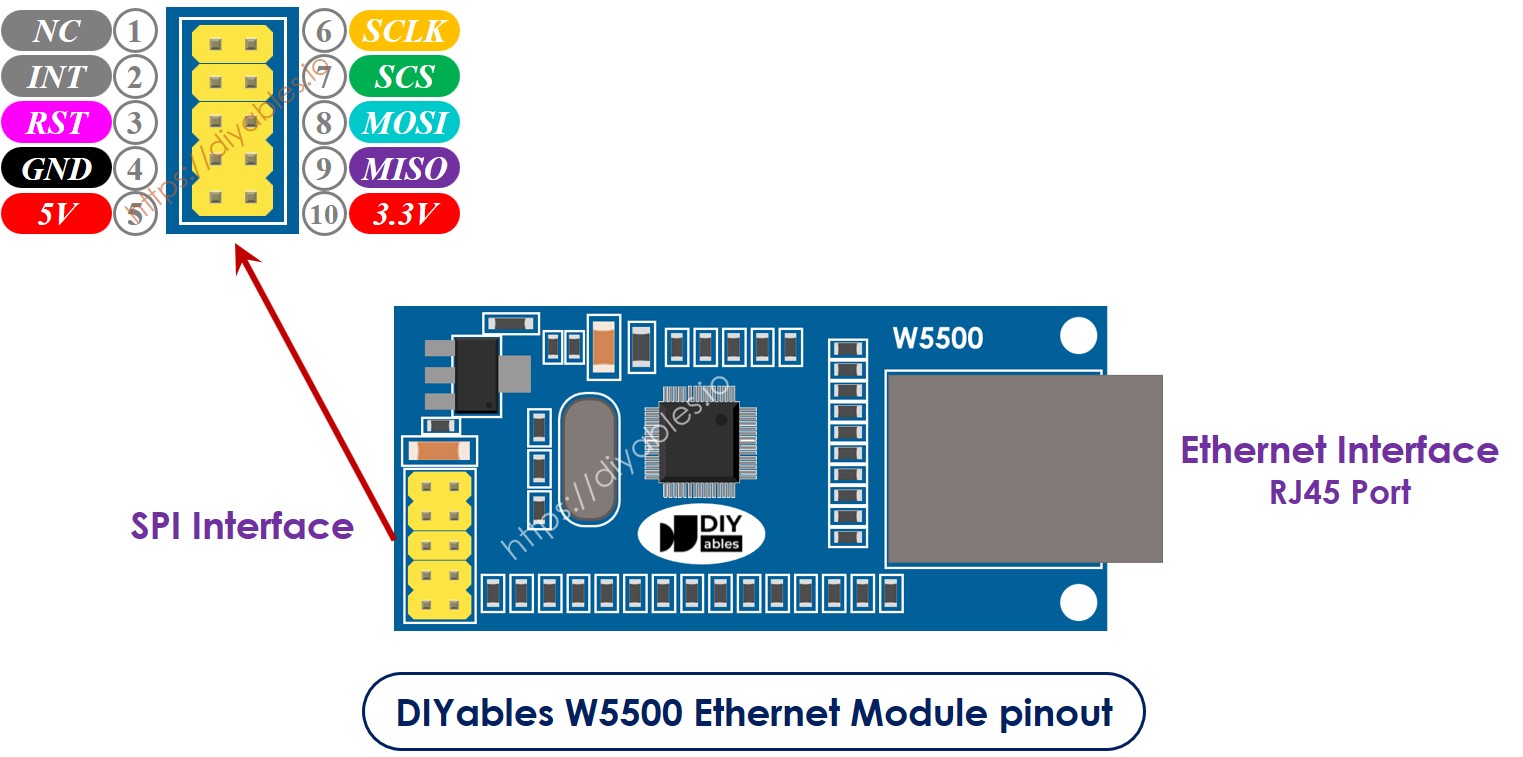
image source: diyables.io
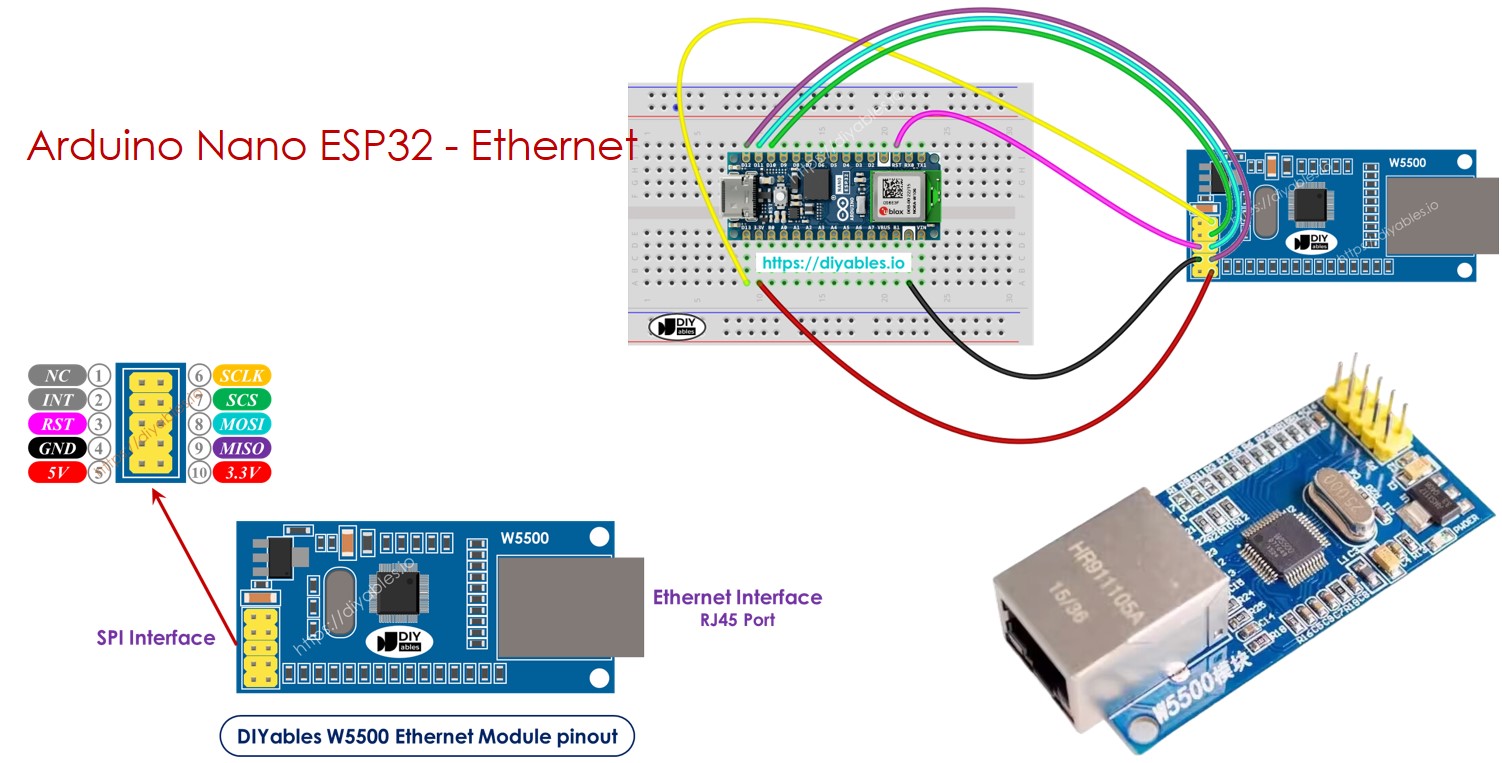
Schéma de câblage entre Arduino Nano ESP32 et module Ethernet W5500
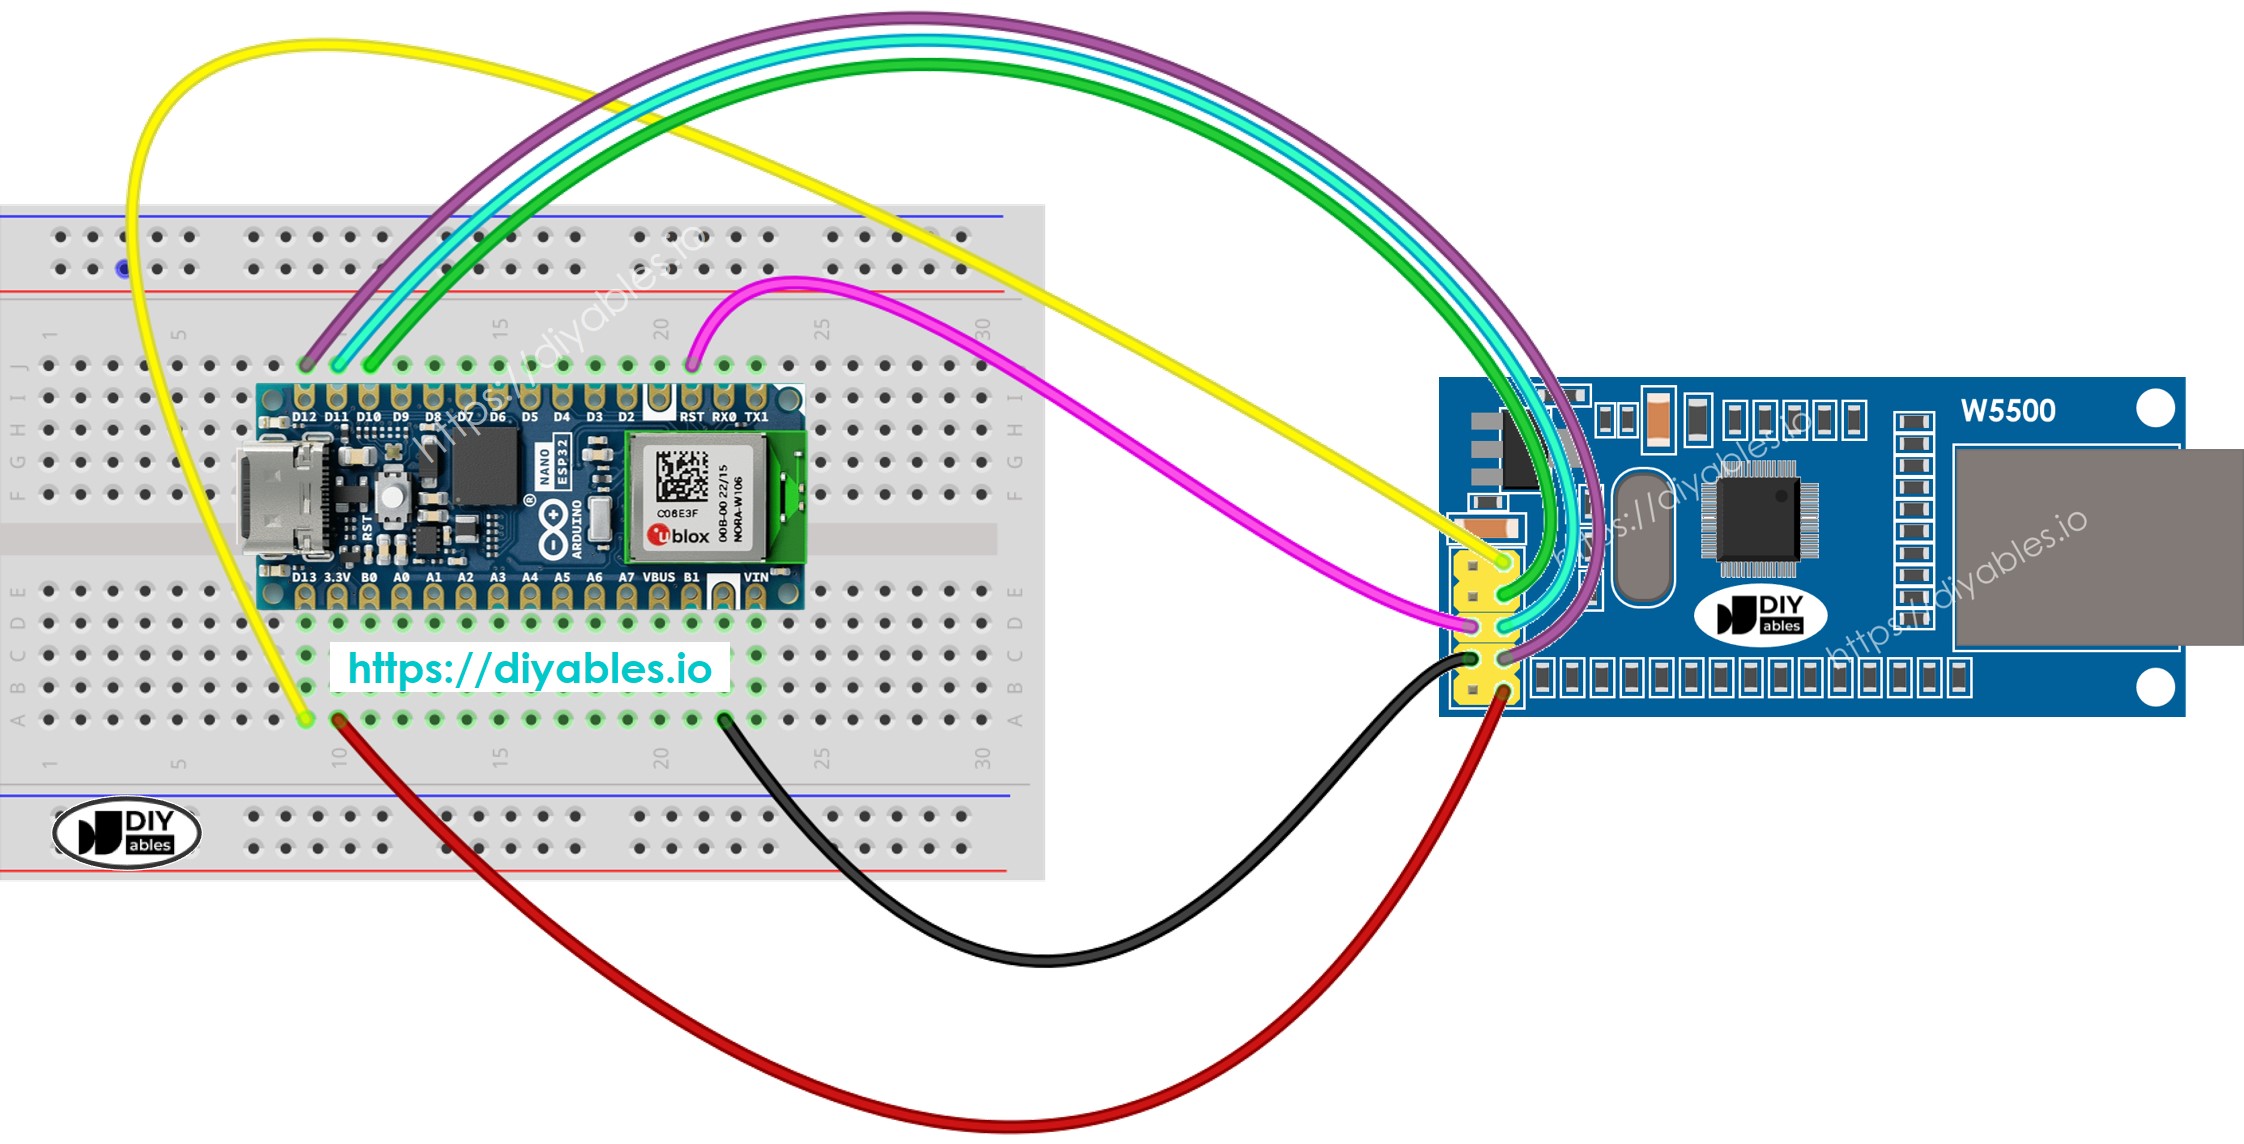
Cette image a été créée avec Fritzing. Cliquez pour agrandir l'image.
image source: diyables.io
Code Arduino Nano ESP32 pour module Ethernet - Faire une requête HTTP via Ethernet
Ce code fonctionne comme un client web. Il envoie des requêtes HTTP au serveur web à l'adresse http://example.com/.
/*
* Ce code Arduino Nano ESP32 a été développé par newbiely.fr
* Ce code Arduino Nano ESP32 est mis à disposition du public sans aucune restriction.
* Pour des instructions complètes et des schémas de câblage, veuillez visiter:
* https://newbiely.fr/tutorials/arduino-nano-esp32/arduino-nano-esp32-ethernet
*/
#include <SPI.h>
#include <Ethernet.h>
// replace the MAC address below by the MAC address printed on a sticker on the Arduino Shield 2
byte mac[] = { 0xDE, 0xAD, 0xBE, 0xEF, 0xFE, 0xEF };
EthernetClient client;
int HTTP_PORT = 80;
String HTTP_METHOD = "GET"; // or POST
char HOST_NAME[] = "example.com";
String PATH_NAME = "/";
void setup() {
Serial.begin(9600);
delay(1000);
Serial.println("Arduino Nano ESP32 - Ethernet Tutorial");
// initialize the Ethernet shield using DHCP:
if (Ethernet.begin(mac) == 0) {
Serial.println("Failed to obtaining an IP address");
// check for Ethernet hardware present
if (Ethernet.hardwareStatus() == EthernetNoHardware)
Serial.println("Ethernet shield was not found");
// check for Ethernet cable
if (Ethernet.linkStatus() == LinkOFF)
Serial.println("Ethernet cable is not connected.");
while (true)
;
}
// connect to web server on port 80:
if (client.connect(HOST_NAME, HTTP_PORT)) {
// if connected:
Serial.println("Connected to server");
// make a HTTP request:
// send HTTP header
client.println(HTTP_METHOD + " " + PATH_NAME + " HTTP/1.1");
client.println("Host: " + String(HOST_NAME));
client.println("Connection: close");
client.println(); // end HTTP header
while (client.connected()) {
if (client.available()) {
// read an incoming byte from the server and print it to serial monitor:
char c = client.read();
Serial.print(c);
}
}
// the server's disconnected, stop the client:
client.stop();
Serial.println();
Serial.println("disconnected");
} else { // if not connected:
Serial.println("connection failed");
}
}
void loop() {
}
Étapes rapides
Pour commencer avec Arduino Nano ESP32, suivez ces étapes :
- Si vous êtes nouveau sur l'Arduino Nano ESP32, référez-vous au tutoriel sur Installation du logiciel Arduino Nano ESP32..
- Connectez l'Arduino Nano ESP32 au module Ethernet selon le schéma fourni.
- Connectez le module Ethernet à votre routeur ou commutateur à l'aide d'un câble Ethernet.
- Connectez la carte Arduino Nano ESP32 à votre ordinateur à l'aide d'un câble USB.
- Lancez l'Arduino IDE sur votre ordinateur.
- Sélectionnez la carte Arduino Nano ESP32 et son port COM correspondant.
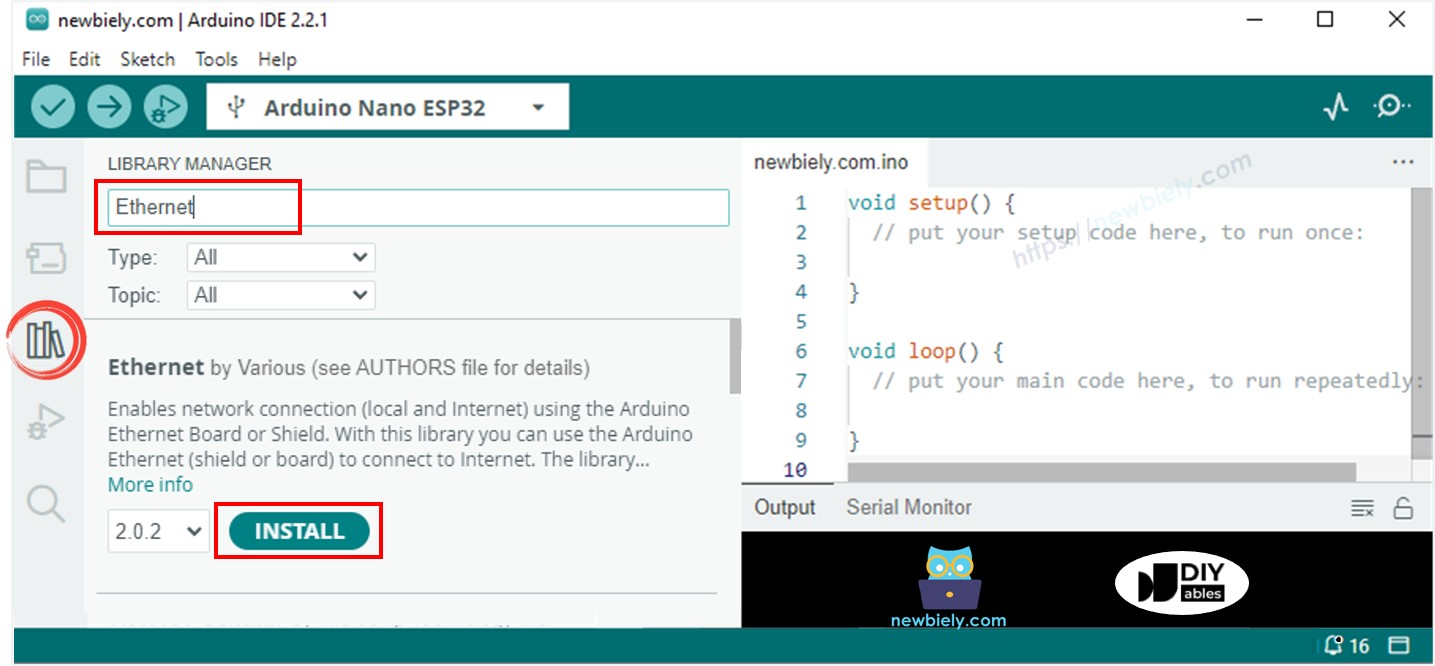
- Cliquez sur l'icône Libraries dans la barre de gauche de l'Arduino IDE.
- Cherchez « Ethernet », puis trouvez la bibliothèque Ethernet par Various.
- Cliquez sur le bouton Install pour installer la bibliothèque Ethernet.
- Ouvrez le Moniteur Série dans l'IDE Arduino.
- Copiez le code donné et collez-le dans l'IDE Arduino.
- Appuyez sur le bouton Téléverser dans l'IDE Arduino pour envoyer le code à l'ESP25.
- Vérifiez le Moniteur Série qui affichera la sortie comme ci-dessous.
8
Serial.println("Hello World!");
Message (Enter to send message to 'Arduino Nano ESP32' on 'COM15')
New Line
9600 baud
Arduino Nano ESP32 - Ethernet Tutorial
Connected to server
HTTP/1.1 200 OK
Accept-Ranges: bytes
Age: 208425
Cache-Control: max-age=604800
Content-Type: text/html; charset=UTF-8
Date: Fri, 12 Jul 2024 07:08:42 GMT
Etag: "3147526947"
Expires: Fri, 19 Jul 2024 07:08:42 GMT
Last-Modified: Thu, 17 Oct 2019 07:18:26 GMT
Server: ECAcc (lac/55B8)
Vary: Accept-Encoding
X-Cache: HIT
Content-Length: 1256
Connection: close
<!doctype html>
<html>
<head>
<title>Example Domain</title>
<meta charset="utf-8" />
<meta http-equiv="Content-type" content="text/html; charset=utf-8" />
<meta name="viewport" content="width=device-width, initial-scale=1" />
</head>
<body>
<div>
<h1>Example Domain</h1>
<p>This domain is for use in illustrative examples in documents. You may use this
domain in literature without prior coordination or asking for permission.</p>
<p><a href="https://www.iana.org/domains/example">More information...</a></p>
</div>
</body>
</html>
disconnected
※ Note:
Si un autre appareil sur le même réseau a la même adresse MAC, cela pourrait causer des problèmes.
Code Arduino Nano ESP32 pour module Ethernet - Serveur Web
Le code ci-dessous transforme l'Arduino Nano ESP32 en serveur web. Ce serveur envoie une page web simple aux navigateurs.
/*
* Ce code Arduino Nano ESP32 a été développé par newbiely.fr
* Ce code Arduino Nano ESP32 est mis à disposition du public sans aucune restriction.
* Pour des instructions complètes et des schémas de câblage, veuillez visiter:
* https://newbiely.fr/tutorials/arduino-nano-esp32/arduino-nano-esp32-ethernet
*/
#include <SPI.h>
#include <Ethernet.h>
// replace the MAC address below by the MAC address printed on a sticker on the Arduino Shield 2
byte mac[] = { 0xDE, 0xAD, 0xBE, 0xEF, 0xFE, 0xEF };
EthernetServer server(80);
void setup() {
Serial.begin(9600);
delay(1000);
Serial.println("Arduino Nano ESP32 - Ethernet Tutorial");
// initialize the Ethernet shield using DHCP:
if (Ethernet.begin(mac) == 0) {
Serial.println("Failed to obtaining an IP address");
// check for Ethernet hardware present
if (Ethernet.hardwareStatus() == EthernetNoHardware)
Serial.println("Ethernet shield was not found");
// check for Ethernet cable
if (Ethernet.linkStatus() == LinkOFF)
Serial.println("Ethernet cable is not connected.");
while (true)
;
}
server.begin();
Serial.print("Arduino Nano ESP32 - Web Server IP Address: ");
Serial.println(Ethernet.localIP());
}
void loop() {
// listen for incoming clients
EthernetClient client = server.available();
if (client) {
Serial.println("new client");
// an HTTP request ends with a blank line
bool currentLineIsBlank = true;
while (client.connected()) {
if (client.available()) {
char c = client.read();
Serial.write(c);
// if you've gotten to the end of the line (received a newline
// character) and the line is blank, the HTTP request has ended,
// so you can send a reply
if (c == '\n' && currentLineIsBlank) {
// send a standard HTTP response header
client.println("HTTP/1.1 200 OK");
client.println("Content-Type: text/html");
client.println("Connection: close"); // the connection will be closed after completion of the response
client.println();
client.println("<!DOCTYPE HTML>");
client.println("<html>");
client.println("<body>");
client.println("<h1>Arduino Nano ESP32 - Web Server with Ethernet</h1>");
client.println("</body>");
client.println("</html>");
break;
}
if (c == '\n') {
// you're starting a new line
currentLineIsBlank = true;
} else if (c != '\r') {
// you've gotten a character on the current line
currentLineIsBlank = false;
}
}
}
// give the web browser time to receive the data
delay(1);
// close the connection:
client.stop();
Serial.println("client disconnected");
}
}
Étapes rapides
- Copiez le code fourni et collez-le dans l'IDE Arduino.
- Cliquez sur le bouton Upload dans l'IDE Arduino pour envoyer le code à votre carte Arduino Nano ESP32.
- Vérifiez le Moniteur Série pour voir les résultats comme indiqué.
8
Serial.println("Hello World!");
Message (Enter to send message to 'Arduino Nano ESP32' on 'COM15')
New Line
9600 baud
Arduino Nano ESP32 - Ethernet Tutorial
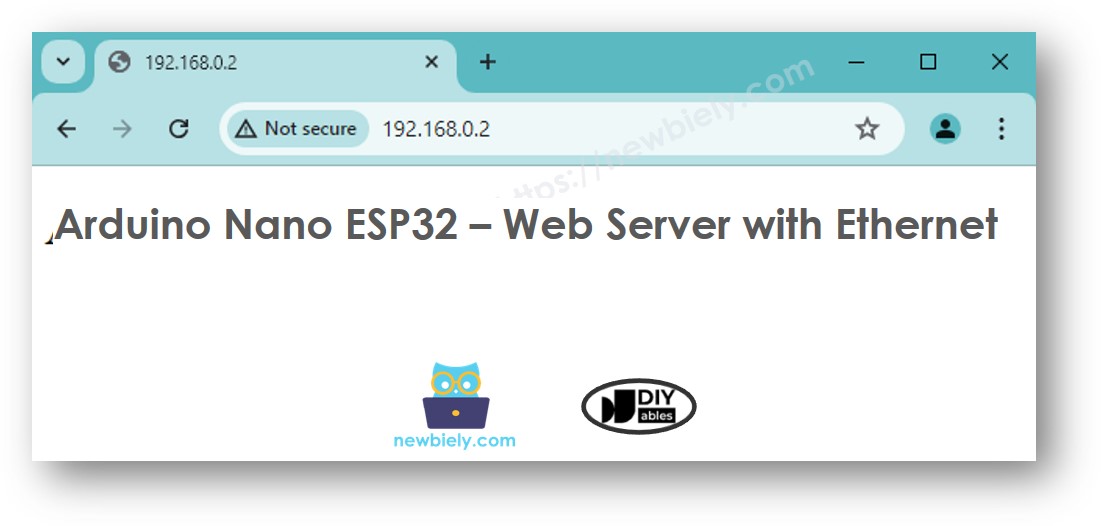
Arduino Nano ESP32 - Web Server IP Address: 192.168.0.2
- Entrez l'adresse IP fournie dans la barre d'adresse de votre navigateur web. Vous verrez une page web simple affichée par l'Arduino Nano ESP32.