Raspberry Pi Pico - OLED
Ce tutoriel explique comment utiliser un Raspberry Pi Pico avec un écran OLED I2C 128x64. Nous aborderons :
- Comment connecter un écran OLED 128x64 à un Raspberry Pi Pico.
- Comment programmer le Raspberry Pi Pico pour afficher du texte, des entiers et des nombres à virgule flottante sur un OLED.
- Comment centrer automatiquement le texte et les nombres verticalement et horizontalement sur l'OLED.
- Comment programmer le Raspberry Pi Pico pour dessiner des formes sur un OLED.
- Comment programmer le Raspberry Pi Pico pour afficher une image sur un OLED.
Préparation du matériel
| 1 | × | Raspberry Pi Pico W | |
| 1 | × | Raspberry Pi Pico Alternativement: | |
| 1 | × | Câble Micro USB | |
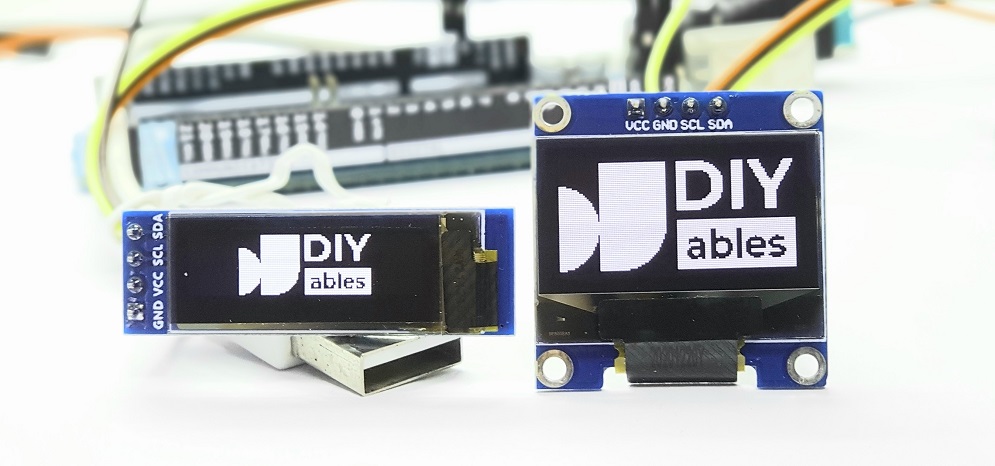
| 1 | × | Écran OLED I2C SSD1306 128x64 | |
| 1 | × | Fils de connexion | |
| 1 | × | Recommandé: Carte d'extension à bornier à vis pour Raspberry Pi Pico |
Ou vous pouvez acheter les kits suivants:
| 1 | × | Kit de Capteurs DIYables (18 capteurs/écrans) |
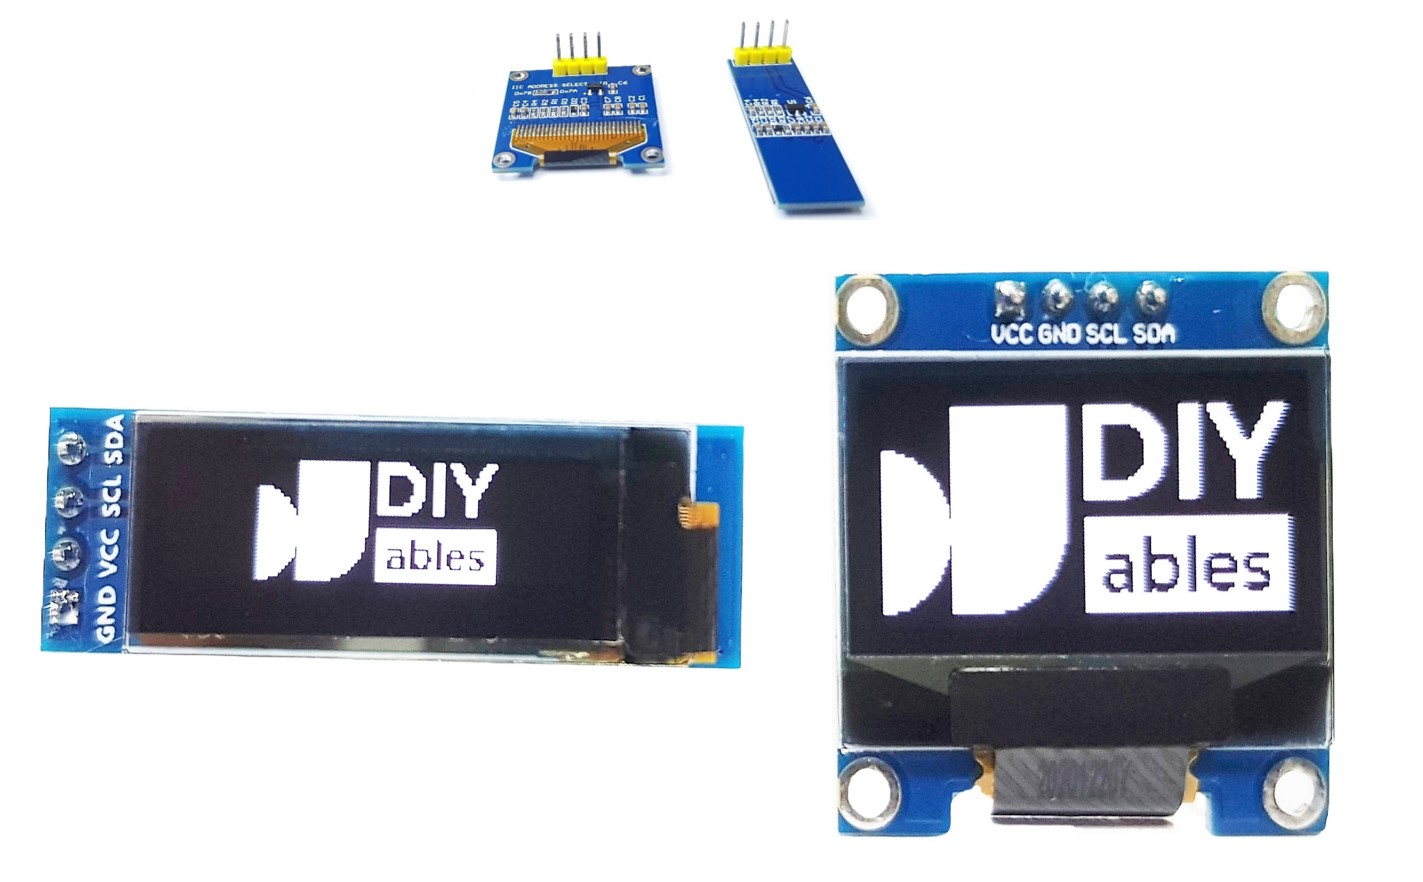
À propos de l'écran OLED
Les écrans OLED existent sous différents types, chacun diffère par les protocoles de communication, leurs tailles et les options de couleur.
- Protocoles de communication : I2C, SPI
- Tailles : 128x64, 128x32
- Couleurs disponibles : blanc, bleu, jaune et d'autres
SPI et I2C pour les écrans OLED
- SPI: Plus rapide mais nécessite plus de broches sur le Raspberry Pi Pico.
- I2C: Utilise moins de broches et permet la connexion à plusieurs péripheriques.
Choisissez le SPI pour un transfert de données plus rapide ou l'I2C pour moins de broches. Ce guide utilise l'affichage OLED SSD1306 I2C 128×64.
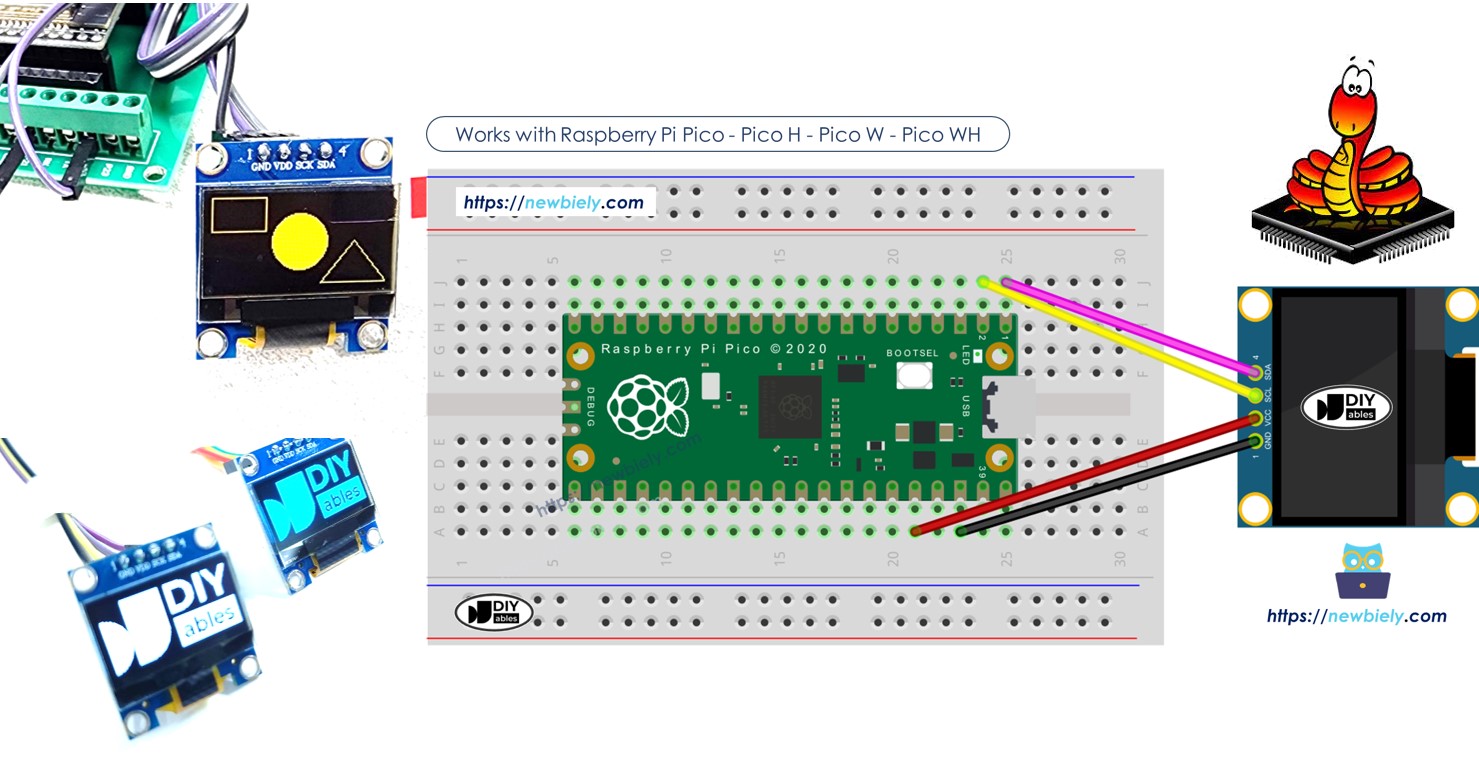
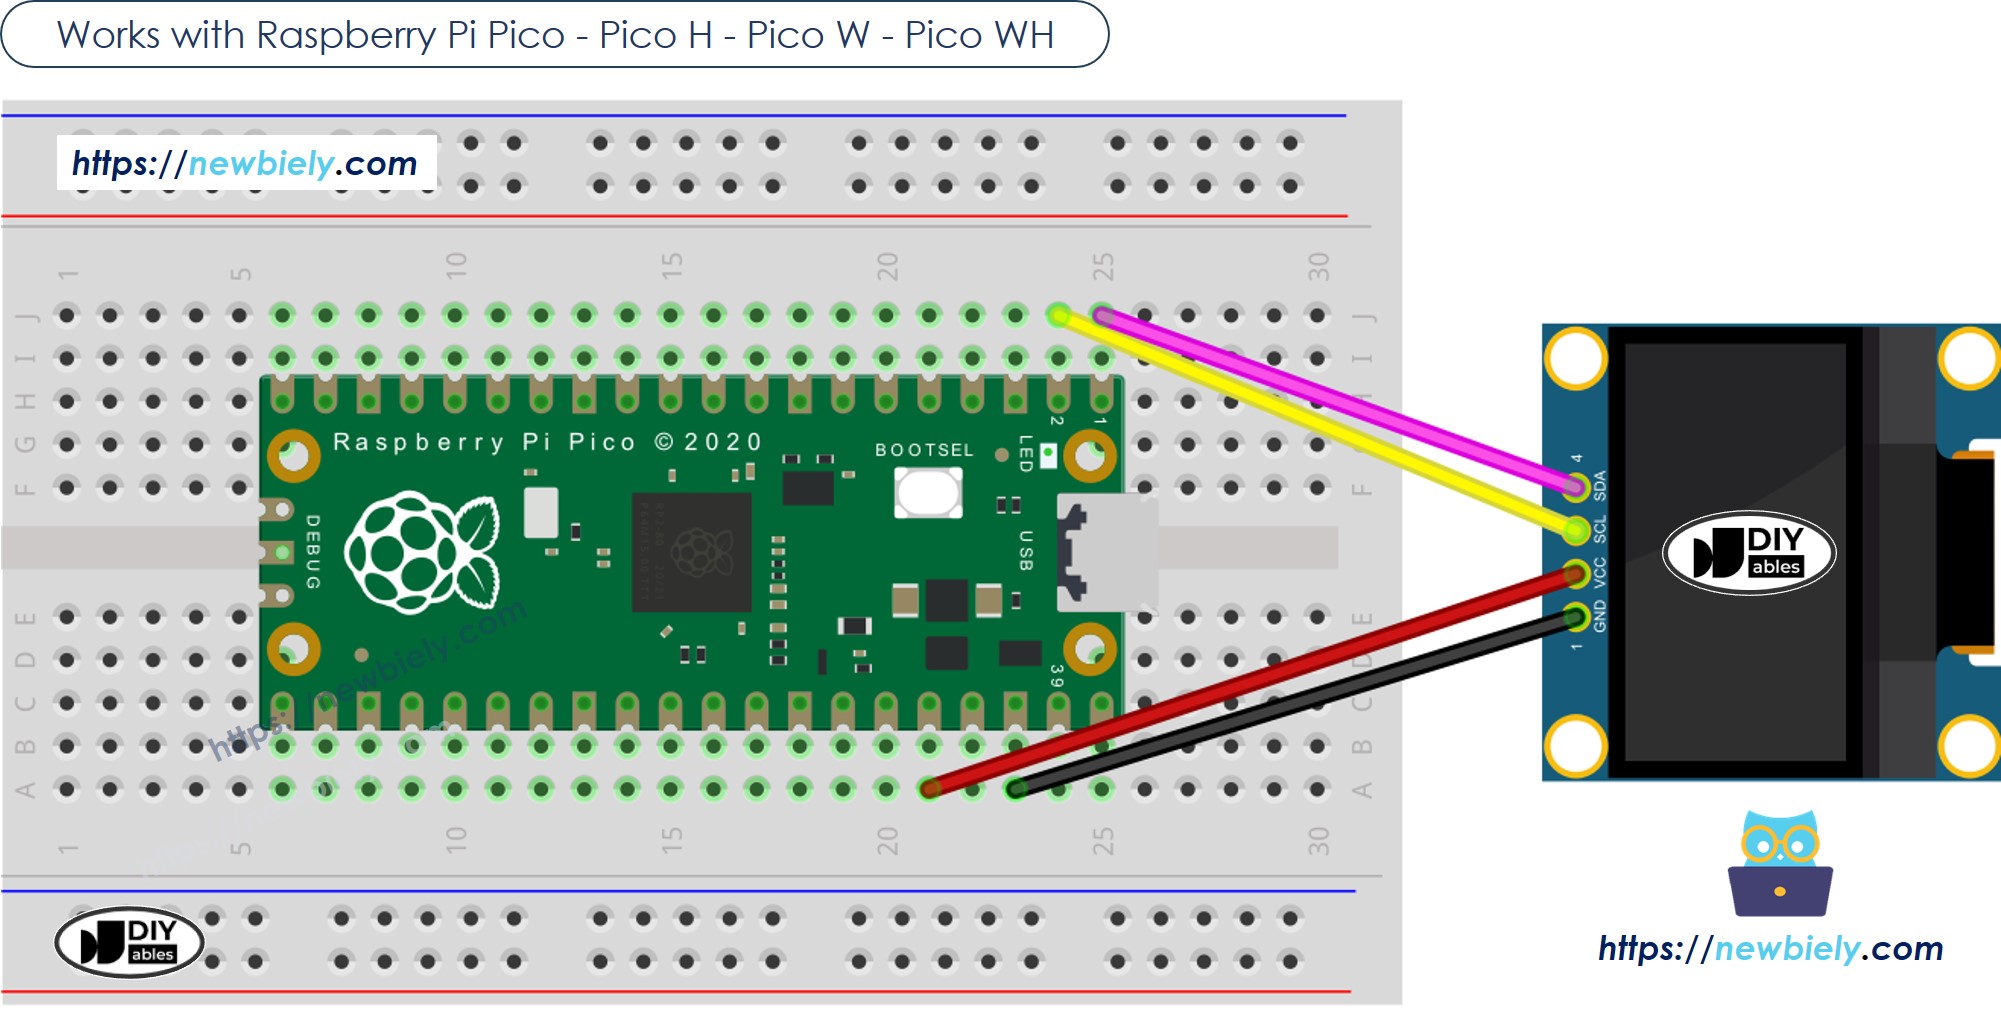
Schéma des broches de l'affichage OLED I2C
- Broche GND : Connectez-la à la masse du Raspberry Pi Pico.
- Broche VCC : Connectez-la à 5 V ou à 3,3 V sur le Raspberry Pi Pico.
- Broche SCL : Broche d'horloge pour l'interface I2C.
- Broche SDA : Broche de données pour l'interface I2C.
※ Note:
Ce guide concerne l'utilisation d'un écran OLED avec le pilote I2C SSD1306. Nous l'avons testé avec un écran OLED de DIYables, et cela a parfaitement fonctionné.
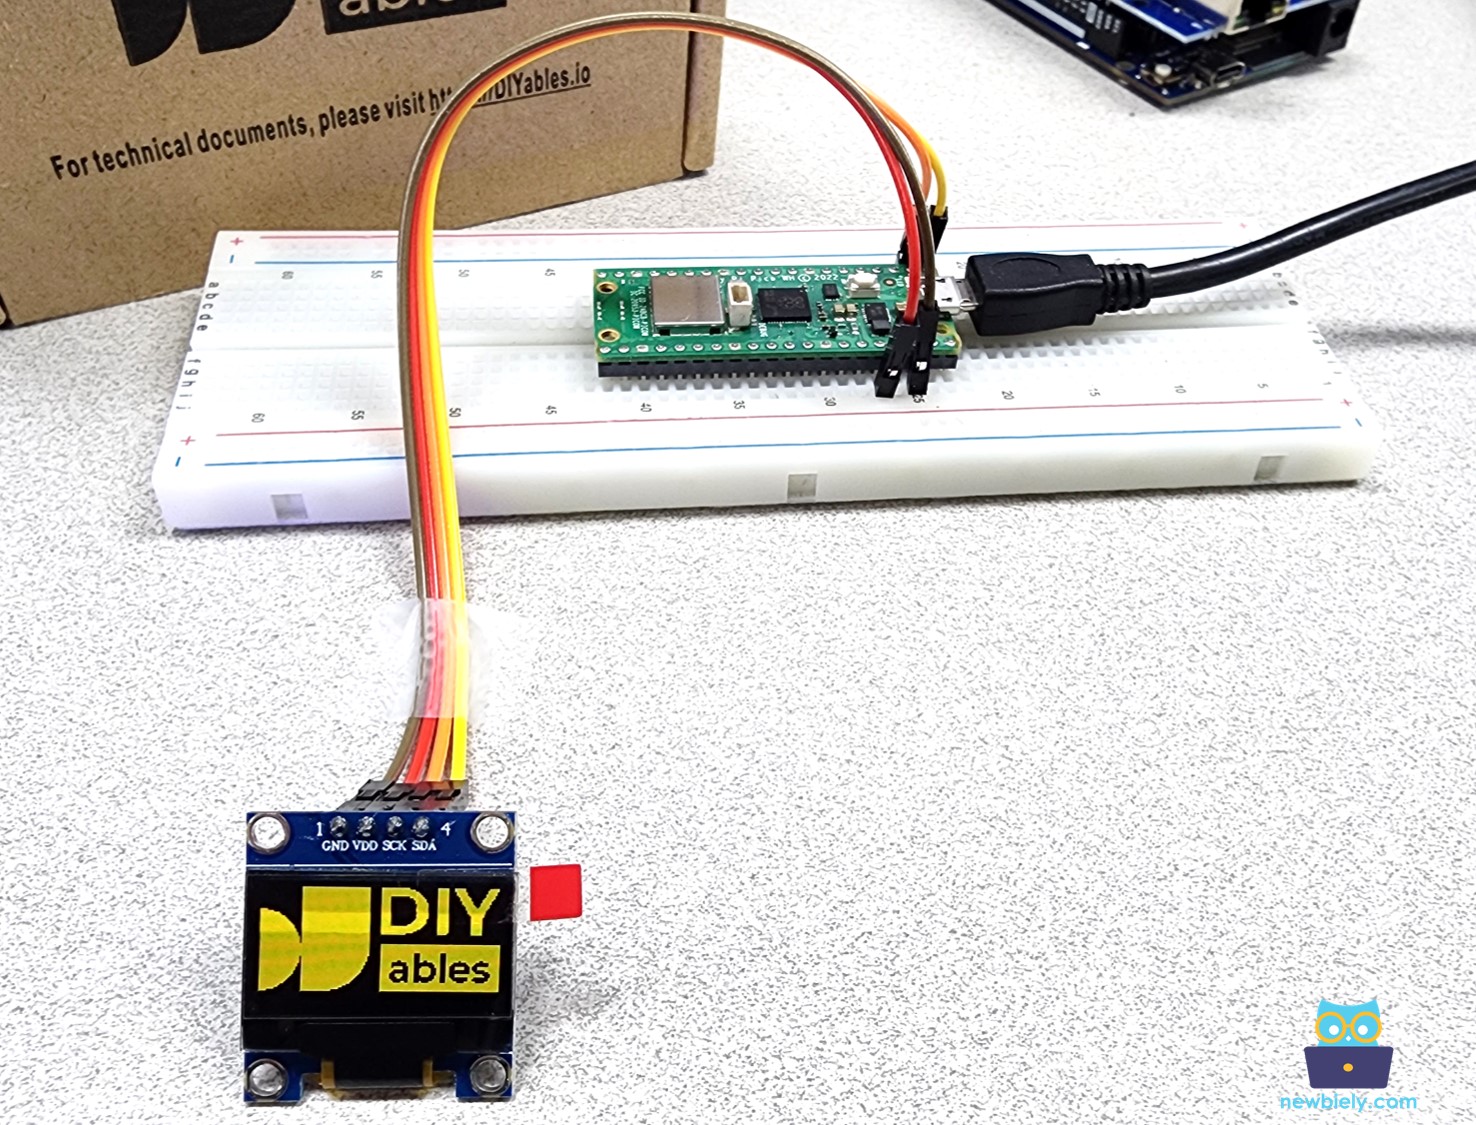
Diagramme de câblage
- Comment connecter le Raspberry Pi Pico à un écran OLED 128x64
Cette image a été créée avec Fritzing. Cliquez pour agrandir l'image.
Consultez le tableau ci-dessous pour obtenir des détails sur d'autres modèles de Raspberry Pi Pico.
| OLED Module | Raspberry Pi Pico |
|---|---|
| VCC | 3.3V |
| GND | GND |
| SDA | GP0 |
| SCL | GP1 |
Code pour Raspberry Pi Pico - Afficher du texte, des nombres entiers et des nombres à virgule flottante sur l'écran OLED
Étapes rapides
Veuillez suivre ces instructions étape par étape :
- Assurez-vous que l'IDE Thonny est installé sur votre ordinateur.
- Assurez-vous que le firmware MicroPython est installé sur votre Raspberry Pi Pico.
- Si c'est la première fois que vous utilisez un Raspberry Pi Pico, reportez-vous au tutoriel Raspberry Pi Pico - Premiers pas. pour des instructions détaillées.
- Connectez l'écran OLED au Raspberry Pi Pico selon le schéma fourni.
- Connectez le Raspberry Pi Pico à votre ordinateur à l'aide d'un câble USB.
- Lancez l'IDE Thonny sur votre ordinateur.
- Dans l'IDE Thonny, sélectionnez l'interpréteur MicroPython (Raspberry Pi Pico) en vous rendant dans Outils Options.
- Dans l'onglet Interpréteur, sélectionnez MicroPython (Raspberry Pi Pico) dans le menu déroulant.
- Assurez-vous que le bon port est sélectionné. L'IDE Thonny devrait détecter automatiquement le port, mais vous devrez peut-être le sélectionner manuellement (par exemple, COM3 sous Windows ou /dev/ttyACM0 sous Linux).
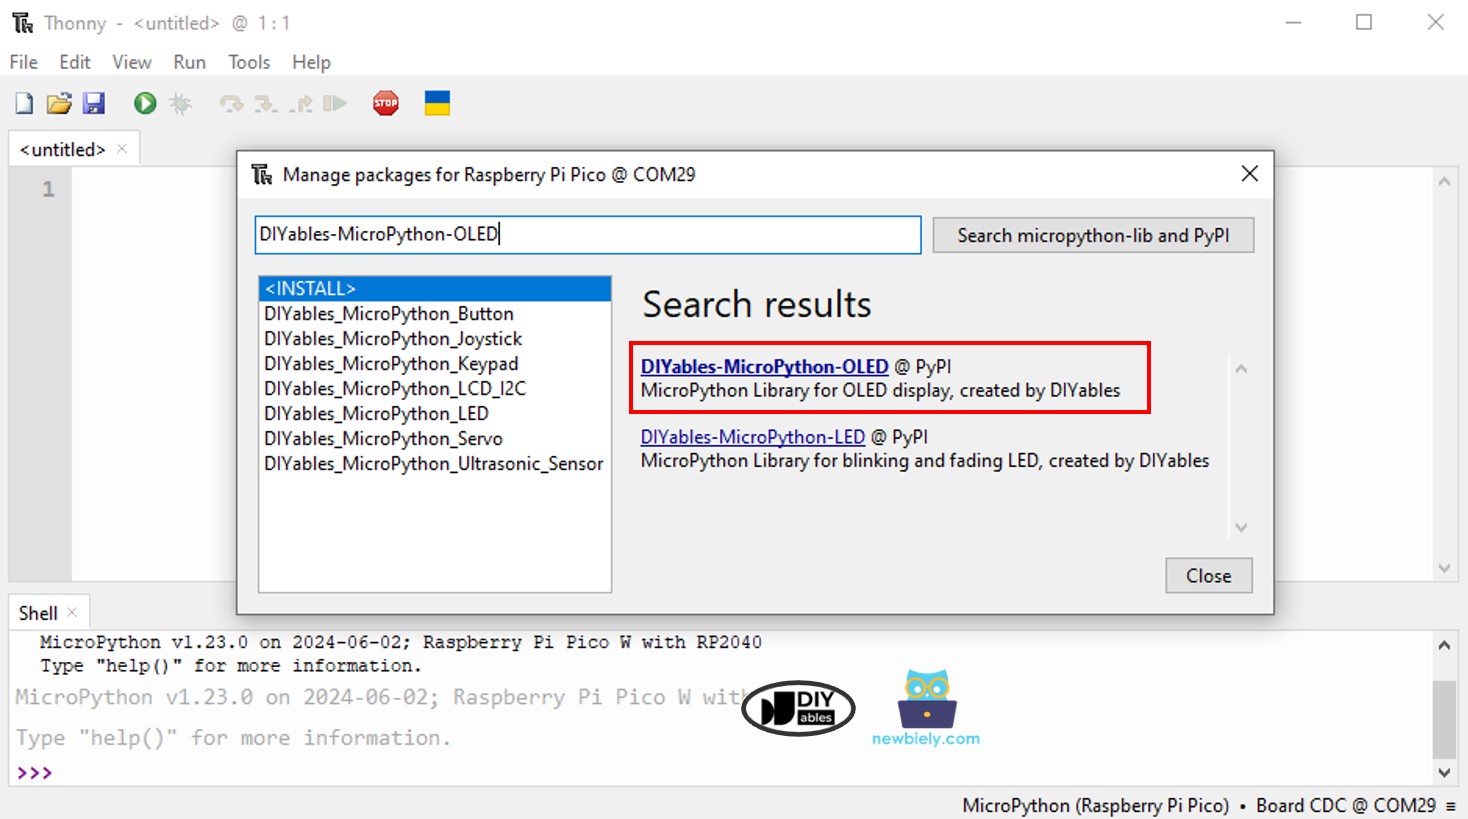
- Accédez à Outils Gérer les paquets dans l'IDE Thonny.
- Recherchez “DIYables-MicroPython-OLED”, puis trouvez la bibliothèque OLED créée par DIYables.
- Cliquez sur DIYables-MicroPython-OLED, puis cliquez sur le bouton Install pour installer la bibliothèque OLED.
- Copiez le code ci-dessus et collez-le dans l’éditeur de l’IDE Thonny.
- Enregistrez le script sur votre Raspberry Pi Pico en procédant comme suit :
- Cliquez sur le bouton Enregistrer, ou utilisez les touches Ctrl+S.
- Dans la boîte de dialogue d’enregistrement, vous verrez deux sections : Cet ordinateur et Raspberry Pi Pico. Sélectionnez Raspberry Pi Pico.
- Enregistrez le fichier sous main.py
- Cliquez sur le bouton vert Exécuter (ou appuyez sur F5) pour exécuter le script. Le script sera exécuté.
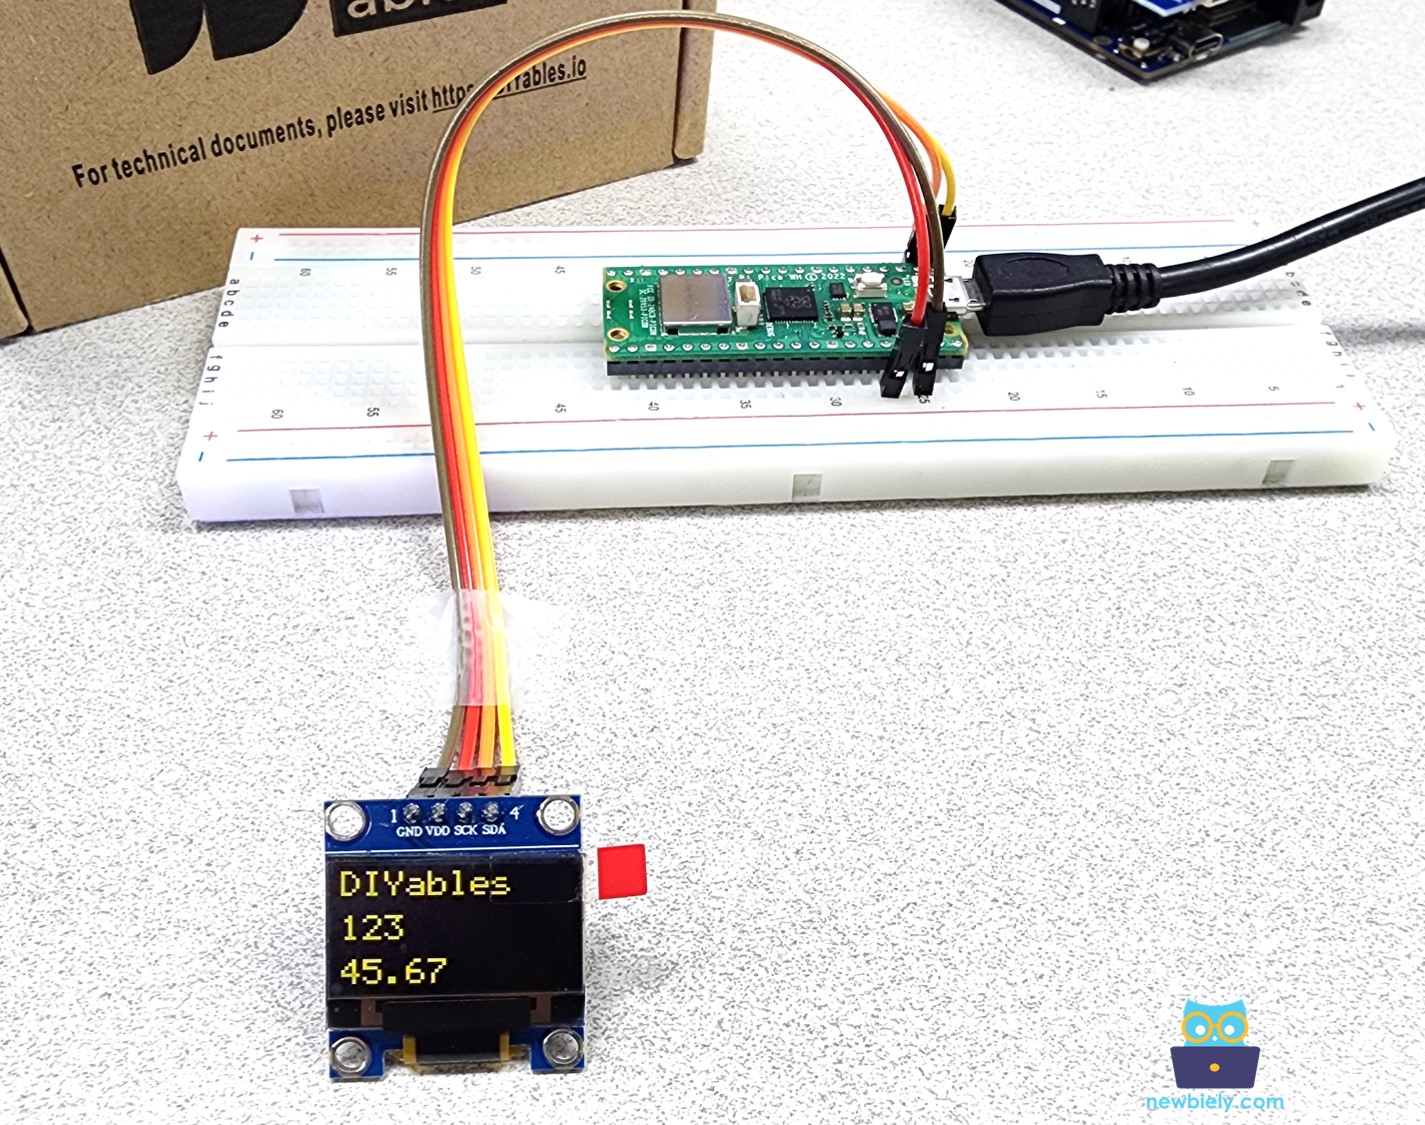
- Regardez la sortie sur l’écran OLED. Elle ressemble à ceci :
Comment centrer automatiquement le texte et les chiffres verticalement et horizontalement sur un écran OLED
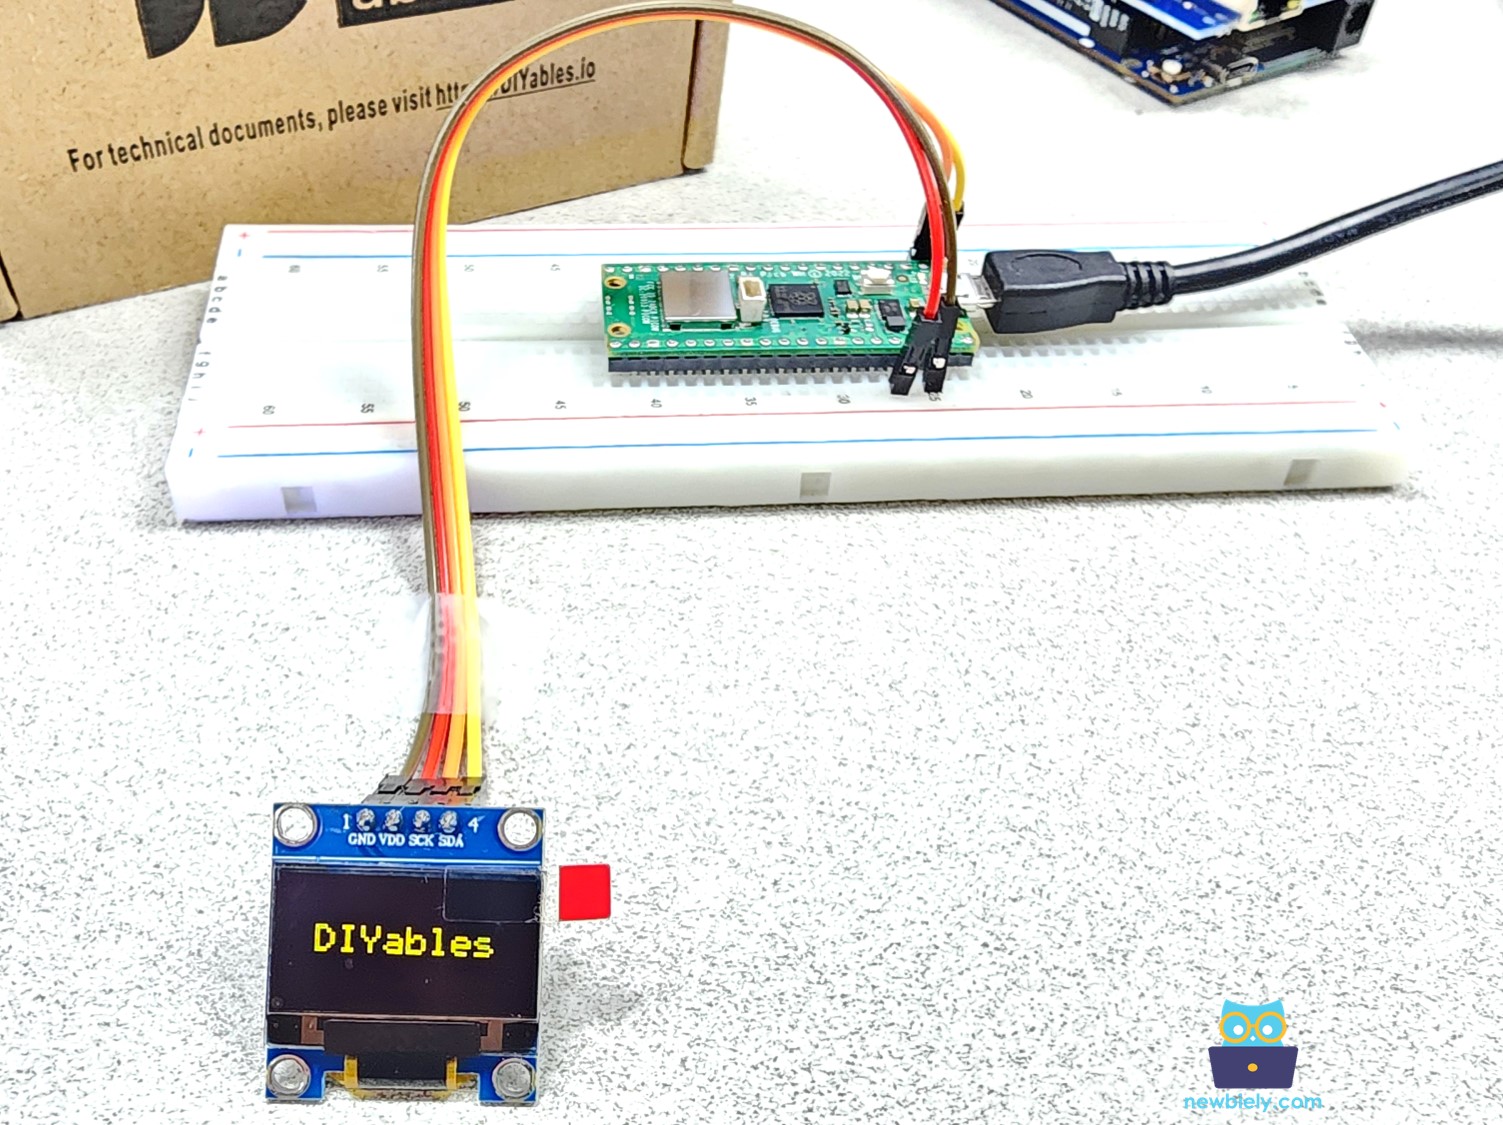
Le code MicroPython ci-dessous centre automatiquement le texte à la fois verticalement et horizontalement sur l'écran OLED.
Après avoir exécuté le code, le texte sera centré à la fois verticalement et horizontalement sur l'écran OLED.
Code pour Raspberry Pi Pico - Dessiner sur OLED
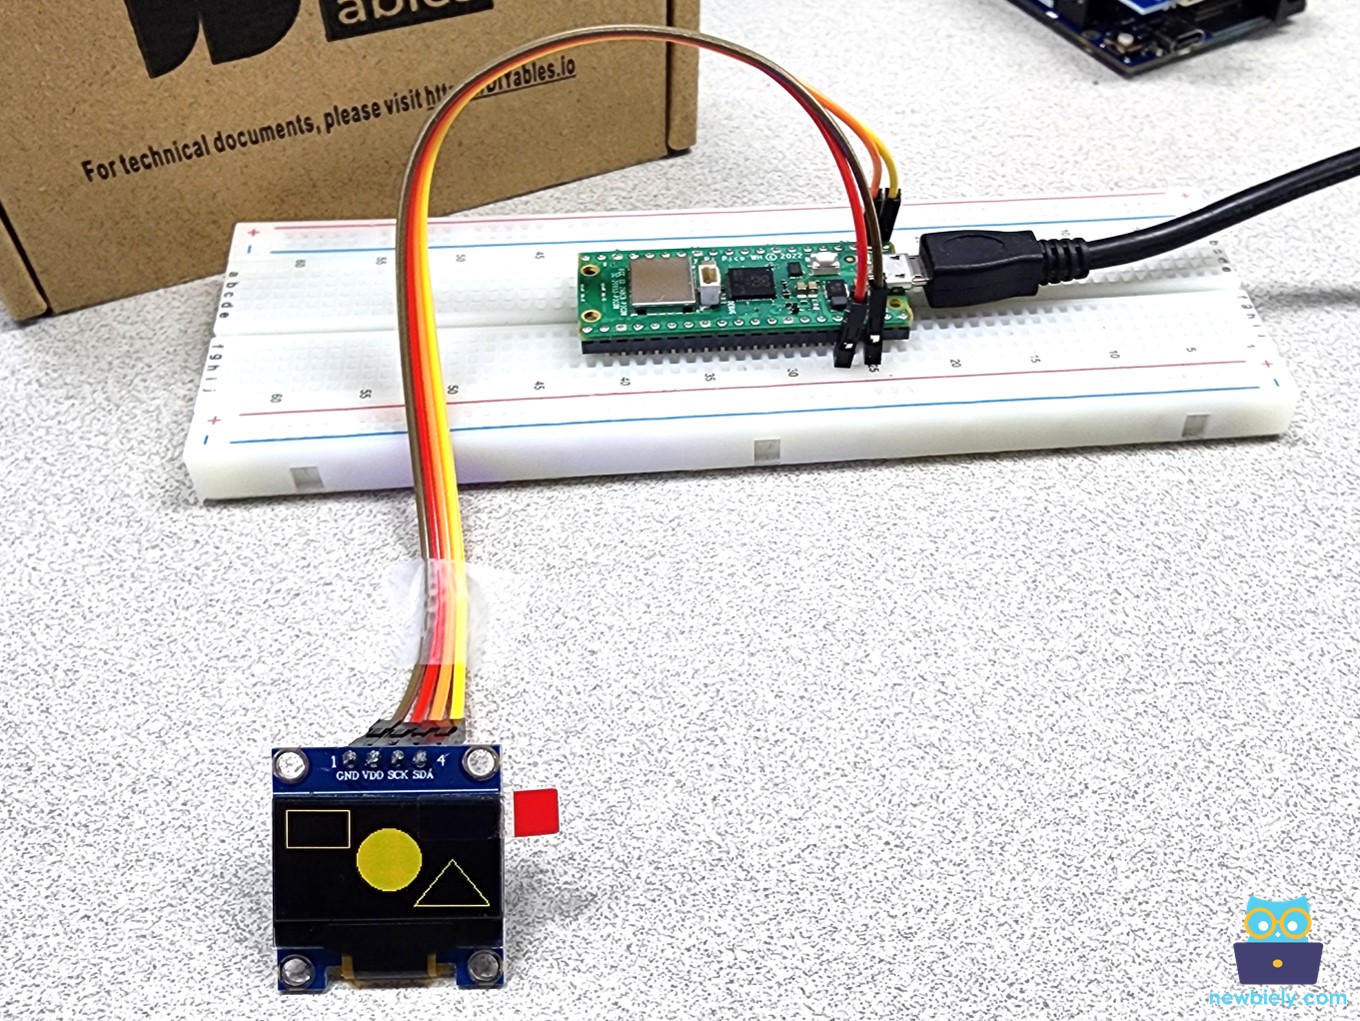
En exécutant le code ci-dessus, vous verrez un rectangle, un cercle et un triangle affichés sur l'écran OLED comme indiqué ci-dessous.
Code Raspberry Pi Pico – Afficher une image sur OLED
Le code ci-dessous dessine une image sur l'écran LCD. L'image est l'icône DIYables.
En exécutant le code ci-dessus, vous verrez l'image affichée sur l'écran OLED ci-dessous.
Pour afficher une autre image sur un écran OLED, vous pouvez suivre les étapes ci-dessous :
- Convertissez l'image (dans n'importe quel format) en un tableau de bits. Vous pouvez utiliser cet outil en ligne pour la conversion. Consultez l'image ci-dessous pour apprendre comment convertir une image en un tableau de bits. J'ai converti l'icône Raspberry Pi Pico en un tableau de bits.
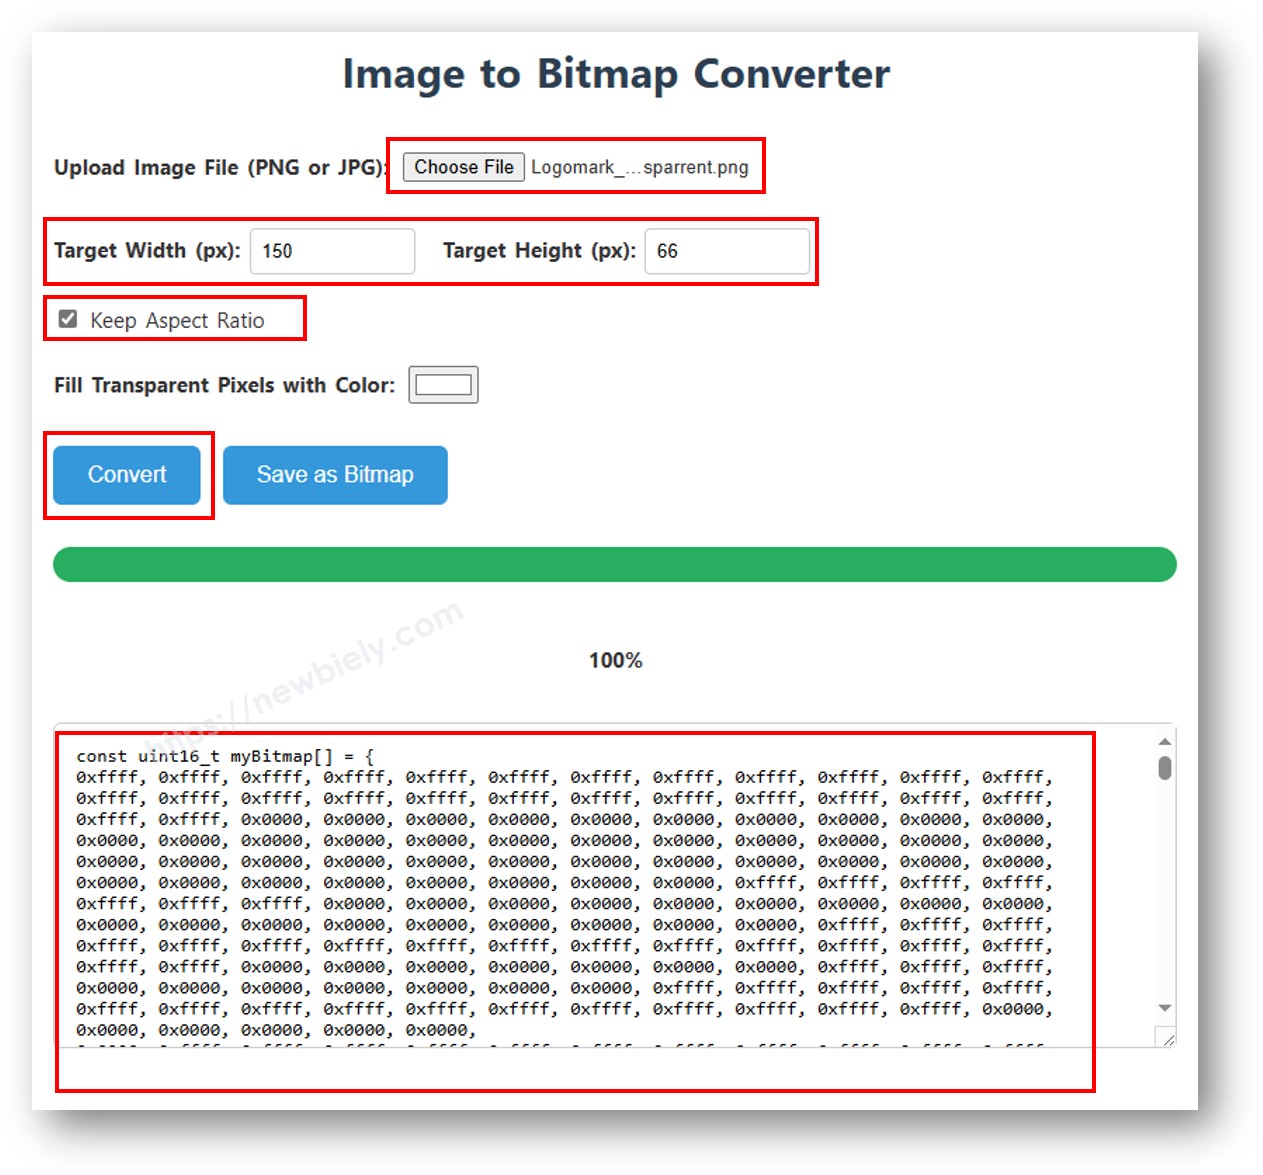
- Mettez à jour le tableau bitmap converti dans le code Raspberry Pi Pico avec le nouveau code du tableau.
- Modifiez la largeur et la hauteur de l'image dans le code Raspberry Pi Pico pour les faire correspondre aux dimensions de l'image.
Veuillez noter que la taille de l'image doit être égale ou inférieure à celle de l'écran.
Dépannage OLED
Si rien n'apparaît sur l'écran OLED, veuillez suivre ces étapes :
- Vérifiez que le câblage est correct.
- Assurez-vous que votre OLED I2C dispose d'un pilote SSD1306.
- Trouvez l'adresse I2C de votre OLED en utilisant ce code de scanner d'adresses I2C sur le Raspberry Pi Pico.
Sortie dans le Shell en bas de Thonny :