ESP8266 - Requête HTTP
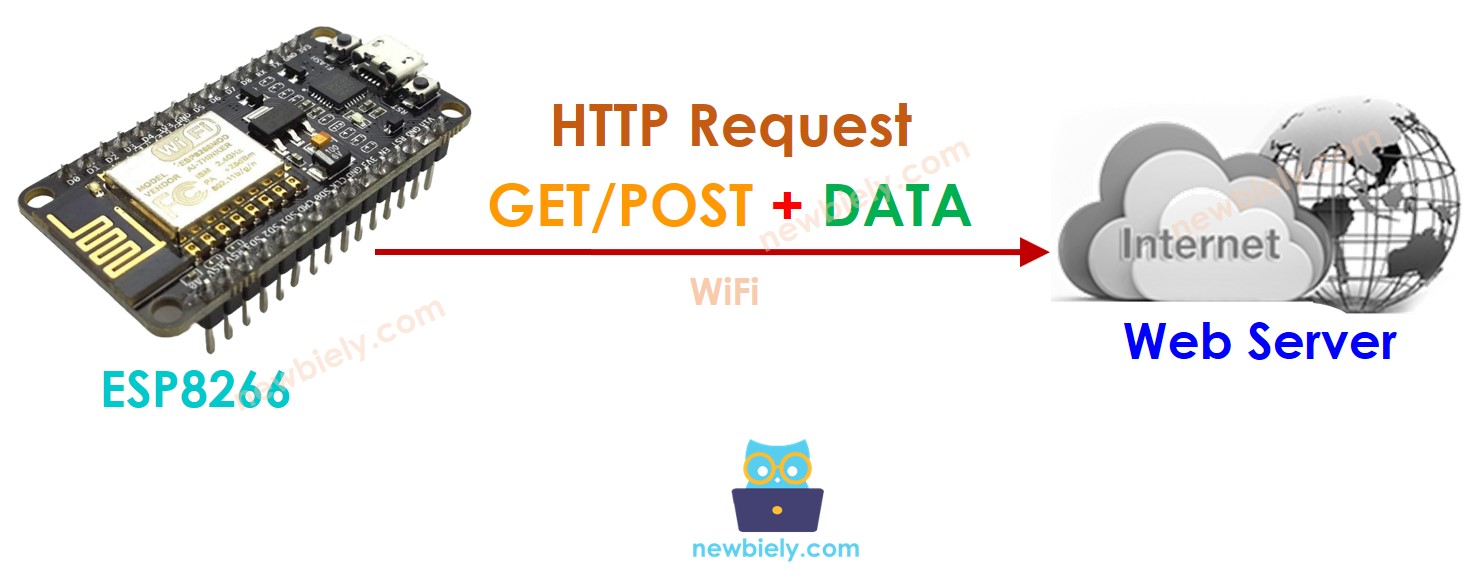
Ce tutoriel vous explique comment utiliser l'ESP8266 pour effectuer une requête HTTP vers un serveur web, une API ou un service web. En détail, vous apprendrez :
- Comment utiliser ESP8266 pour effectuer une requête HTTP (GET et POST)
- Comment inclure les données du capteur dans une requête HTTP
Préparation du matériel
Ou vous pouvez acheter les kits suivants:
| 1 | × | Kit de Capteurs DIYables (18 capteurs/écrans) |
Divulgation : Certains des liens fournis dans cette section sont des liens affiliés Amazon. Nous pouvons recevoir une commission pour tout achat effectué via ces liens, sans coût supplémentaire pour vous. Nous vous remercions de votre soutien.
Concepts de base du client Web et du serveur Web
Il existe quelques concepts de base du web tels que : adresse web (URL), nom d'hôte, chemin d'accès, chaîne de requête, requête HTTP... Vous pouvez en apprendre davantage à leur sujet dans le tutoriel HTTP
Comment effectuer une requête HTTP
- Inclure les bibliothèques
#include <WiFi.h>
#include <HTTPClient.h>
- Déclarez le SSID et le mot de passe WiFi
const char WIFI_SSID[] = "YOUR_WIFI_SSID"; // MODIFIEZ-LE
const char WIFI_PASSWORD[] = "YOUR_WIFI_PASSWORD"; // MODIFIEZ-LE
- Déclarez nom d'hôte, chemin d'accès, chaîne de requête
String HOST_NAME = "http://YOUR_DOMAIN.com"; // CHANGEZ-LE
String PATH_NAME = "/products/arduino"; // CHANGEZ-LE
//String PATH_NAME = "/products/arduino.php"; // CHANGEZ-LE
String queryString = "temperature=26&humidity=70"; // FACULTATIF
- Déclarer un objet client HTTP
HTTPClient http;
- Si connecté au serveur, envoyez une requête HTTP. Par exemple, HTTP GET.
http.begin(HOST_NAME + PATH_NAME); //HTTP
int httpCode = http.GET(); // Obtenir le code HTTP
- Lisez les données de réponse du serveur web.
// httpCode sera négatif en cas d'erreur
if (httpCode > 0) {
// fichier trouvé sur le serveur
if (httpCode == HTTP_CODE_OK) {
String payload = http.getString();
Serial.println(payload);
} else {
// L'en-tête HTTP a été envoyé et l'en-tête de réponse du serveur a été traité
Serial.printf("[HTTP] GET... code: %d\n", httpCode);
}
} else {
Serial.printf("[HTTP] GET... failed, error: %s\n", http.errorToString(httpCode).c_str());
}
http.end();
Comment inclure des données dans une requête HTTP
Nous pouvons envoyer des données au serveur web en incluant des données dans la requête HTTP. Le format des données dépend de la méthode de requête HTTP :
- Pour une requête HTTP GET
- Les données peuvent être envoyées uniquement dans la chaîne de requête de l'URI.
- Requête HTTP POST
- Les données peuvent être envoyées NON SEULEMENT sous forme de chaîne de requête MAIS AUSSI dans tout autre format tel que Json, XML, image...
- Les données sont placées dans le corps de la requête HTTP.
- Créer une chaîne de requête
- GET HTTP : ajoutez chaîne de requête au chemin d'accès
- POST HTTP : placez la chaîne de requête dans le corps HTTP.
- Pour les méthodes GET et POST, lisez les données de réponse du serveur web.
Apprenons à envoyer des données au format de chaîne de requête pour les méthodes HTTP GET et POST.
int temp = // du capteur
int humi = // du capteur
String queryString = String("temperature=") + String(temp) + String("&humidity=") + String(humi);
http.begin(HOST_NAME + PATH_NAME + "?" + queryString);
http.addHeader("Content-Type", "application/x-www-form-urlencoded");
int httpCode = http.GET();
http.begin(HOST_NAME + PATH_NAME);
http.addHeader("Content-Type", "application/x-www-form-urlencoded");
int httpCode = http.POST(queryString);
// httpCode sera négatif en cas d'erreur
if (httpCode > 0) {
// fichier trouvé sur le serveur
if (httpCode == HTTP_CODE_OK) {
String payload = http.getString();
Serial.println(payload);
} else {
// L'en-tête HTTP a été envoyé et l'en-tête de réponse du serveur a été traité
Serial.printf("[HTTP] GET/POST... code: %d\n", httpCode);
}
} else {
Serial.printf("[HTTP] GET/POST... échoué, erreur: %s\n", http.errorToString(httpCode).c_str());
}
http.end();
Code complet ESP8266 pour effectuer une requête HTTP
Le code ESP8266 complet pour effectuer une requête HTTP GET/POST est le suivant.
/*
* Ce code ESP8266 NodeMCU a été développé par newbiely.fr
* Ce code ESP8266 NodeMCU est mis à disposition du public sans aucune restriction.
* Pour des instructions complètes et des schémas de câblage, veuillez visiter:
* https://newbiely.fr/tutorials/esp8266/esp8266-http-request
*/
#include <ESP8266WiFi.h>
#include <ESP8266HTTPClient.h>
const char WIFI_SSID[] = "YOUR_WIFI_SSID"; // CHANGE IT
const char WIFI_PASSWORD[] = "YOUR_WIFI_PASSWORD"; // CHANGE IT
String HOST_NAME = "http://YOUR_DOMAIN.com"; // CHANGE IT
String PATH_NAME = "/products/arduino.php"; // CHANGE IT
WiFiClient client; // Create a WiFiClient object
HTTPClient http;
void setup() {
Serial.begin(9600);
WiFi.begin(WIFI_SSID, WIFI_PASSWORD);
Serial.println("Connecting");
while (WiFi.status() != WL_CONNECTED) {
delay(500);
Serial.print(".");
}
Serial.println("");
Serial.print("Connected to WiFi network with IP Address: ");
Serial.println(WiFi.localIP());
http.begin(client, HOST_NAME + PATH_NAME); //HTTP
int httpCode = http.GET();
// httpCode will be negative on error
if (httpCode > 0) {
// file found at server
if (httpCode == HTTP_CODE_OK) {
String payload = http.getString();
Serial.println(payload);
} else {
// HTTP header has been sent and Server response header has been handled
Serial.printf("[HTTP] GET... code: %d\n", httpCode);
}
} else {
Serial.printf("[HTTP] GET... failed, error: %s\n", http.errorToString(httpCode).c_str());
}
http.end();
}
void loop() {
// Your loop code here (if needed)
}
Code ESP8266 complet pour effectuer une requête HTTP GET avec des données
/*
* Ce code ESP8266 NodeMCU a été développé par newbiely.fr
* Ce code ESP8266 NodeMCU est mis à disposition du public sans aucune restriction.
* Pour des instructions complètes et des schémas de câblage, veuillez visiter:
* https://newbiely.fr/tutorials/esp8266/esp8266-http-request
*/
#include <ESP8266WiFi.h>
#include <ESP8266HTTPClient.h>
const char WIFI_SSID[] = "YOUR_WIFI_SSID"; // CHANGE IT
const char WIFI_PASSWORD[] = "YOUR_WIFI_PASSWORD"; // CHANGE IT
String HOST_NAME = "http://YOUR_DOMAIN.com"; // CHANGE IT
String PATH_NAME = "/products/arduino"; // CHANGE IT
//String PATH_NAME = "/products/arduino.php"; // CHANGE IT
String queryString = "temperature=26&humidity=70";
void setup() {
Serial.begin(9600);
WiFi.begin(WIFI_SSID, WIFI_PASSWORD);
Serial.println("Connecting");
while (WiFi.status() != WL_CONNECTED) {
delay(500);
Serial.print(".");
}
Serial.println("");
Serial.print("Connected to WiFi network with IP Address: ");
Serial.println(WiFi.localIP());
WiFiClient client; // Create a WiFiClient object
HTTPClient http;
http.begin(client, HOST_NAME + PATH_NAME + "?" + queryString);
http.addHeader("Content-Type", "application/x-www-form-urlencoded");
int httpCode = http.GET();
// httpCode will be negative on error
if (httpCode > 0) {
// file found at the server
if (httpCode == HTTP_CODE_OK) {
String payload = http.getString();
Serial.println(payload);
} else {
// HTTP header has been sent, and Server response header has been handled
Serial.printf("[HTTP] GET... code: %d\n", httpCode);
}
} else {
Serial.printf("[HTTP] GET... failed, error: %s\n", http.errorToString(httpCode).c_str());
}
http.end();
}
void loop() {
// Your loop code here (if needed)
}
Code ESP8266 complet pour faire une requête HTTP POST avec des données
/*
* Ce code ESP8266 NodeMCU a été développé par newbiely.fr
* Ce code ESP8266 NodeMCU est mis à disposition du public sans aucune restriction.
* Pour des instructions complètes et des schémas de câblage, veuillez visiter:
* https://newbiely.fr/tutorials/esp8266/esp8266-http-request
*/
#include <ESP8266WiFi.h>
#include <ESP8266HTTPClient.h>
const char WIFI_SSID[] = "YOUR_WIFI_SSID"; // CHANGE IT
const char WIFI_PASSWORD[] = "YOUR_WIFI_PASSWORD"; // CHANGE IT
String HOST_NAME = "http://YOUR_DOMAIN.com"; // CHANGE IT
String PATH_NAME = "/products/arduino"; // CHANGE IT
//String PATH_NAME = "/products/arduino.php"; // CHANGE IT
String queryString = "temperature=26&humidity=70";
void setup() {
Serial.begin(9600);
WiFi.begin(WIFI_SSID, WIFI_PASSWORD);
Serial.println("Connecting");
while (WiFi.status() != WL_CONNECTED) {
delay(500);
Serial.print(".");
}
Serial.println("");
Serial.print("Connected to WiFi network with IP Address: ");
Serial.println(WiFi.localIP());
WiFiClient client; // Create a WiFiClient object
HTTPClient http;
http.begin(client, HOST_NAME + PATH_NAME);
http.addHeader("Content-Type", "application/x-www-form-urlencoded");
int httpCode = http.POST(queryString);
// httpCode will be negative on error
if (httpCode > 0) {
// file found at server
if (httpCode == HTTP_CODE_OK) {
String payload = http.getString();
Serial.println(payload);
} else {
// HTTP header has been sent and Server response header has been handled
Serial.printf("[HTTP] POST... code: %d\n", httpCode);
}
} else {
Serial.printf("[HTTP] POST... failed, error: %s\n", http.errorToString(httpCode).c_str());
}
http.end();
}
void loop() {
// Your loop code here (if needed)
}