Raspberry Pi - Capteur tactile - LED
Ce tutoriel vous apprend à utiliser le Raspberry Pi et le capteur tactile pour contrôler la LED. Nous découvrirons deux applications différentes :
Application 1 - L'état LED est synchronisé avec l'état du capteur tactile. En détail :
- Le Raspberry Pi allume la LED lorsque le capteur tactile est touché.
- Le Raspberry Pi éteint la LED lorsque le capteur tactile n'est PAS touché.
Application 2 - L'état de la LED est inversé chaque fois que le capteur tactile est touché. Plus précisément :
- Si le Raspberry Pi détecte que le capteur tactile a été touché (passant de BAS à HAUT), il allumera la LED si elle est actuellement éteinte, ou éteindra la LED si elle est actuellement allumée.
- Relâcher le capteur tactile n'affecte pas l'état de la LED.
Préparation du matériel
Ou vous pouvez acheter les kits suivants:
| 1 | × | Kit de Capteurs DIYables (30 capteurs/écrans) | |
| 1 | × | Kit de Capteurs DIYables (18 capteurs/écrans) |
Note d'achat: Pour simplifier le processus de câblage, nous recommandons d'utiliser le LED Module, qui est livré avec une résistance intégrée.
À propos de LED et Capteur Tactile
Si vous n'êtes pas familier avec les LED et le capteur tactile (y compris le brochage, le fonctionnement et la programmation), les tutoriels suivants peuvent vous aider :
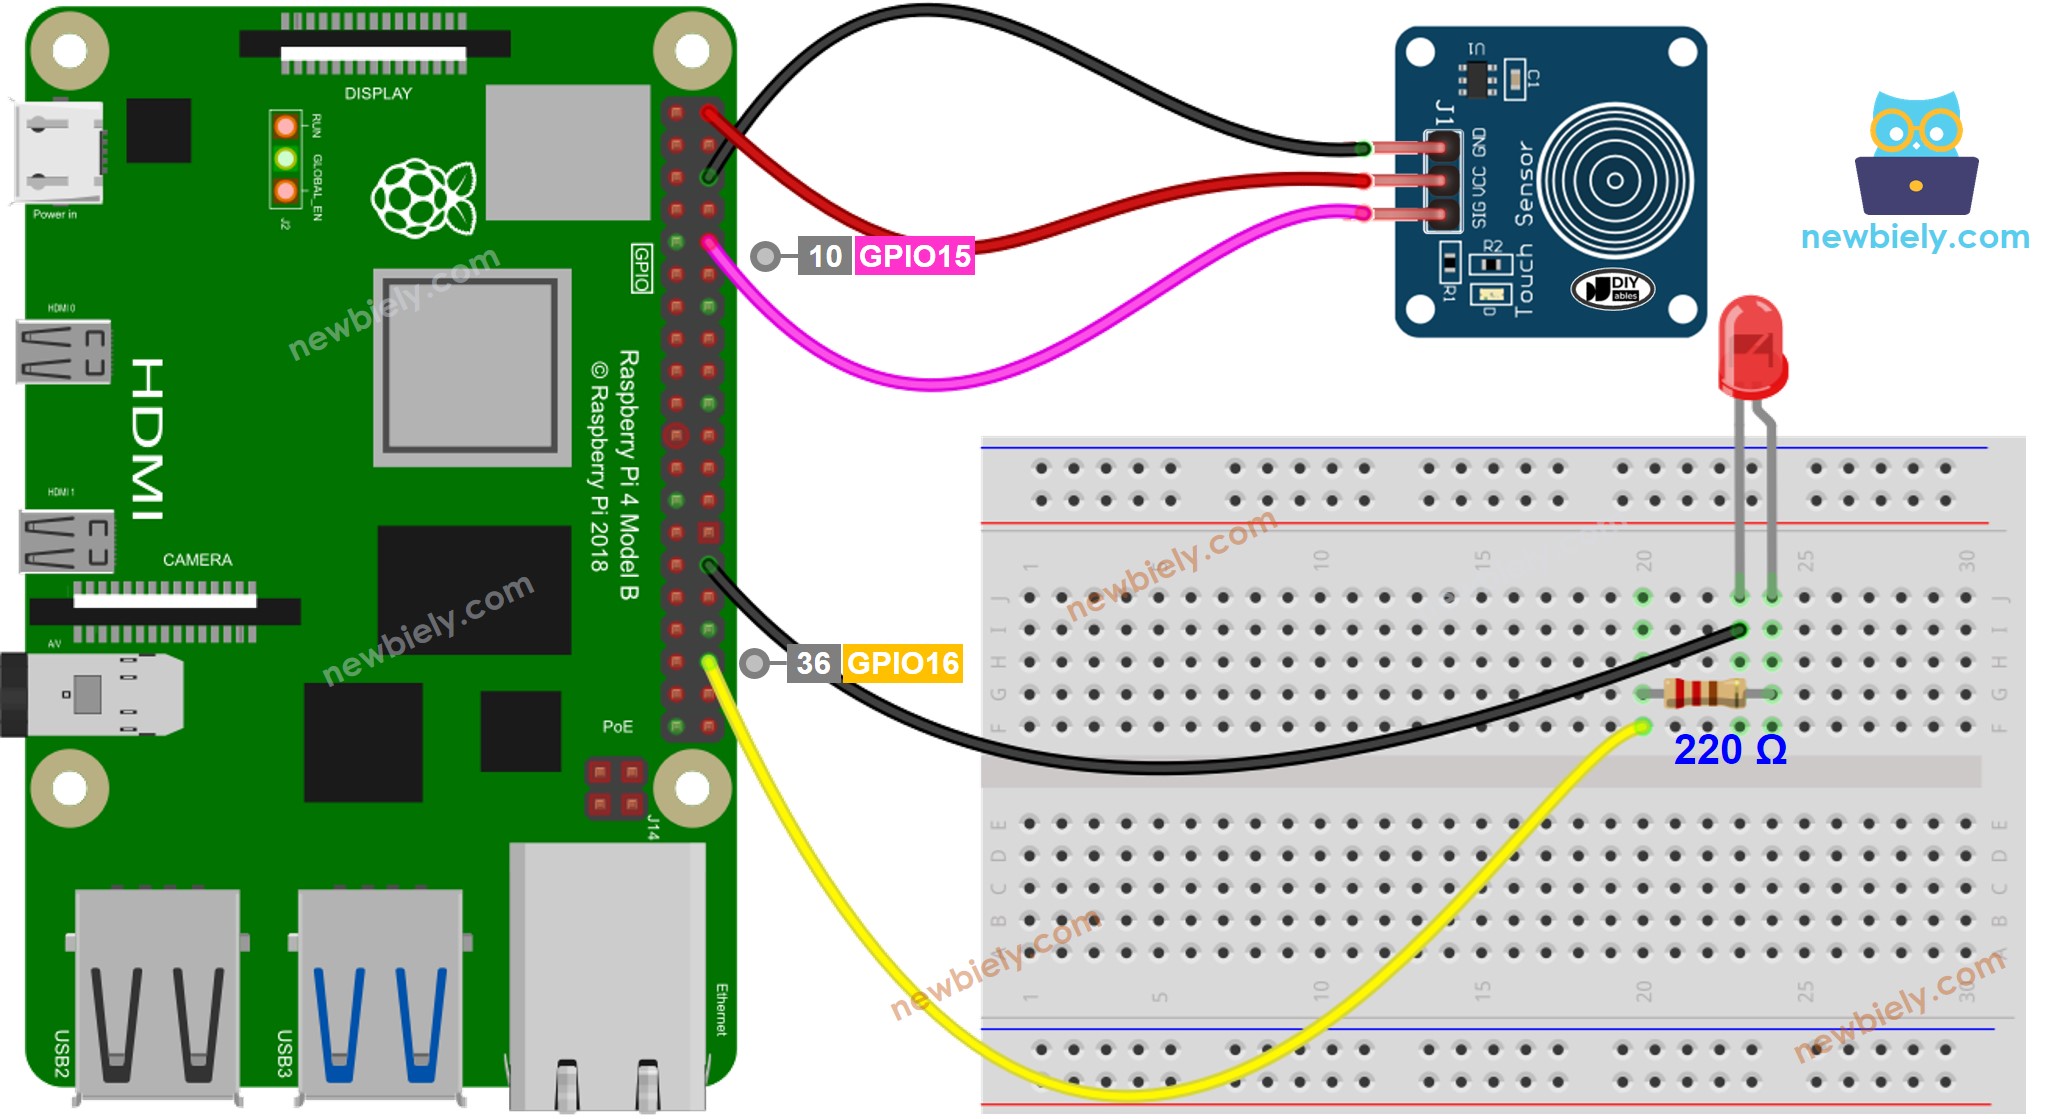
Diagramme de câblage

Cette image a été créée avec Fritzing. Cliquez pour agrandir l'image.
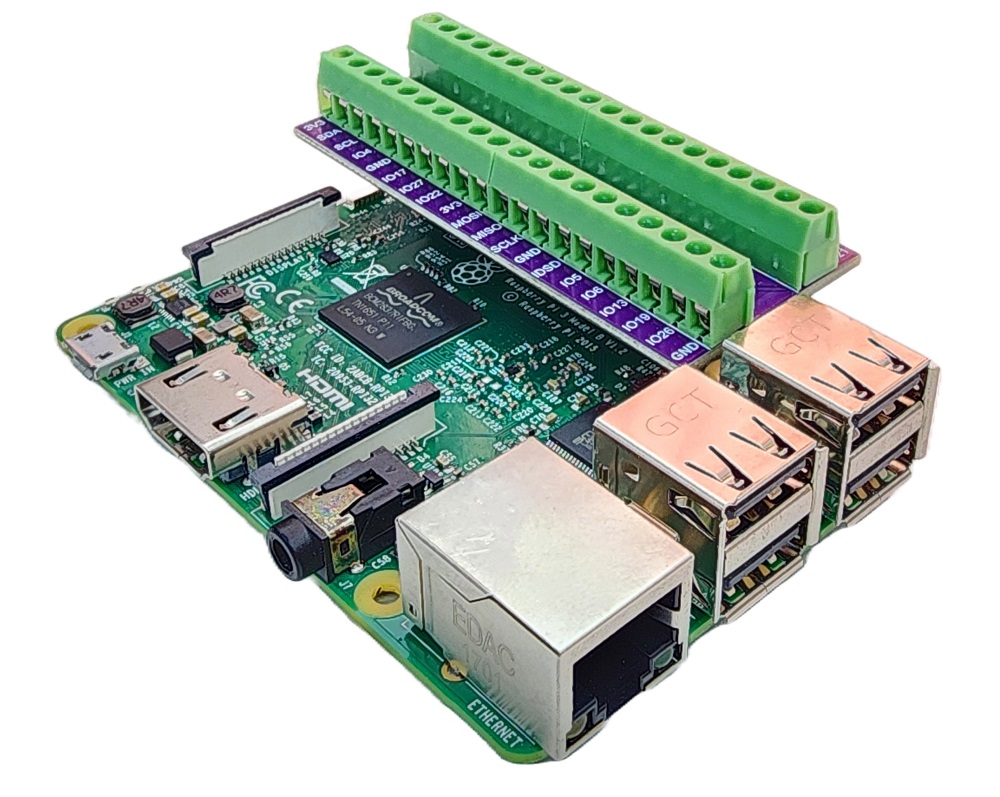
Pour simplifier et organiser votre montage de câblage, nous recommandons l'utilisation d'un shield à bornier à vis pour Raspberry Pi. Ce shield assure des connexions plus sûres et mieux gérées, comme illustré ci-dessous :

Application 1 - L'état de la LED est synchronisé avec l'état du capteur tactile.
Étapes rapides
- Assurez-vous d'avoir installé Raspbian ou tout autre système d'exploitation compatible avec le Raspberry Pi sur votre Pi.
- Assurez-vous que votre Raspberry Pi est connecté au même réseau local que votre PC.
- Assurez-vous que votre Raspberry Pi est connecté à Internet si vous devez installer certaines bibliothèques.
- Si c'est la première fois que vous utilisez un Raspberry Pi, consultez Installation du logiciel - Raspberry Pi.
- Connectez votre PC au Raspberry Pi via SSH en utilisant le client SSH intégré sur Linux et macOS ou PuTTY sur Windows. Consultez comment connecter votre PC au Raspberry Pi via SSH.
- Assurez-vous d'avoir installé la bibliothèque RPi.GPIO. Sinon, installez-la en utilisant la commande suivante :
- Créez un fichier de script Python touch_sensor_led.py et ajoutez le code suivant :
- Enregistrez le fichier et exécutez le script Python en saisissant la commande suivante dans le terminal :
- Touchez le capteur tactile et maintenez-le pendant quelques secondes.
- Observez le changement de l'état de la LED. Vous verrez que l'état de la LED est synchronisé avec l'état du capteur tactile.
Le script s'exécute dans une boucle infinie en continu jusqu'à ce que vous appuyiez sur Ctrl + C dans le terminal.
Explication du Code
Consultez l'explication ligne par ligne contenue dans les commentaires du code source !
Application 2 - Le capteur tactile bascule la LED
Étapes rapides
- Créez un fichier de script Python touch_sensor_toggle_led.py et ajoutez le code suivant :
- Enregistrez le fichier et exécutez le script Python en exécutant la commande suivante dans le terminal :
- Touchez et relâchez le capteur tactile plusieurs fois.
- Observez le changement d'état de la LED.
Vous verrez que l'état de la LED est basculé une fois chaque fois que le capteur tactile est touché.
