Raspberry Pi - Buzzer Piézo
Ce tutoriel vous explique comment utiliser le Raspberry Pi pour contrôler le buzzer piézoélectrique. En détail, nous apprendrons :
- Comment fonctionne un buzzer piézo
- Comment connecter le buzzer piézo à une carte Raspberry Pi
- Comment programmer le Raspberry Pi pour que le buzzer piézo génère du son
- Comment programmer le Raspberry Pi pour que le buzzer piézo joue la mélodie d'une chanson
Préparation du matériel
Ou vous pouvez acheter les kits suivants:
| 1 | × | Kit de Capteurs DIYables (18 capteurs/écrans) |
À propos du buzzer piézoélectrique
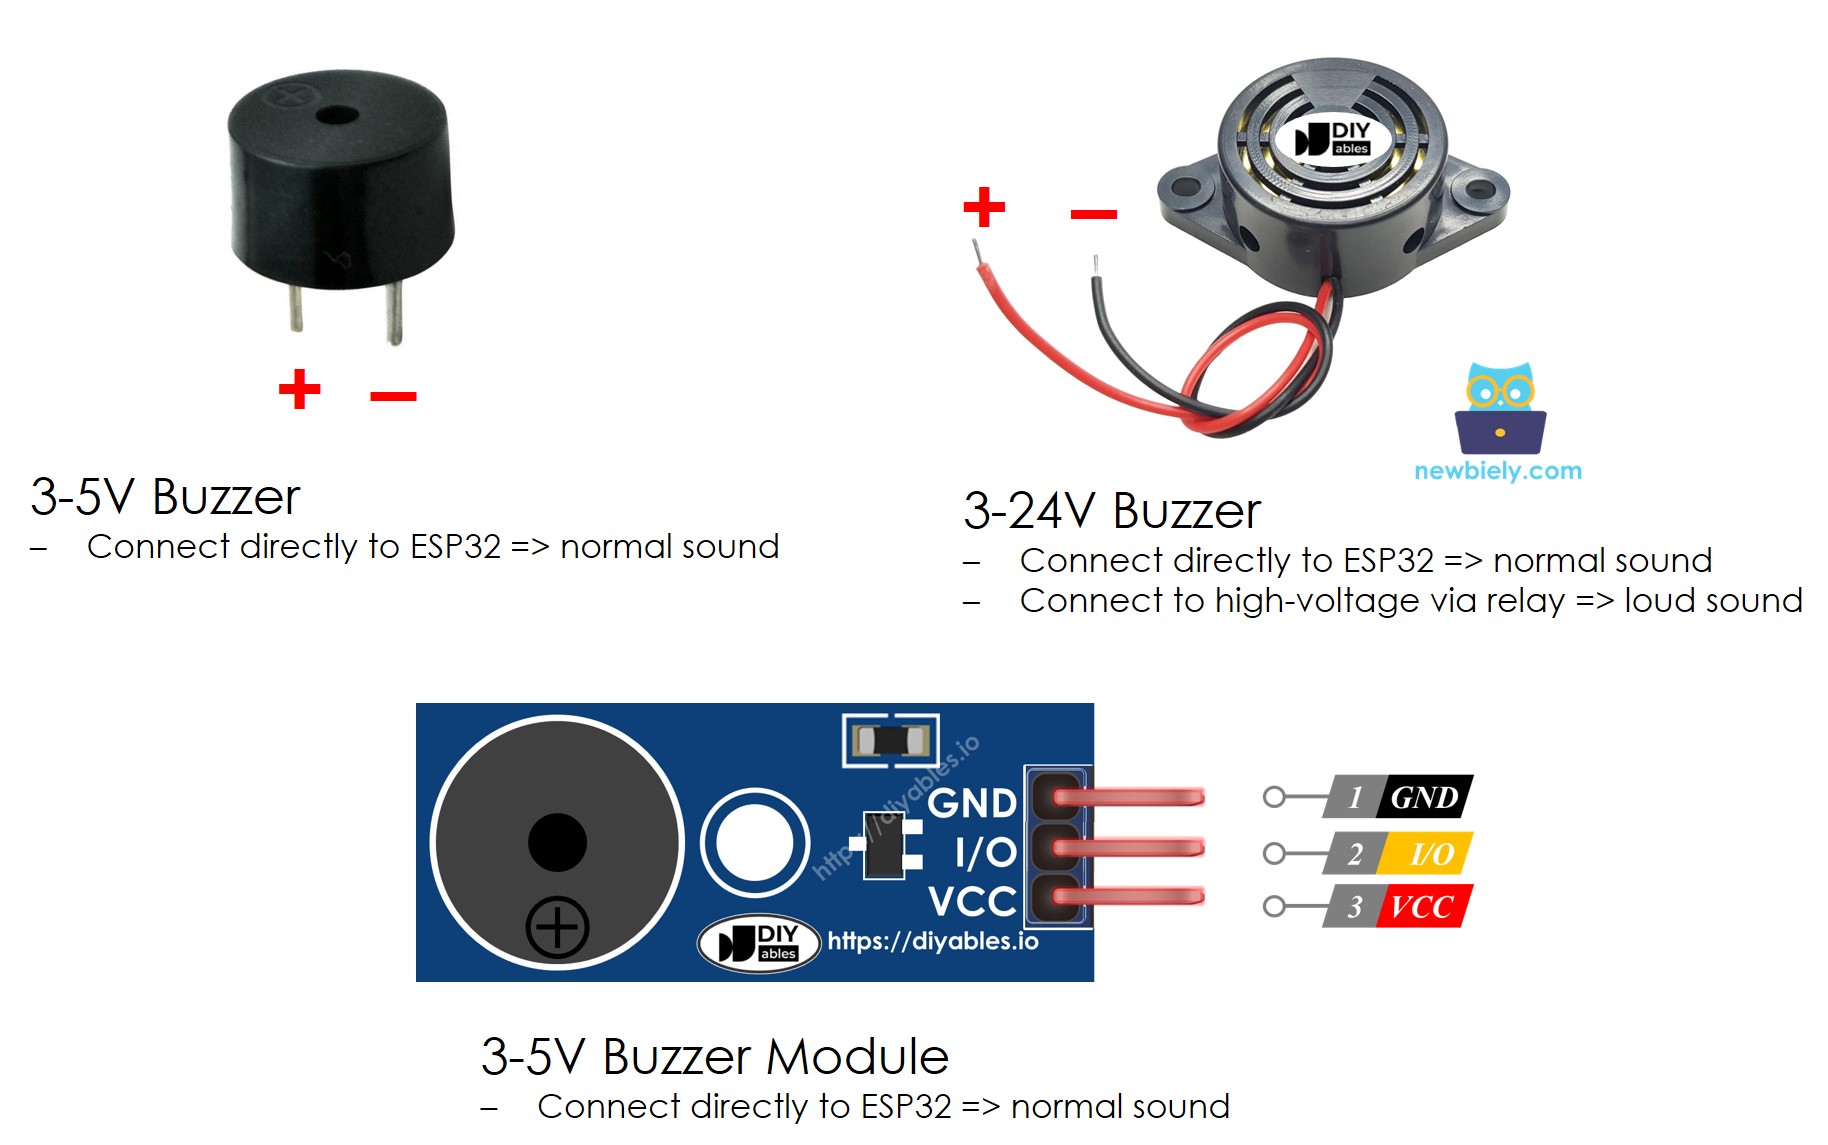
Un buzzer piézoélectrique est utilisé pour produire du son, des bips ou même une mélodie à partir d'une chanson.
Disponible sur le marché, un buzzer actif 3V-24V qui sert à deux fins : fonctionnant à la fois comme un buzzer actif 3-5V et comme un buzzer haute tension (12V et plus).
- Connecter ce buzzer directement à une broche Arduino produit un son standard, ce qui le rend idéal pour des applications telles que les indicateurs sonores, comme les sons de clavier.
- D'autre part, lorsqu'il est connecté à une haute tension à travers un relais, il émet un son fort, ce qui le rend approprié pour des signaux d'avertissement.
Le brochage du buzzer piézo-électrique
Le buzzer piézoélectrique a généralement deux broches :
- La broche négative (-) doit être connectée à la masse (GND, 0 V).
- La broche positive (+) reçoit le signal de commande du Raspberry Pi (directement ou indirectement via relais).
Fonctionnement d'un buzzer piézoélectrique
Diagramme de câblage
- Le schéma de câblage entre le Raspberry Pi et le buzzer piézo-électrique
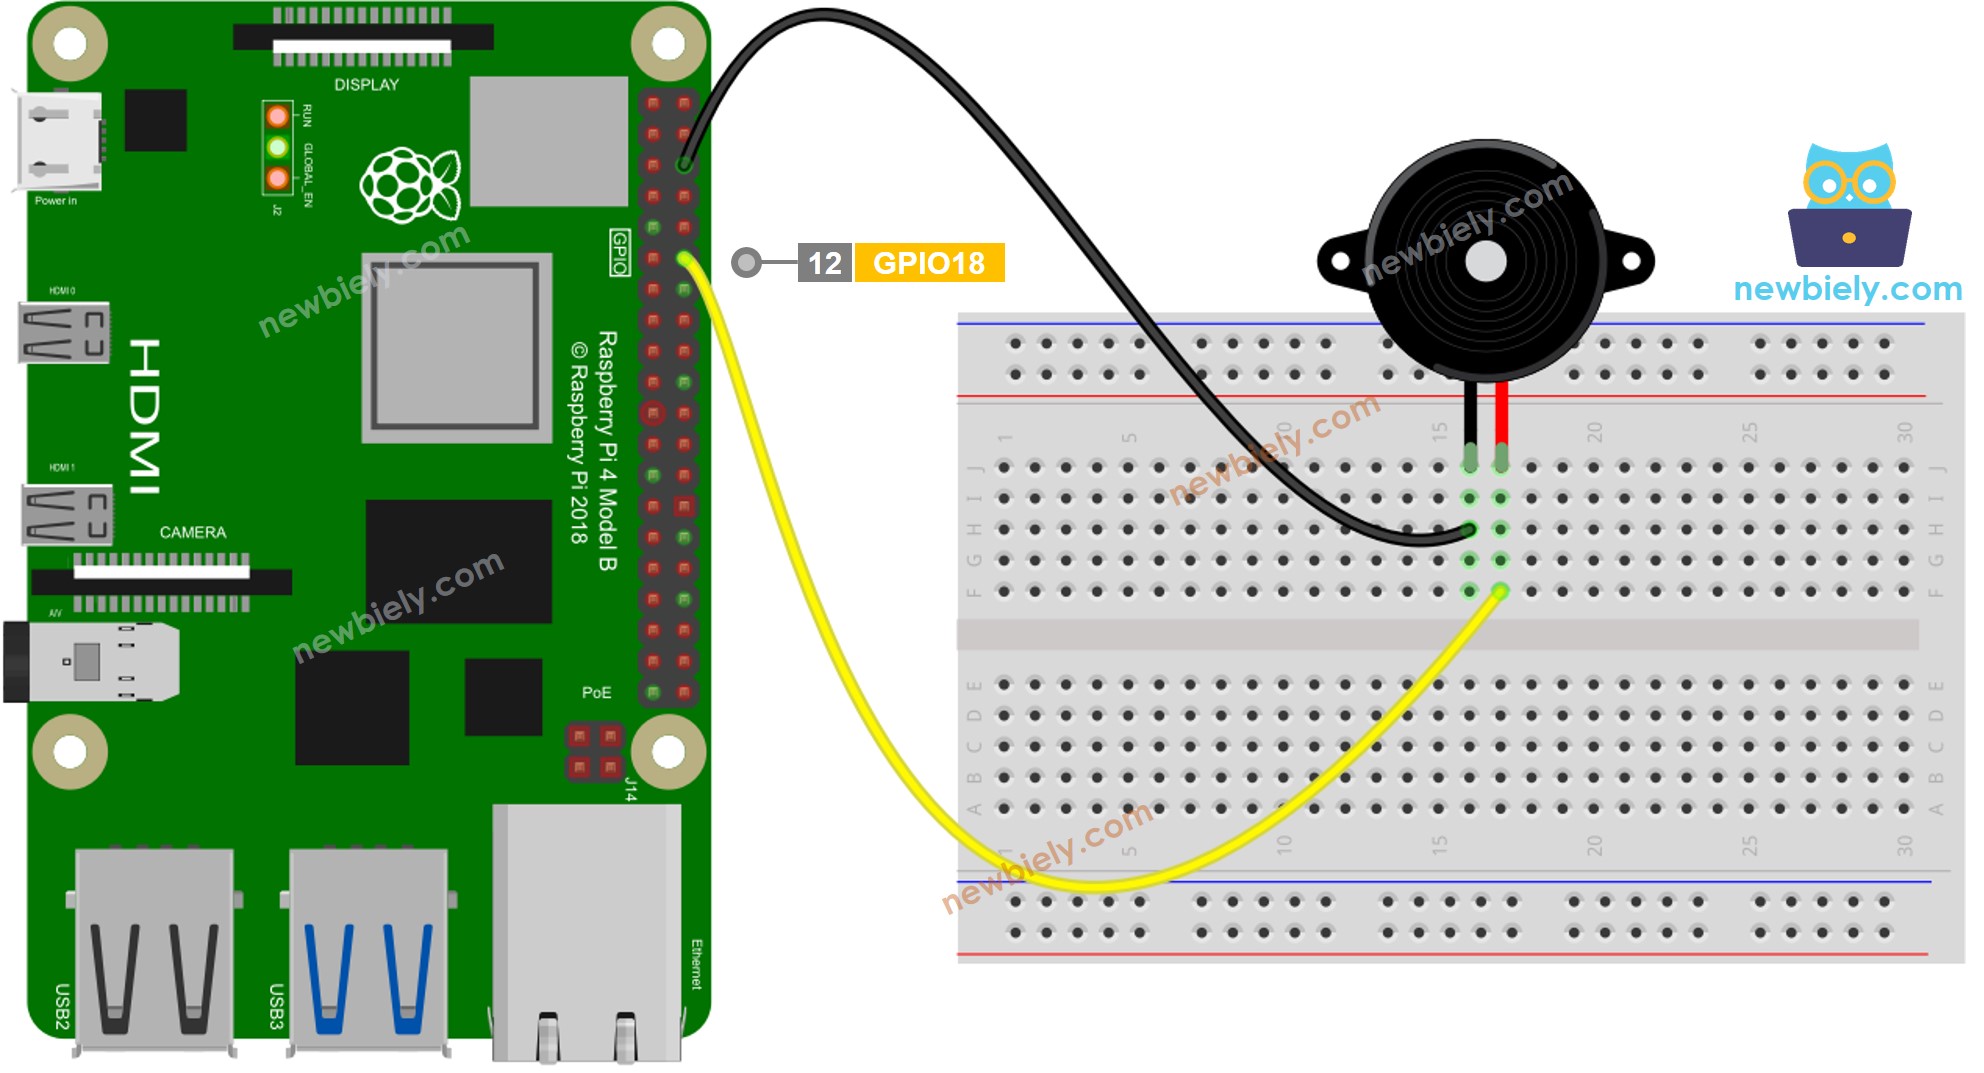
Cette image a été créée avec Fritzing. Cliquez pour agrandir l'image.
- Le schéma de câblage entre le Raspberry Pi et le module de buzzer piézo.
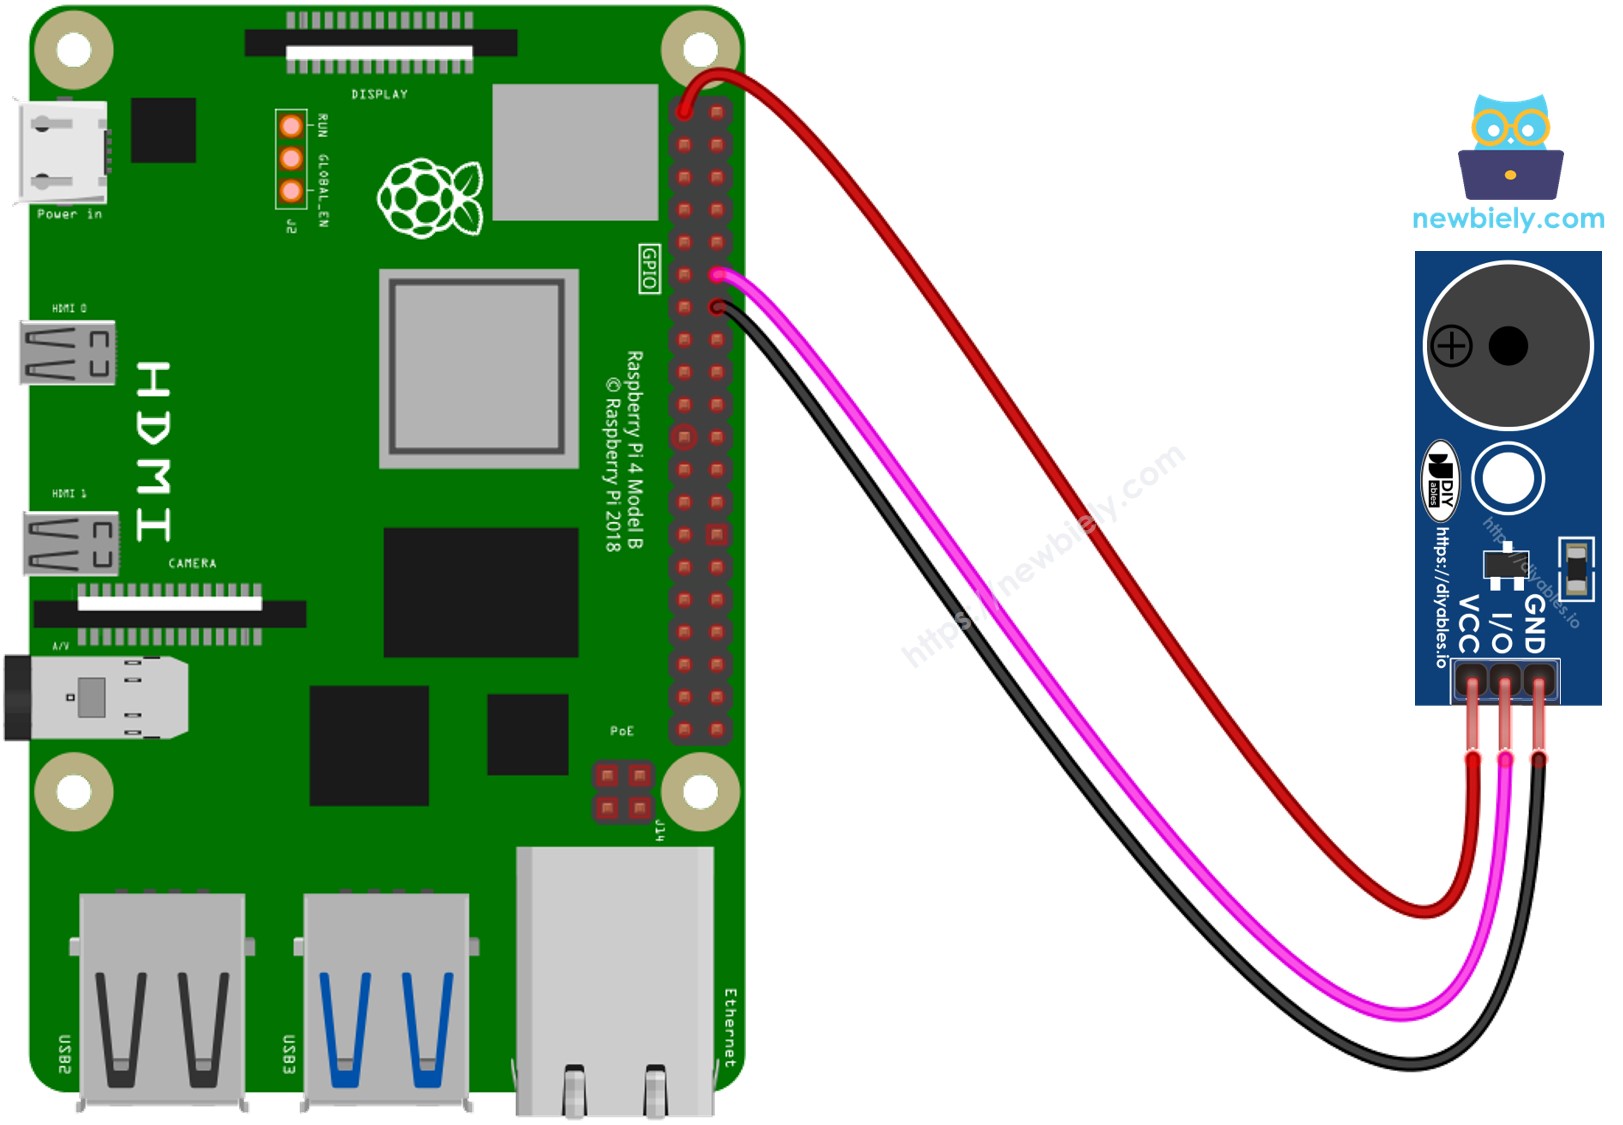
Cette image a été créée avec Fritzing. Cliquez pour agrandir l'image.
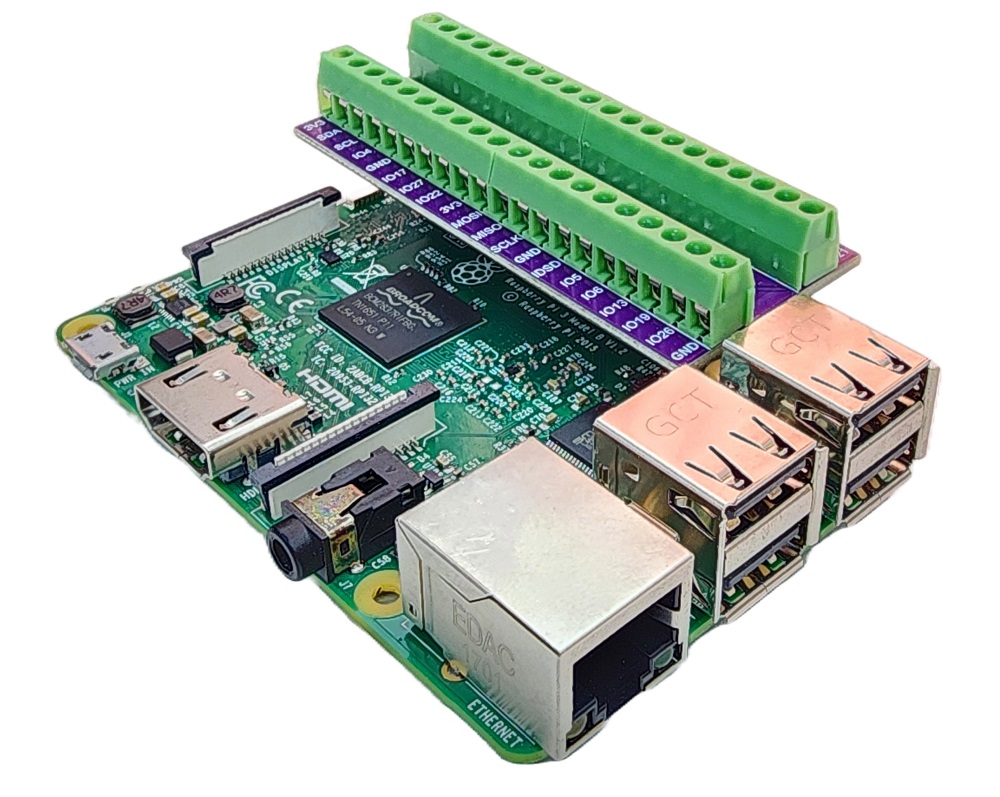
Pour simplifier et organiser votre montage de câblage, nous recommandons l'utilisation d'un shield à bornier à vis pour Raspberry Pi. Ce shield assure des connexions plus sûres et mieux gérées, comme illustré ci-dessous :
Code Raspberry Pi
Étapes rapides
- Assurez-vous d'avoir Raspbian ou tout autre système d'exploitation compatible avec Raspberry Pi installé sur votre Pi.
- Assurez-vous que votre Raspberry Pi est connecté au même réseau local que votre PC.
- Assurez-vous que votre Raspberry Pi est connecté à Internet si vous avez besoin d'installer des bibliothèques.
- Si c'est la première fois que vous utilisez le Raspberry Pi, consultez Installation du logiciel - Raspberry Pi..
- Connectez votre PC au Raspberry Pi via SSH en utilisant le client SSH intégré sur Linux et macOS ou PuTTY sur Windows. Consultez comment connecter votre PC au Raspberry Pi via SSH.
- Assurez-vous que la bibliothèque RPi.GPIO est installée. Sinon, installez-la en utilisant la commande suivante :
- Créez un fichier de script Python buzzer.py et ajoutez le code suivant :
- Enregistrez le fichier et exécutez le script Python en exécutant la commande suivante dans le terminal :
- Écoutez la mélodie d'une chanson émise par le buzzer piézo.
Le script fonctionne en boucle infinie jusqu'à ce que vous appuyiez sur Ctrl + C dans le terminal.
Modification du code Raspberry Pi
Maintenant, nous allons modifier le code pour jouer la chanson "Jingle Bells".
- Créez un fichier de script Python buzzer_Jingle_Bells.py et ajoutez le code suivant :
- Enregistrez le fichier et exécutez le script Python en lançant la commande suivante dans le terminal :
- Vous pouvez comparer ce code avec le code précédent pour voir les différences.
Avec cette modification, le code jouera désormais la mélodie de "Jingle Bells" en utilisant le buzzer piézoélectrique connecté au Raspberry Pi. Profitez de l'air festif !
Vidéo
Défiez-vous
- Utilisez un buzzer piézoélectrique pour jouer votre chanson préférée.
- Utilisez un capteur de mouvement Raspberry Pi pour déclencher automatiquement une alarme lorsque quelqu'un s'approche de vos objets de valeur. Consultez Raspberry Pi - Capteur de mouvement. pour plus d'informations.