Arduino Nano - Capteur de Température et d'Humidité - OLED
Ce tutoriel vous explique comment lire la température et l'humidité à partir d'un capteur DHT11/DHT22 et les afficher sur un OLED.
You can use DHT22 sensor instead of DHT11 sensor.
Ou vous pouvez acheter les kits suivants:
Divulgation : Certains des liens fournis dans cette section sont des liens affiliés Amazon. Nous pouvons recevoir une commission pour tout achat effectué via ces liens, sans coût supplémentaire pour vous. Nous vous remercions de votre soutien.
Note d'achat: Si vous souhaitez un écran OLED plus grand, utilisez le Arduino Nano - Écran OLED SSD1309 128x64 | Tutoriel OLED I2C 2.42 pouces.
Si vous n'êtes pas familier avec l'écran OLED, les capteurs d'humidité et de température DHT11 et DHT22 (brochage, fonctionnalités, programmation...), les tutoriels suivants peuvent vous aider :
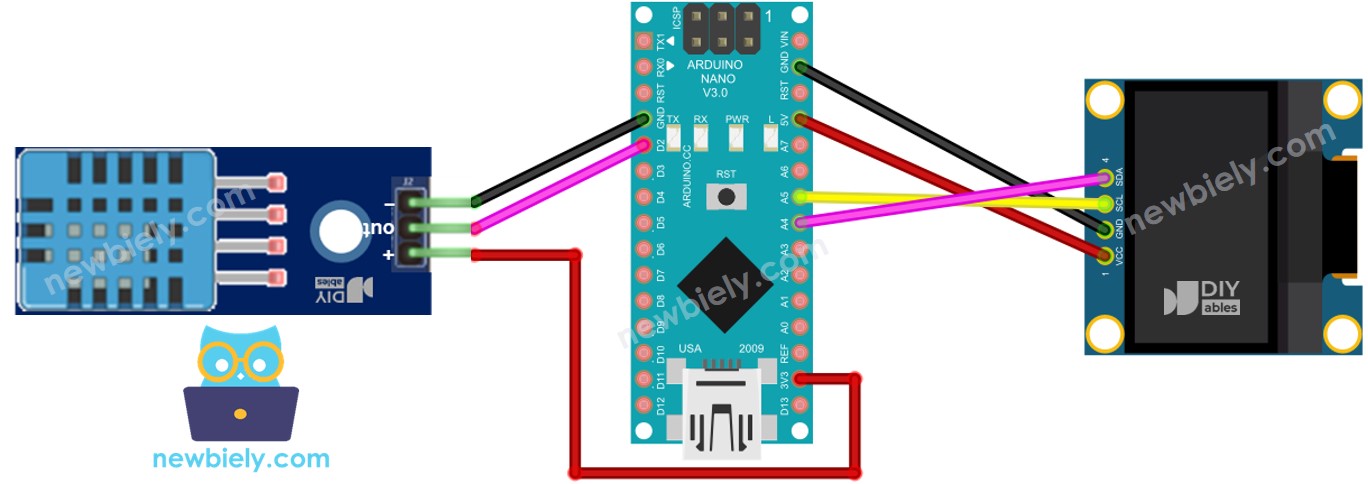
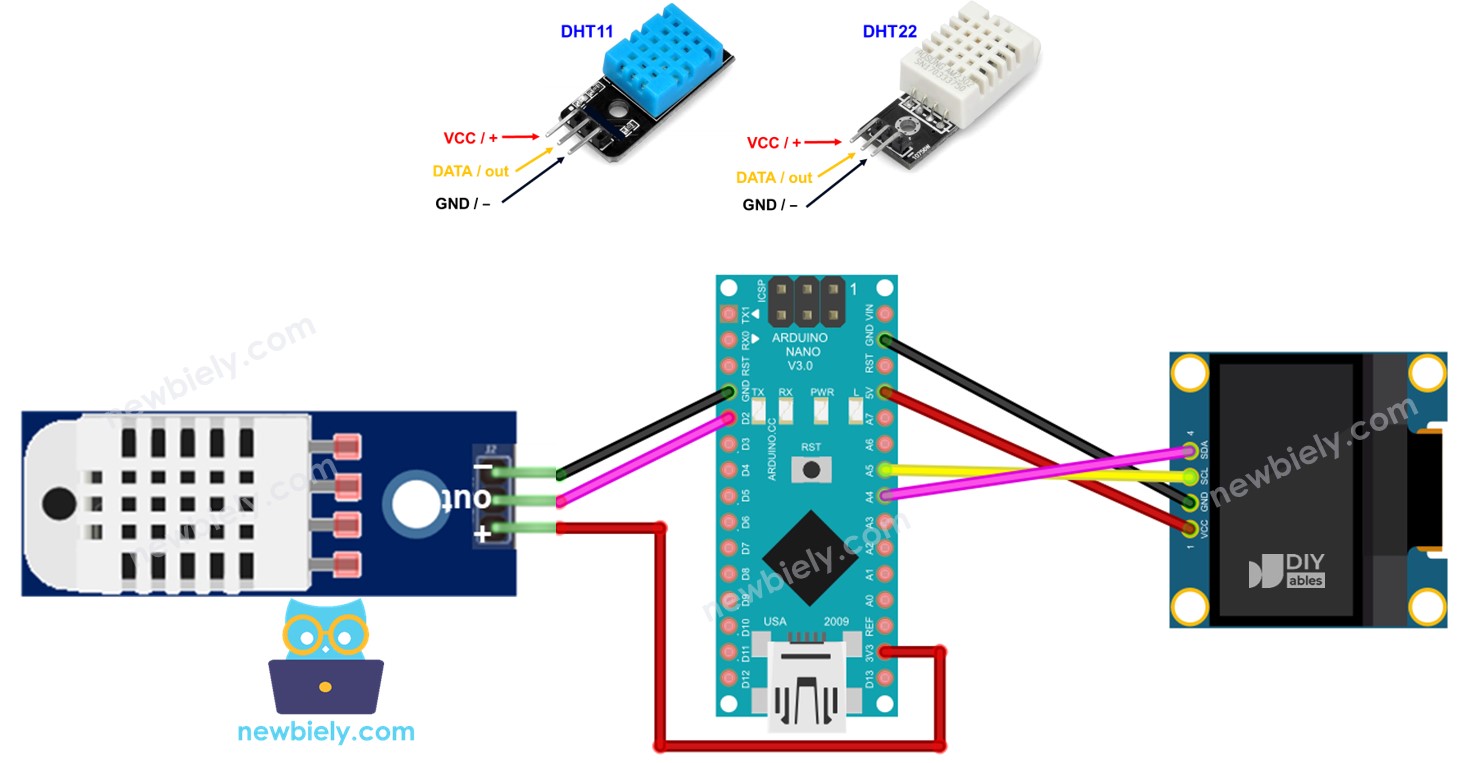
Cette image a été créée avec Fritzing. Cliquez pour agrandir l'image.
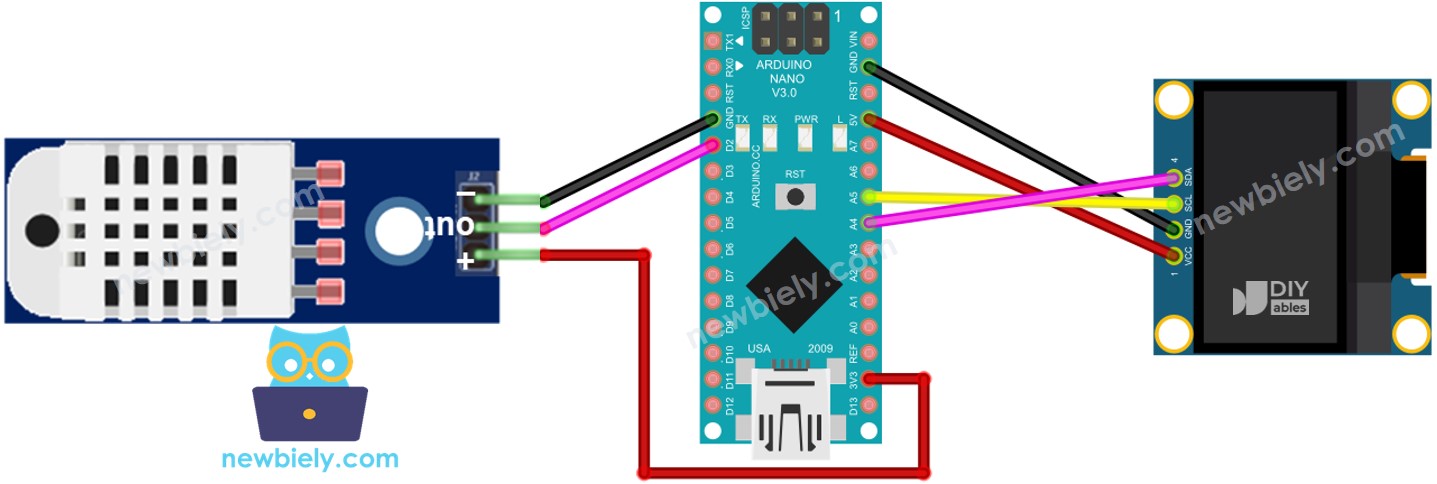
Cette image a été créée avec Fritzing. Cliquez pour agrandir l'image.
Voir Comment alimenter un Arduino Nano..
#include <Wire.h>
#include <Adafruit_GFX.h>
#include <Adafruit_SSD1306.h>
#include <DHT.h>
#define OLED_WIDTH 128
#define OLED_HEIGHT 64
#define DHT_PIN 2
#define DHT_TYPE DHT11
Adafruit_SSD1306 oled(OLED_WIDTH, OLED_HEIGHT, &Wire, -1);
DHT dht(DHT_PIN, DHT_TYPE);
String temperature;
String humidity;
void setup() {
Serial.begin(9600);
if (!oled.begin(SSD1306_SWITCHCAPVCC, 0x3C)) {
Serial.println(F("SSD1306 allocation failed"));
while (true)
;
}
delay(2000);
oled.clearDisplay();
oled.setTextSize(3);
oled.setTextColor(WHITE);
oled.setCursor(0, 10);
dht.begin();
temperature.reserve(10);
humidity.reserve(10);
}
void loop() {
float humi = dht.readHumidity();
float tempC = dht.readTemperature();
if (isnan(humi) || isnan(tempC)) {
temperature = "Failed";
humidity = "Failed";
} else {
temperature = String(tempC, 1);
temperature += char(247);
temperature += "C";
humidity = String(humi, 1);
humidity += "%";
}
Serial.print(tempC);
Serial.print("°C | " );
Serial.print(humi);
Serial.println("%");
oledDisplayCenter(temperature, humidity);
}
void oledDisplayCenter(String temperature, String humidity) {
int16_t x1;
int16_t y1;
uint16_t width_T;
uint16_t height_T;
uint16_t width_H;
uint16_t height_H;
oled.getTextBounds(temperature, 0, 0, &x1, &y1, &width_T, &height_T);
oled.getTextBounds(temperature, 0, 0, &x1, &y1, &width_H, &height_H);
oled.clearDisplay();
oled.setCursor((SCREEN_WIDTH - width_T) / 2, SCREEN_HEIGHT / 2 - height_T - 5);
oled.println(temperature);
oled.setCursor((SCREEN_WIDTH - width_H) / 2, SCREEN_HEIGHT / 2 + 5);
oled.println(humidity);
oled.display();
}
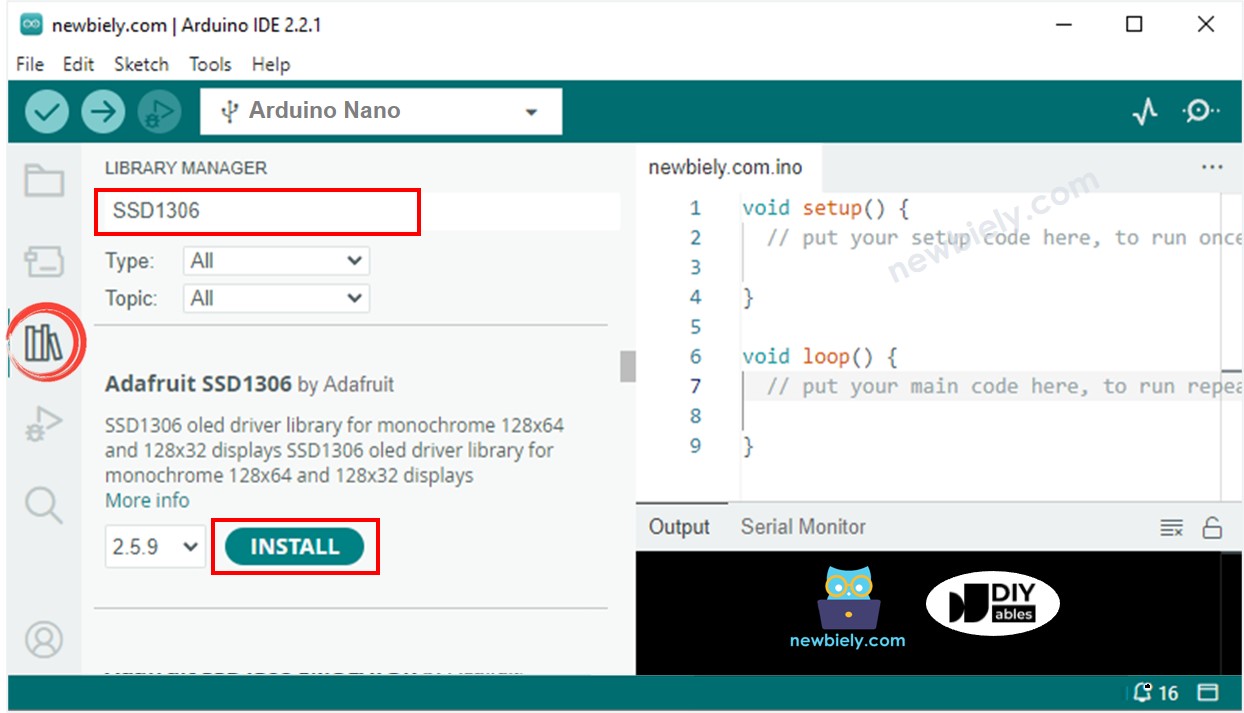
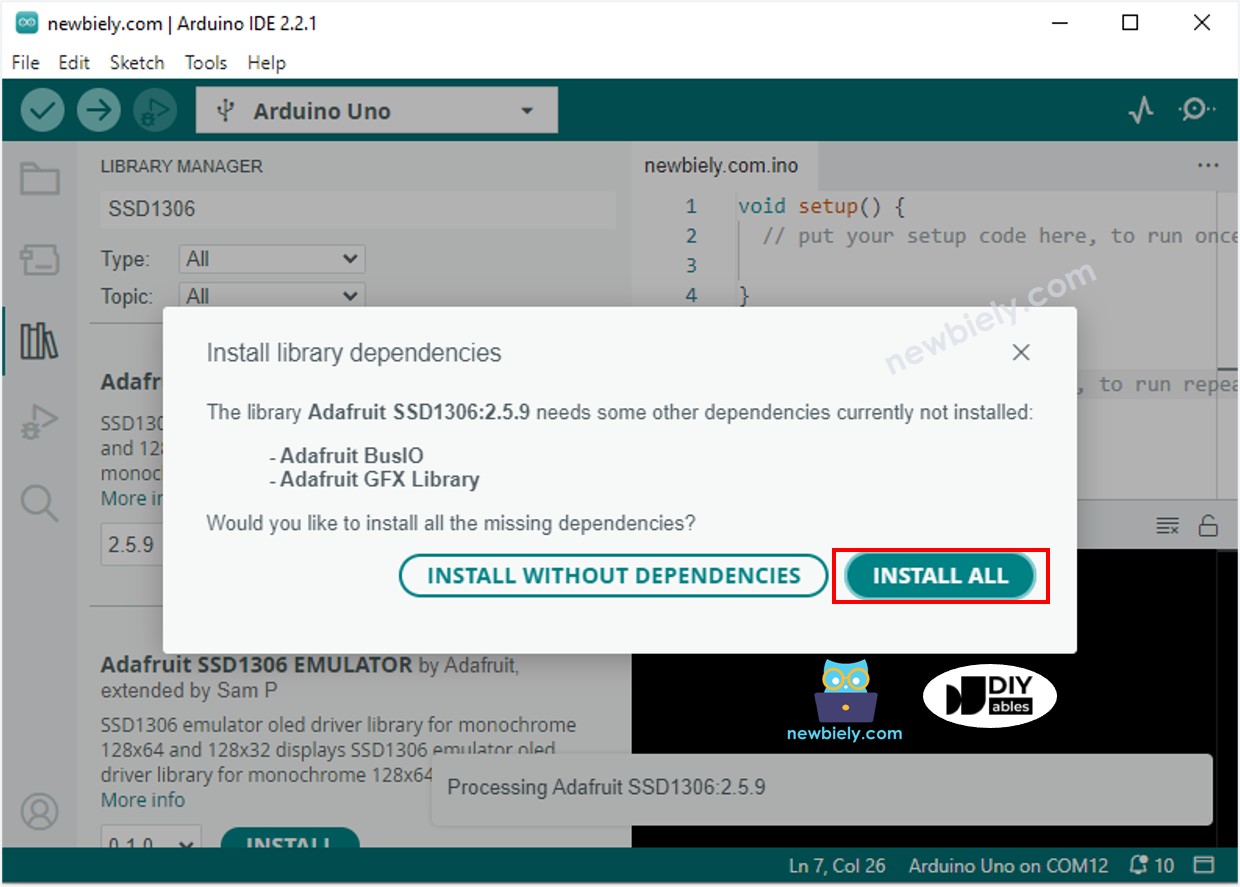
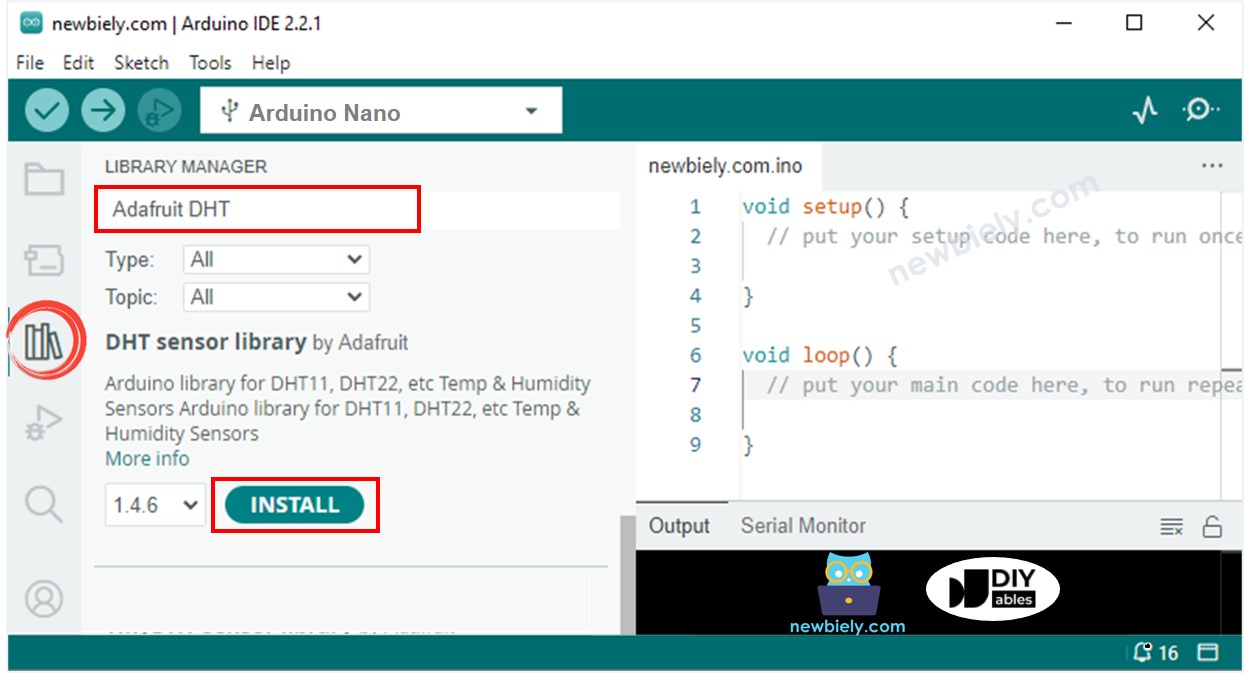
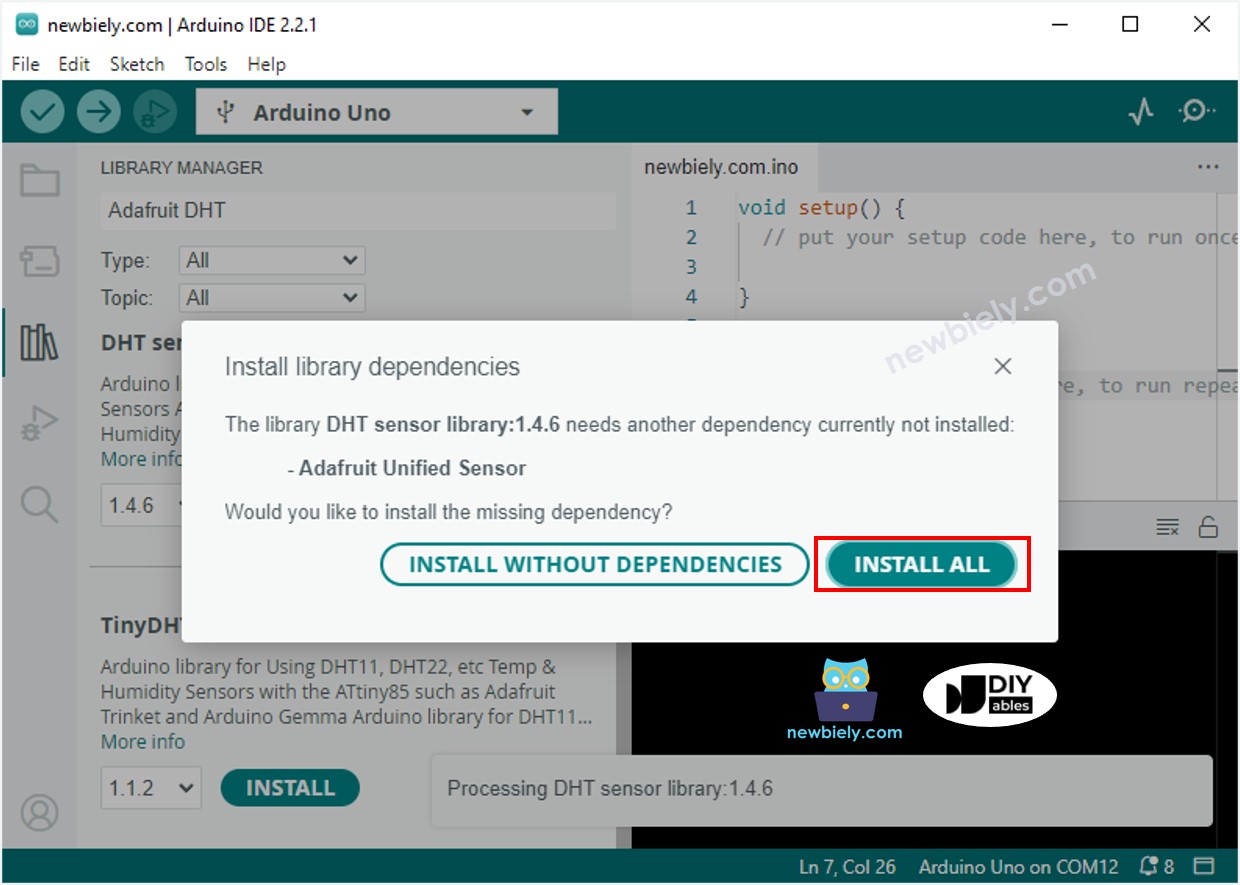
Cliquez sur l'icône Libraries dans la barre gauche de l'IDE Arduino.
Recherchez "SSD1306" puis trouvez la bibliothèque SSD1306 d'Adafruit.
Appuyez sur le bouton Install pour installer la bibliothèque.
Copiez le code ci-dessus et ouvrez-le dans l'IDE Arduino.
Cliquez sur le bouton Upload dans l'IDE Arduino pour envoyer le code au Arduino Nano.
Placez le capteur dans de l'eau chaude et froide, ou tenez-le dans votre main.
Vérifiez le résultat sur l'OLED et le moniteur série.
※ Note:
Le code en question centre automatiquement le texte à la fois horizontalement et verticalement sur un écran OLED.
#include <Wire.h>
#include <Adafruit_GFX.h>
#include <Adafruit_SSD1306.h>
#include <DHT.h>
#define OLED_WIDTH 128
#define OLED_HEIGHT 64
#define DHT_PIN 2
#define DHT_TYPE DHT22
Adafruit_SSD1306 oled(OLED_WIDTH, OLED_HEIGHT, &Wire, -1);
DHT dht(DHT_PIN, DHT_TYPE);
String temperature;
String humidity;
void setup() {
Serial.begin(9600);
if (!oled.begin(SSD1306_SWITCHCAPVCC, 0x3C)) {
Serial.println(F("SSD1306 allocation failed"));
while (true)
;
}
delay(2000);
oled.clearDisplay();
oled.setTextSize(3);
oled.setTextColor(WHITE);
oled.setCursor(0, 10);
dht.begin();
temperature.reserve(10);
humidity.reserve(10);
}
void loop() {
float humi = dht.readHumidity();
float tempC = dht.readTemperature();
if (isnan(humi) || isnan(tempC)) {
temperature = "Failed";
humidity = "Failed";
} else {
temperature = String(tempC, 1);
temperature += char(247);
temperature += "C";
humidity = String(humi, 1);
humidity += "%";
Serial.print(tempC);
Serial.print("°C | " );
Serial.print(humi);
Serial.println("%");
}
oledDisplayCenter(temperature, humidity);
}
void oledDisplayCenter(String temperature, String humidity) {
int16_t x1;
int16_t y1;
uint16_t width_T;
uint16_t height_T;
uint16_t width_H;
uint16_t height_H;
oled.getTextBounds(temperature, 0, 0, &x1, &y1, &width_T, &height_T);
oled.getTextBounds(temperature, 0, 0, &x1, &y1, &width_H, &height_H);
oled.clearDisplay();
oled.setCursor((SCREEN_WIDTH - width_T) / 2, SCREEN_HEIGHT / 2 - height_T - 5);
oled.println(temperature);
oled.setCursor((SCREEN_WIDTH - width_H) / 2, SCREEN_HEIGHT / 2 + 5);
oled.println(humidity);
oled.display();
}
※ Note:
Le code pour DHT11 et DHT22 est le même, à part une ligne. La bibliothèque utilisée pour les deux est également la même.
※ NOS MESSAGES
N'hésitez pas à partager le lien de ce tutoriel. Cependant, veuillez ne pas utiliser notre contenu sur d'autres sites web. Nous avons investi beaucoup d'efforts et de temps pour créer ce contenu, veuillez respecter notre travail !