Caméra ESP32 S3 - Détecter le mouvement sans capteur
Vous n'avez pas besoin d'un capteur de mouvement pour voir un mouvement. La caméra est déjà un capteur. Dans ce tutoriel, l'ESP32 S3 fait du traitement d'image : il prend en permanence de petites images en noir et blanc, compare chaque nouvelle image avec la précédente, et détermine si quelque chose devant la caméra a bougé.
Quand il détecte un mouvement, il fait deux choses :
Il écrit une ligne dans le Serial Monitor, afin que vous puissiez voir exactement ce que la caméra a vu
Il enregistre une grande photo en couleur sur la carte microSD
Aucune pièce supplémentaire n'est nécessaire. Vous avez seulement besoin de la carte caméra ESP32 S3 et d'une carte microSD. Il n'y a pas de capteur PIR, pas de câblage, et pas de breadboard dans ce projet.
※ Note:
Ce tutoriel enseigne uniquement la partie détection. Une fois que votre caméra détecte un mouvement, vous pouvez envoyer l'information où vous voulez. Prenez la fonction takeAndSavePhoto() et remplacez-la par la partie envoi d'un autre tutoriel :
Le code de détection reste le même. Seule la dernière étape change.
Ce que vous allez construire :
Une caméra qui surveille elle-même les mouvements, sans capteur PIR
Un message dans le Serial Monitor chaque fois que la caméra voit quelque chose bouger
Une grande photo enregistrée sur la carte microSD quand quelque chose change
Des réglages en haut du code que vous pouvez modifier, pour rendre la caméra plus ou moins sensible, et pour distinguer une personne d'une lampe ou de feuilles dans le vent
Une caméra qui voit aussi des choses qu'un capteur PIR ne peut pas voir, comme un objet froid
Divulgation : Certains des liens fournis dans cette section sont des liens affiliés Amazon. Nous pouvons recevoir une commission pour tout achat effectué via ces liens, sans coût supplémentaire pour vous. Nous vous remercions de votre soutien.
※ Note:
La carte caméra ESP32 S3 a 40 broches, mais le bornier à vis et la carte d'extension ont 44 broches. Elles fonctionnent quand même ensemble. Placez la carte caméra au centre de la carte à 44 broches, afin que 2 broches restent libres du côté gauche et 2 broches restent libres du côté droit.
Le bornier à vis vous permet de connecter des fils avec un tournevis, sans soudure. La carte d'extension vous donne des connecteurs à broches faciles pour un breadboard.
Comment ça marche
L'idée est simple. Prenez une photo. Prenez une autre photo. Comparez-les.
La caméra prend une petite image en noir et blanc, seulement 160 × 120 pixels.
En noir et blanc, un pixel est un nombre entre 0 (noir) et 255 (blanc).
Le code compare chaque pixel avec le même pixel de l'image précédente.
Si les deux nombres sont très différents, ce pixel a changé.
Si de nombreux pixels ont changé, quelque chose a bougé.
Pourquoi noir et blanc, et pourquoi si petit ?
Choix
Raison
Noir et blanc
Un pixel est un nombre, donc comparer est facile et rapide
160 x 120
19200 nombres tiennent facilement en mémoire, et la carte peut les comparer plusieurs fois par seconde
Pas JPEG
Un JPEG est compressé, donc vous ne pouvez pas le comparer pixel par pixel
La petite image sert uniquement à surveiller. Quand quelque chose bouge, le code fait basculer la caméra vers une grande photo en couleur, l'enregistre, puis revient en arrière.
Il n'y a pas de câblage dans ce projet. Vous n'avez qu'à insérer la carte microSD dans son emplacement.
Cette image a été créée avec Fritzing. Cliquez pour agrandir l'image.
Débranchez le câble USB.
Assurez-vous que le module caméra est connecté avec son câble plat.
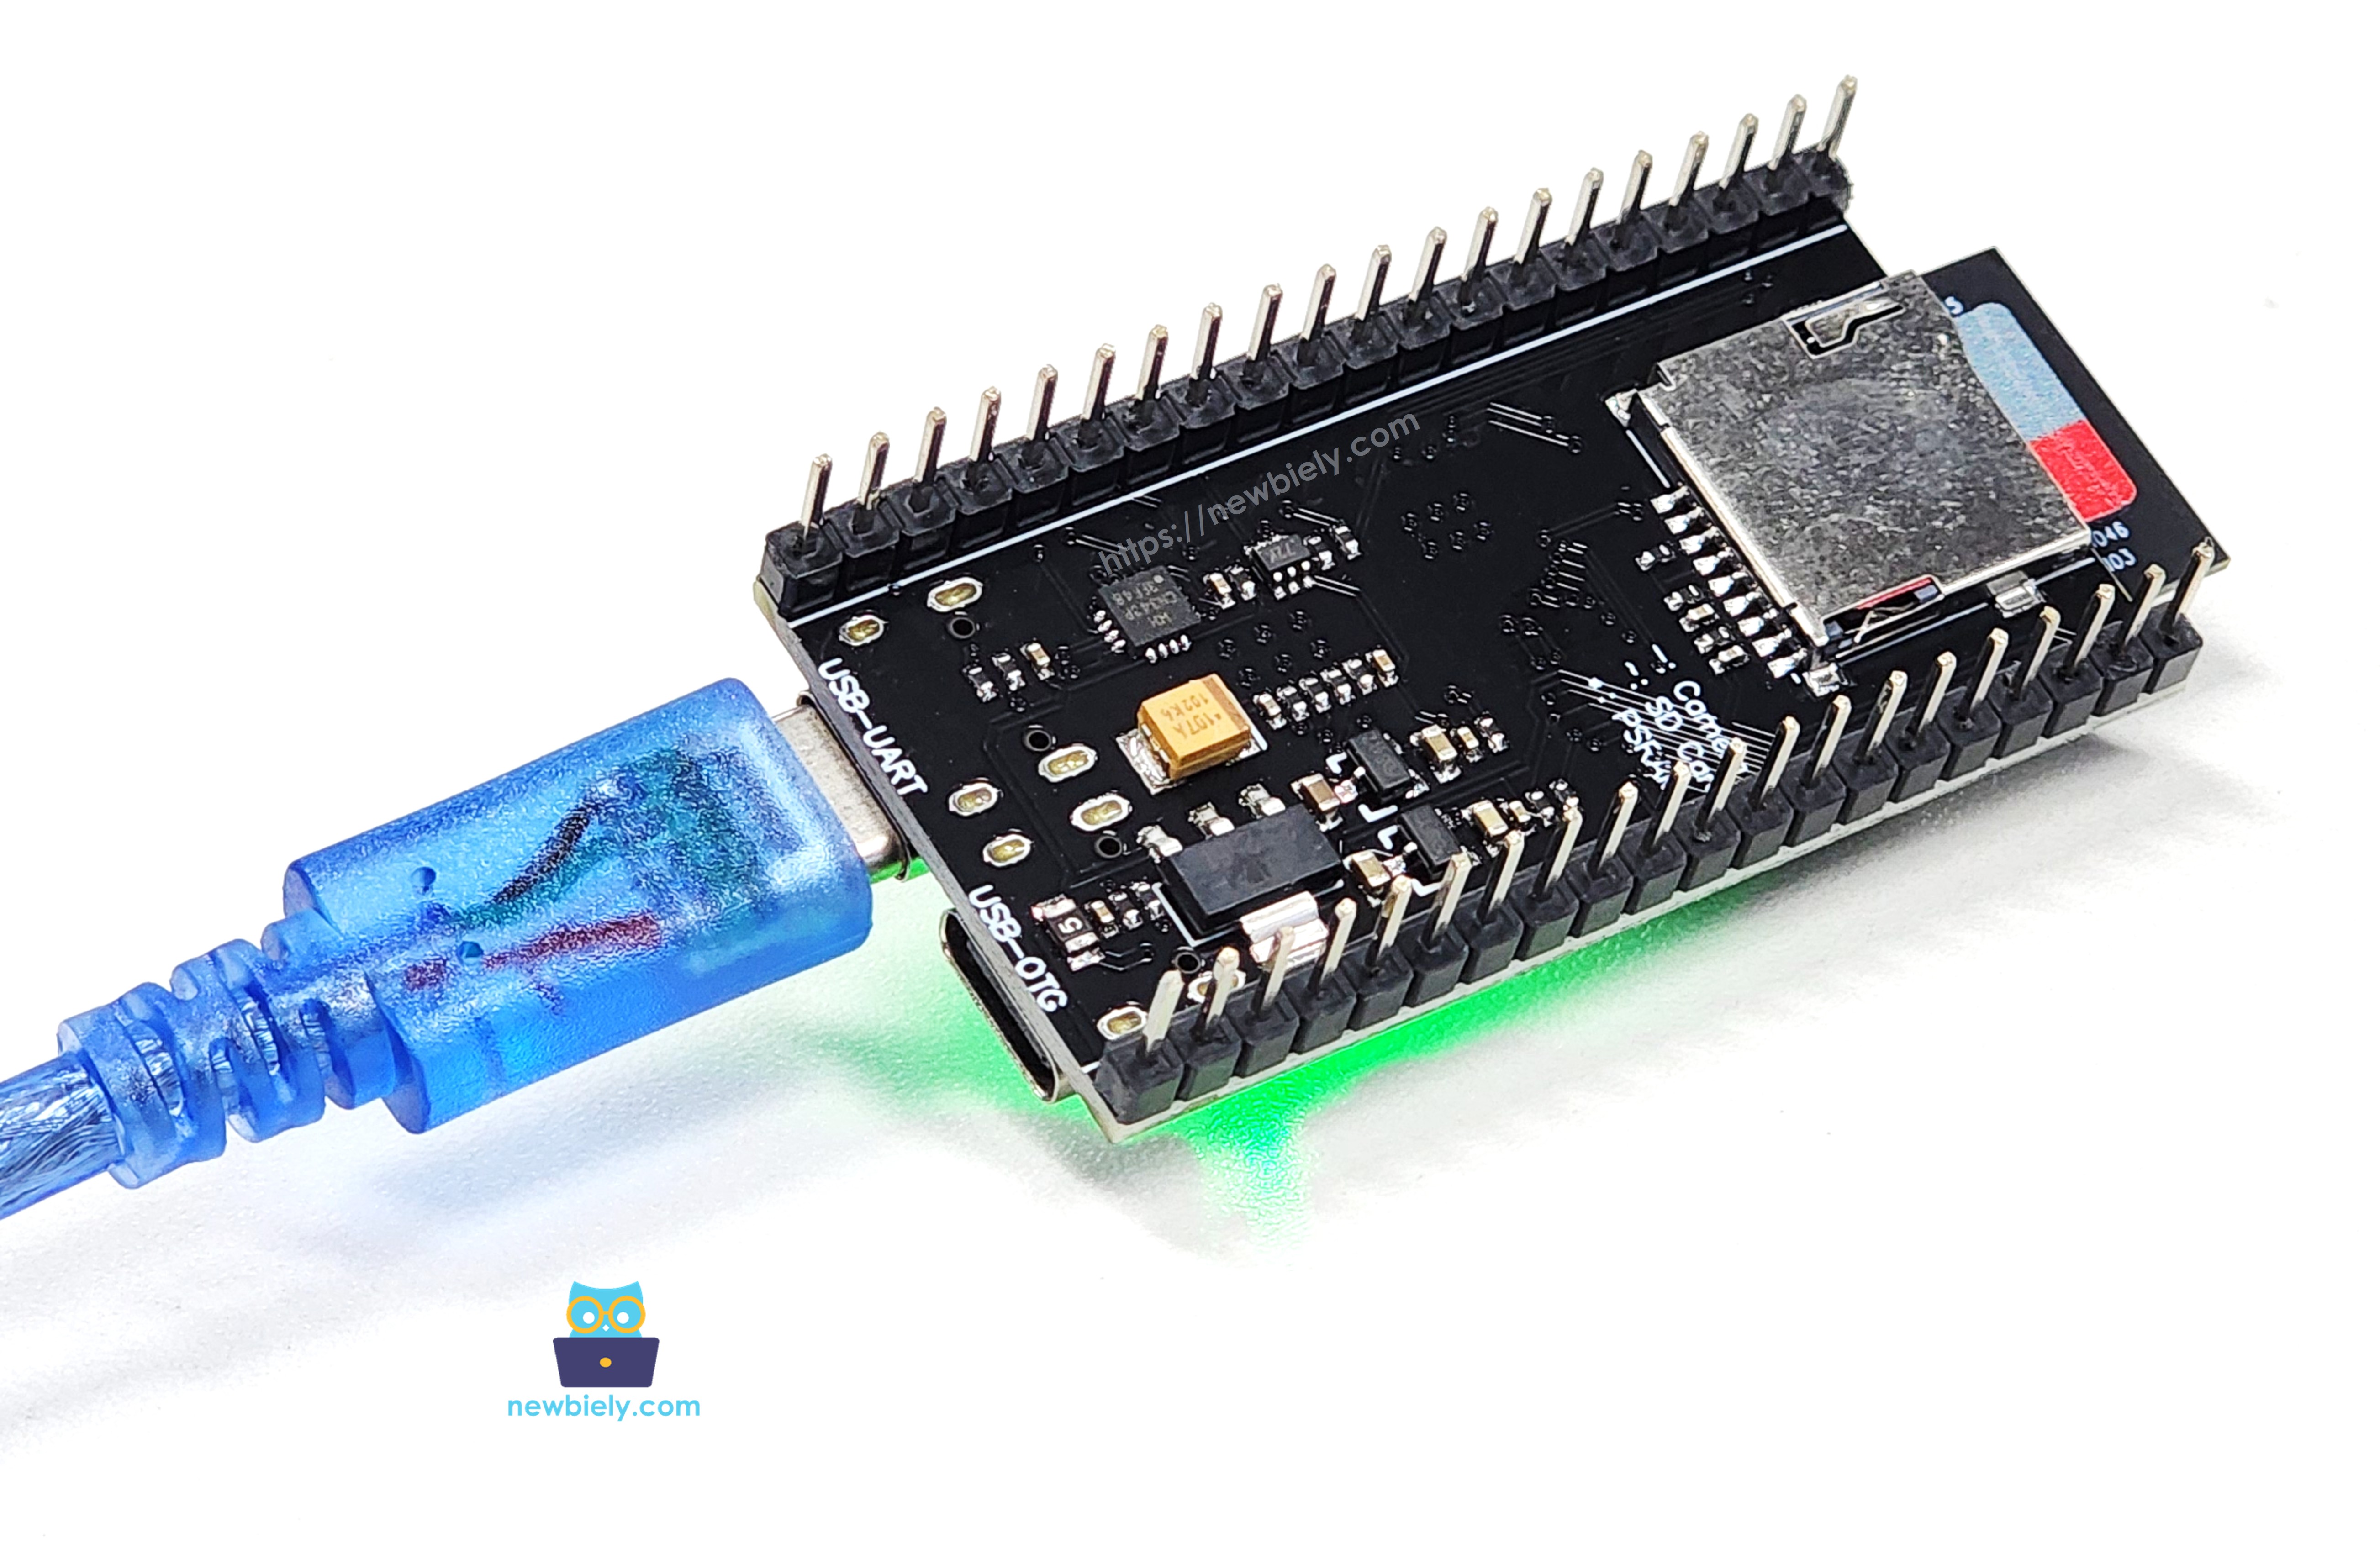
Poussez la carte microSD dans son emplacement jusqu'à entendre un petit clic.
Branchez le câble USB.
Notes de sécurité
Ne retirez jamais la carte pendant que la carte enregistre une photo. Débranchez toujours d'abord le câble USB, attendez deux secondes, puis retirez la carte.
Réglages de l'Arduino IDE pour la caméra ESP32 S3
La caméra ne fonctionne pas avec les réglages par défaut de l'Arduino IDE. Vous devez modifier certains éléments dans le menu Tools avant de téléverser le code.
Élément du menu Tools
Sélectionnez ceci
Board
ESP32S3 Dev Module
Flash Size
16MB (128Mb)
PSRAM
OPI PSRAM
Partition Scheme
Huge APP (3MB No OTA/1MB SPIFFS)
CPU Frequency
240MHz (WiFi)
USB Mode
Hardware CDC and JTAG
Upload Mode
UART0 / Hardware CDC
Upload Speed
921600
USB CDC On Boot
Enabled
Trois exemples, une étape à la fois
Ce tutoriel comporte trois programmes. Ils font tous le même travail, mais chacun est meilleur que le précédent. Commencez par l'exemple 1, faites-le fonctionner, puis passez à la suite.
Exemple
Ce qu'il ajoute
Bon pour
*i. Simple
Compare deux images, compte les pixels changés
Apprendre l'idée. Une pièce calme à l'intérieur.
*i. Sûr avec la lumière
Tout de l'exemple 1, PLUS les lampes, les nuages et le soleil du soir
Une pièce avec des fenêtres, ou une lampe
*i. Sûr avec la lumière et le vent
Tout de l'exemple 2, PLUS les feuilles, les rideaux et les objets qui tremblent
À l'extérieur, un jardin, une fenêtre
※ Note:
Chaque exemple enregistre une grande photo sur la carte microSD. La différence est seulement quand il décide que quelque chose a bougé.
Chaque exemple conserve tout de celui d'avant. L'exemple 3 n'est pas seulement sûr avec le vent, il est aussi sûr avec la lumière :
Protection
Exemple 1
Exemple 2
Exemple 3
Voit une personne en mouvement
Oui
Oui
Oui
Retire le changement de lumière (averageShift)
Non
Oui
Oui
Refuse un changement de l'image entière (une lampe)
Non
Oui
Oui
Attend après un changement de lumière (SETTLE_TIME)
Non
Oui
Oui
Groupes de blocs qui se touchent (vent)
Non
Non
Oui
Doit être vu sur plusieurs images (CONFIRM_FRAMES)
Non
Non
Oui
Peut ignorer le haut de l'image
Non
Non
Oui
※ Note:
Si vous voulez seulement le meilleur, utilisez l'exemple 3. Les exemples 1 et 2 sont là pour que vous compreniez pourquoi chaque partie est nécessaire. Téléversez-les dans l'ordre, cassez-les exprès, et les chiffres de l'exemple 3 prendront tout leur sens.
Code ESP32 S3 - Exemple 1 : Simple
C'est la version la plus courte, et la plus facile à lire. Elle fait exactement trois choses : prendre une petite image en noir et blanc, la comparer avec l'image précédente, et compter combien de pixels ont changé.
Les nombres que vous pouvez changer
Nom
Commencer avec
Ce que cela signifie
PIXEL_THRESHOLD
30
À quel point un pixel doit être différent (0 à 255)
MOTION_PERCENT
2
Quelle part de l'image doit changer, en pourcentage
QUIET_TIME
5000
Millisecondes à attendre avant la prochaine photo
Comptez les pixels qui ont changé.
int countChangedPixels(uint8_t *now, uint8_t *before, size_t size) {int changed = 0;for (size_t i = 0; i < size; i++) {int difference = (int)now[i] - (int)before[i];if (difference < 0) difference = -difference; // we do not care if it is brighter or darkerif (difference > PIXEL_THRESHOLD) changed++; }return changed;}
/* * Ce code ESP32 S3 a été développé par newbiely.fr * Ce code ESP32 S3 est mis à disposition du public sans aucune restriction. * Pour des instructions complètes et des schémas de câblage, veuillez visiter: * https://newbiely.fr/tutorials/esp32-s3/esp32-s3-camera-detect-motion-without-a-sensor*/#include"esp_camera.h"#include"FS.h"#include"SD_MMC.h"// How different one pixel must be before we call it "changed"#define PIXEL_THRESHOLD 30// How many pixels must change before we call it "motion".// The small picture has 160 x 120 = 19200 pixels, so 2% is about 384 pixels.#define MOTION_PERCENT 2#define QUIET_TIME 5000 // wait 5 seconds before the next photo// Camera pins of the ESP32-S3-N16R8 camera board.// The same pins work for the OV2640, OV3660 and OV5640 versions.#define PWDN_GPIO_NUM -1#define RESET_GPIO_NUM -1#define XCLK_GPIO_NUM 15#define SIOD_GPIO_NUM 4#define SIOC_GPIO_NUM 5#define Y9_GPIO_NUM 16#define Y8_GPIO_NUM 17#define Y7_GPIO_NUM 18#define Y6_GPIO_NUM 12#define Y5_GPIO_NUM 10#define Y4_GPIO_NUM 8#define Y3_GPIO_NUM 9#define Y2_GPIO_NUM 11#define VSYNC_GPIO_NUM 6#define HREF_GPIO_NUM 7#define PCLK_GPIO_NUM 13// Pins of the microSD card slot on the board#define SD_CLK_GPIO_NUM 39#define SD_CMD_GPIO_NUM 38#define SD_D0_GPIO_NUM 40camera_config_t cameraConfig; // we keep the settings, because we change them lateruint8_t *lastPicture = NULL; // the picture we saw the time beforesize_t pictureSize = 0;int photoNumber = 1;unsignedlong lastPhotoTime = 0;// Returns the name of the camera sensor that is installed on the boardconstchar *getSensorName(int pid) {switch (pid) {case OV2640_PID: return"OV2640 (2 MP, max UXGA 1600x1200)";case OV3660_PID: return"OV3660 (3 MP, max QXGA 2048x1536)";case OV5640_PID: return"OV5640 (5 MP, max QSXGA 2592x1944)";default: return"Unknown sensor"; }}// Each sensor needs slightly different settings.// We must call this again every time the camera restarts.void applyCameraSettings() { sensor_t *s = esp_camera_sensor_get();switch (s->id.PID) {case OV2640_PID: s->set_vflip(s, 0); s->set_hmirror(s, 0);break;case OV3660_PID: s->set_vflip(s, 1); // the OV3660 image is upside down by default s->set_brightness(s, 1); // make the image a little brighter s->set_saturation(s, -2); // make the colors a little softerbreak;case OV5640_PID: s->set_vflip(s, 0); s->set_hmirror(s, 0);break;default:break; }}// Starts the camera in the small black and white mode, used for watchingbool initCamera() { cameraConfig.ledc_channel = LEDC_CHANNEL_0; cameraConfig.ledc_timer = LEDC_TIMER_0; cameraConfig.pin_d0 = Y2_GPIO_NUM; cameraConfig.pin_d1 = Y3_GPIO_NUM; cameraConfig.pin_d2 = Y4_GPIO_NUM; cameraConfig.pin_d3 = Y5_GPIO_NUM; cameraConfig.pin_d4 = Y6_GPIO_NUM; cameraConfig.pin_d5 = Y7_GPIO_NUM; cameraConfig.pin_d6 = Y8_GPIO_NUM; cameraConfig.pin_d7 = Y9_GPIO_NUM; cameraConfig.pin_xclk = XCLK_GPIO_NUM; cameraConfig.pin_pclk = PCLK_GPIO_NUM; cameraConfig.pin_vsync = VSYNC_GPIO_NUM; cameraConfig.pin_href = HREF_GPIO_NUM; cameraConfig.pin_sccb_sda = SIOD_GPIO_NUM; cameraConfig.pin_sccb_scl = SIOC_GPIO_NUM; cameraConfig.pin_pwdn = PWDN_GPIO_NUM; cameraConfig.pin_reset = RESET_GPIO_NUM; cameraConfig.xclk_freq_hz = 20000000; cameraConfig.jpeg_quality = 10; cameraConfig.fb_count = 1; cameraConfig.fb_location = psramFound() ? CAMERA_FB_IN_PSRAM : CAMERA_FB_IN_DRAM; cameraConfig.grab_mode = CAMERA_GRAB_WHEN_EMPTY;// GRAYSCALE means black and white. One pixel is one byte, so it is easy to compare. cameraConfig.pixel_format = PIXFORMAT_GRAYSCALE; cameraConfig.frame_size = FRAMESIZE_QQVGA; // 160x120 - small and fastif (!psramFound())Serial.println("WARNING: PSRAM not found. Please set PSRAM to OPI PSRAM in the Tools menu."); esp_err_t err = esp_camera_init(&cameraConfig);if (err != ESP_OK) {Serial.printf("Camera init failed with error 0x%x\n", err);returnfalse; } sensor_t *s = esp_camera_sensor_get();Serial.printf("Camera sensor: %s\n", getSensorName(s->id.PID)); applyCameraSettings();returntrue;}bool initSDCard() { SD_MMC.setPins(SD_CLK_GPIO_NUM, SD_CMD_GPIO_NUM, SD_D0_GPIO_NUM);// true means 1-bit mode. The camera uses the other pins, so we cannot use 4-bit mode.if (!SD_MMC.begin("/sdcard", true)) {Serial.println("SD card not found. Please check the card and push it in again.");returnfalse; }if (SD_MMC.cardType() == CARD_NONE) {Serial.println("No SD card inside the slot");returnfalse; }Serial.printf("SD card size: %llu MB\n", SD_MMC.cardSize() / (1024 * 1024));returntrue;}String makeFileName(int number) {charname[32]; sprintf(name, "/change_%05d.jpg", number);returnString(name);}void findFirstFreeNumber() {while (SD_MMC.exists(makeFileName(photoNumber))) photoNumber++;Serial.printf("The next photo will be change_%05d.jpg\n", photoNumber);}// Compares the new picture with the old one and returns how many pixels changedint countChangedPixels(uint8_t *now, uint8_t *before, size_t size) {int changed = 0;for (size_t i = 0; i < size; i++) {int difference = (int)now[i] - (int)before[i];if (difference < 0) difference = -difference; // we do not care if it is brighter or darkerif (difference > PIXEL_THRESHOLD) changed++; }return changed;}// Changes the camera to the big colour mode, takes one photo, saves it,// and changes back to the small black and white modevoid takeAndSavePhoto() { cameraConfig.pixel_format = PIXFORMAT_JPEG; cameraConfig.frame_size = FRAMESIZE_SVGA;if (esp_camera_reconfigure(&cameraConfig) != ESP_OK) {Serial.println("Cannot change the camera to photo mode");return; } applyCameraSettings();delay(200); camera_fb_t *fb = esp_camera_fb_get();if (fb) {String fileName = makeFileName(photoNumber);File file = SD_MMC.open(fileName.c_str(), FILE_WRITE);if (file) { file.write(fb->buf, fb->len); file.close();Serial.printf("Saved %s (%u bytes)\n", fileName.c_str(), fb->len); photoNumber++; } else {Serial.printf("Cannot write the file %s\n", fileName.c_str()); } esp_camera_fb_return(fb); } else {Serial.println("Photo capture failed"); }// Back to watching mode cameraConfig.pixel_format = PIXFORMAT_GRAYSCALE; cameraConfig.frame_size = FRAMESIZE_QQVGA; esp_camera_reconfigure(&cameraConfig); applyCameraSettings();delay(200);// The old picture belongs to the other mode, so we forget itif (lastPicture) { free(lastPicture); lastPicture = NULL; }}voidsetup() {Serial.begin(115200);delay(1000);if (!initCamera()) {Serial.println("Stopped");while (true)delay(1000); }if (!initSDCard()) {Serial.println("Stopped");while (true)delay(1000); } findFirstFreeNumber();Serial.printf("Watching for movement. A photo is saved when more than %d%% of the picture changes.\n", MOTION_PERCENT);}voidloop() { camera_fb_t *fb = esp_camera_fb_get();if (!fb) {Serial.println("Frame capture failed");delay(500);return; }// The very first picture has nothing to compare with, so we only keep itif (lastPicture == NULL) { pictureSize = fb->len; lastPicture = (uint8_t *)malloc(pictureSize);if (lastPicture) memcpy(lastPicture, fb->buf, pictureSize); esp_camera_fb_return(fb);return; }int changed = countChangedPixels(fb->buf, lastPicture, pictureSize);int limit = (pictureSize * MOTION_PERCENT) / 100;if (changed > limit) {Serial.printf("Movement seen: %d pixels changed (the limit is %d)\n", changed, limit);if (millis() - lastPhotoTime >= QUIET_TIME) { esp_camera_fb_return(fb); takeAndSavePhoto(); lastPhotoTime = millis();return; } } memcpy(lastPicture, fb->buf, pictureSize); // remember this picture for the next time esp_camera_fb_return(fb);}
※ Note:
Essayez celui-ci en premier, à l'intérieur, rideaux fermés. Il fonctionne très bien dans une pièce calme. Puis allumez une lampe et regardez ce qui se passe : il enregistre une photo d'une pièce vide. C'est ce problème que l'exemple 2 corrige.
Code ESP32 S3 - Exemple 2 : Sûr avec la lumière
Quand quelqu'un allume une lampe, ou qu'un nuage passe devant le soleil, chaque pixel change en même temps. L'exemple 1 dit alors « mouvement ! » et enregistre une photo d'une pièce vide.
La caméra aggrave elle-même les choses. Elle règle en permanence sa propre luminosité, donc même sous une lumière stable, toute l'image se décale de temps en temps.
Les nombres que vous pouvez changer
Nom
Commencer avec
Ce que cela signifie
PIXEL_THRESHOLD
30
À quel point un pixel doit être différent (0 à 255)
MOTION_PERCENT
2
Quelle part de l'image doit changer, en pourcentage
LIGHT_CHANGE_PERCENT
50
Au-dessus de ce seuil, c'est une lampe et non une personne
SETTLE_TIME
1000
Millisecondes à attendre après un changement de lumière
QUIET_TIME
5000
Millisecondes à attendre avant la prochaine photo
1. Retirer le changement de lumière
Une lampe déplace tous les pixels d'à peu près la même quantité. Une personne n'en déplace qu'une partie. Le code mesure donc d'abord de combien l'image entière a bougé, puis retire cette quantité à chaque pixel :
int averageShift(uint8_t *now, uint8_t *before, size_t size) {long total = 0;for (size_t i = 0; i < size; i++) total += (int)now[i] - (int)before[i];return (int)(total / (long)size);}
Et ensuite, dans la comparaison :
int difference = ((int)now[i] - (int)before[i]) - shift;
※ Note:
C'est l'idée importante. Si toute la pièce devient 20 crans plus lumineuse, shift vaut environ 20, et après l'avoir retiré, chaque pixel paraît de nouveau inchangé. Mais une personne qui traverse l'image change quand même ses propres pixels de bien plus que 20, donc elle est toujours vue.
2. Refuser les changements trop importants
Une personne ne remplit jamais la moitié de l'image. Si plus de LIGHT_CHANGE_PERCENT des pixels ont changé, c'est forcément la lumière :
if (changed > lightLimit) {Serial.printf("The light changed (%d pixels). No photo.\n", changed);delay(SETTLE_TIME); // let the camera set its brightness againreturn;}
※ Note:
Après un changement de lumière, le code attend une seconde. La caméra a besoin de ce temps pour régler sa propre luminosité, et sans cette attente, les deux ou trois images suivantes paraîtraient elles aussi changées.
/* * Ce code ESP32 S3 a été développé par newbiely.fr * Ce code ESP32 S3 est mis à disposition du public sans aucune restriction. * Pour des instructions complètes et des schémas de câblage, veuillez visiter: * https://newbiely.fr/tutorials/esp32-s3/esp32-s3-camera-detect-motion-without-a-sensor*/#include"esp_camera.h"#include"FS.h"#include"SD_MMC.h"// How different one pixel must be before we call it "changed"#define PIXEL_THRESHOLD 30// How many pixels must change before we call it "motion".// The small picture has 160 x 120 = 19200 pixels, so 2% is about 384 pixels.#define MOTION_PERCENT 2// When MORE than this much of the picture changes, it is a light change and// not a person. A lamp, a cloud or a passing car light moves the whole picture.#define LIGHT_CHANGE_PERCENT 50#define SETTLE_TIME 1000 // after a light change, give the camera 1 second#define QUIET_TIME 5000 // wait 5 seconds before the next photo// Camera pins of the ESP32-S3-N16R8 camera board.// The same pins work for the OV2640, OV3660 and OV5640 versions.#define PWDN_GPIO_NUM -1#define RESET_GPIO_NUM -1#define XCLK_GPIO_NUM 15#define SIOD_GPIO_NUM 4#define SIOC_GPIO_NUM 5#define Y9_GPIO_NUM 16#define Y8_GPIO_NUM 17#define Y7_GPIO_NUM 18#define Y6_GPIO_NUM 12#define Y5_GPIO_NUM 10#define Y4_GPIO_NUM 8#define Y3_GPIO_NUM 9#define Y2_GPIO_NUM 11#define VSYNC_GPIO_NUM 6#define HREF_GPIO_NUM 7#define PCLK_GPIO_NUM 13// Pins of the microSD card slot on the board#define SD_CLK_GPIO_NUM 39#define SD_CMD_GPIO_NUM 38#define SD_D0_GPIO_NUM 40camera_config_t cameraConfig; // we keep the settings, because we change them lateruint8_t *lastPicture = NULL; // the picture we saw the time beforesize_t pictureSize = 0;int photoNumber = 1;unsignedlong lastPhotoTime = 0;// Returns the name of the camera sensor that is installed on the boardconstchar *getSensorName(int pid) {switch (pid) {case OV2640_PID: return"OV2640 (2 MP, max UXGA 1600x1200)";case OV3660_PID: return"OV3660 (3 MP, max QXGA 2048x1536)";case OV5640_PID: return"OV5640 (5 MP, max QSXGA 2592x1944)";default: return"Unknown sensor"; }}// Each sensor needs slightly different settings.// We must call this again every time the camera restarts.void applyCameraSettings() { sensor_t *s = esp_camera_sensor_get();switch (s->id.PID) {case OV2640_PID: s->set_vflip(s, 0); s->set_hmirror(s, 0);break;case OV3660_PID: s->set_vflip(s, 1); // the OV3660 image is upside down by default s->set_brightness(s, 1); // make the image a little brighter s->set_saturation(s, -2); // make the colors a little softerbreak;case OV5640_PID: s->set_vflip(s, 0); s->set_hmirror(s, 0);break;default:break; }}// Starts the camera in the small black and white mode, used for watchingbool initCamera() { cameraConfig.ledc_channel = LEDC_CHANNEL_0; cameraConfig.ledc_timer = LEDC_TIMER_0; cameraConfig.pin_d0 = Y2_GPIO_NUM; cameraConfig.pin_d1 = Y3_GPIO_NUM; cameraConfig.pin_d2 = Y4_GPIO_NUM; cameraConfig.pin_d3 = Y5_GPIO_NUM; cameraConfig.pin_d4 = Y6_GPIO_NUM; cameraConfig.pin_d5 = Y7_GPIO_NUM; cameraConfig.pin_d6 = Y8_GPIO_NUM; cameraConfig.pin_d7 = Y9_GPIO_NUM; cameraConfig.pin_xclk = XCLK_GPIO_NUM; cameraConfig.pin_pclk = PCLK_GPIO_NUM; cameraConfig.pin_vsync = VSYNC_GPIO_NUM; cameraConfig.pin_href = HREF_GPIO_NUM; cameraConfig.pin_sccb_sda = SIOD_GPIO_NUM; cameraConfig.pin_sccb_scl = SIOC_GPIO_NUM; cameraConfig.pin_pwdn = PWDN_GPIO_NUM; cameraConfig.pin_reset = RESET_GPIO_NUM; cameraConfig.xclk_freq_hz = 20000000; cameraConfig.jpeg_quality = 10; cameraConfig.fb_count = 1; cameraConfig.fb_location = psramFound() ? CAMERA_FB_IN_PSRAM : CAMERA_FB_IN_DRAM; cameraConfig.grab_mode = CAMERA_GRAB_WHEN_EMPTY;// GRAYSCALE means black and white. One pixel is one byte, so it is easy to compare. cameraConfig.pixel_format = PIXFORMAT_GRAYSCALE; cameraConfig.frame_size = FRAMESIZE_QQVGA; // 160x120 - small and fastif (!psramFound())Serial.println("WARNING: PSRAM not found. Please set PSRAM to OPI PSRAM in the Tools menu."); esp_err_t err = esp_camera_init(&cameraConfig);if (err != ESP_OK) {Serial.printf("Camera init failed with error 0x%x\n", err);returnfalse; } sensor_t *s = esp_camera_sensor_get();Serial.printf("Camera sensor: %s\n", getSensorName(s->id.PID)); applyCameraSettings();returntrue;}bool initSDCard() { SD_MMC.setPins(SD_CLK_GPIO_NUM, SD_CMD_GPIO_NUM, SD_D0_GPIO_NUM);// true means 1-bit mode. The camera uses the other pins, so we cannot use 4-bit mode.if (!SD_MMC.begin("/sdcard", true)) {Serial.println("SD card not found. Please check the card and push it in again.");returnfalse; }if (SD_MMC.cardType() == CARD_NONE) {Serial.println("No SD card inside the slot");returnfalse; }Serial.printf("SD card size: %llu MB\n", SD_MMC.cardSize() / (1024 * 1024));returntrue;}String makeFileName(int number) {charname[32]; sprintf(name, "/change_%05d.jpg", number);returnString(name);}void findFirstFreeNumber() {while (SD_MMC.exists(makeFileName(photoNumber))) photoNumber++;Serial.printf("The next photo will be change_%05d.jpg\n", photoNumber);}// Works out how much the WHOLE picture became brighter or darker.// A lamp, a cloud or the evening sun moves every pixel by about the same amount.int averageShift(uint8_t *now, uint8_t *before, size_t size) {long total = 0;for (size_t i = 0; i < size; i++) total += (int)now[i] - (int)before[i];return (int)(total / (long)size);}// Compares the new picture with the old one and returns how many pixels changed.// We take the light change away first, so only real movement is counted.int countChangedPixels(uint8_t *now, uint8_t *before, size_t size, int shift) {int changed = 0;for (size_t i = 0; i < size; i++) {int difference = ((int)now[i] - (int)before[i]) - shift;if (difference < 0) difference = -difference; // we do not care if it is brighter or darkerif (difference > PIXEL_THRESHOLD) changed++; }return changed;}// Changes the camera to the big colour mode, takes one photo, saves it,// and changes back to the small black and white modevoid takeAndSavePhoto() { cameraConfig.pixel_format = PIXFORMAT_JPEG; cameraConfig.frame_size = FRAMESIZE_SVGA;if (esp_camera_reconfigure(&cameraConfig) != ESP_OK) {Serial.println("Cannot change the camera to photo mode");return; } applyCameraSettings();delay(200); camera_fb_t *fb = esp_camera_fb_get();if (fb) {String fileName = makeFileName(photoNumber);File file = SD_MMC.open(fileName.c_str(), FILE_WRITE);if (file) { file.write(fb->buf, fb->len); file.close();Serial.printf("Saved %s (%u bytes)\n", fileName.c_str(), fb->len); photoNumber++; } else {Serial.printf("Cannot write the file %s\n", fileName.c_str()); } esp_camera_fb_return(fb); } else {Serial.println("Photo capture failed"); }// Back to watching mode cameraConfig.pixel_format = PIXFORMAT_GRAYSCALE; cameraConfig.frame_size = FRAMESIZE_QQVGA; esp_camera_reconfigure(&cameraConfig); applyCameraSettings();delay(200);// The old picture belongs to the other mode, so we forget itif (lastPicture) { free(lastPicture); lastPicture = NULL; }}voidsetup() {Serial.begin(115200);delay(1000);if (!initCamera()) {Serial.println("Stopped");while (true)delay(1000); }if (!initSDCard()) {Serial.println("Stopped");while (true)delay(1000); } findFirstFreeNumber();Serial.printf("Watching for movement. A photo is saved when more than %d%% of the picture changes.\n", MOTION_PERCENT);}voidloop() { camera_fb_t *fb = esp_camera_fb_get();if (!fb) {Serial.println("Frame capture failed");delay(500);return; }// The very first picture has nothing to compare with, so we only keep itif (lastPicture == NULL) { pictureSize = fb->len; lastPicture = (uint8_t *)malloc(pictureSize);if (lastPicture) memcpy(lastPicture, fb->buf, pictureSize); esp_camera_fb_return(fb);return; }int shift = averageShift(fb->buf, lastPicture, pictureSize);int changed = countChangedPixels(fb->buf, lastPicture, pictureSize, shift);int limit = (pictureSize * MOTION_PERCENT) / 100;int lightLimit = (pictureSize * LIGHT_CHANGE_PERCENT) / 100;// Almost the whole picture changed. A person is never that big,// so this is a light change, not a movement.if (changed > lightLimit) {Serial.printf("The light changed (%d pixels). No photo.\n", changed); memcpy(lastPicture, fb->buf, pictureSize); esp_camera_fb_return(fb);delay(SETTLE_TIME); // let the camera set its brightness againreturn; }if (changed > limit) {Serial.printf("Movement seen: %d pixels changed (the limit is %d, light shift %d)\n", changed, limit, shift);if (millis() - lastPhotoTime >= QUIET_TIME) { esp_camera_fb_return(fb); takeAndSavePhoto(); lastPhotoTime = millis();return; } } memcpy(lastPicture, fb->buf, pictureSize); // remember this picture for the next time esp_camera_fb_return(fb);}
※ Note:
Maintenant, pointez la caméra vers une fenêtre avec un arbre dehors, un jour de vent. Les feuilles bougent, et la caméra enregistre photo après photo de rien du tout. C'est ce problème que l'exemple 3 corrige.
Code ESP32 S3 - Exemple 3 : Sûr avec la lumière et le vent
Le vent est un problème différent de la lumière. Les feuilles, un rideau ou un drapeau changent des pixels partout dans l'image, en petites taches. Une personne change un groupe de pixels voisins.
Compter les pixels ne peut pas faire la différence entre les deux, car les deux donnent un nombre similaire. Regarder où ils ont changé, oui.
L'image devient des blocs
Le code découpe la petite image en 8 × 8 = 64 blocs. Chaque bloc fait 20 × 15 pixels. Un bloc est « changé » lorsque suffisamment de ses propres pixels ont changé :
Les deux ont environ 8 blocs changés. Mais les blocs du vent sont isolés, et les blocs de la personne se touchent.
Trouver le plus grand groupe connecté
Le code part d'un bloc changé et se déplace vers chaque bloc changé voisin, puis compte la taille de ce groupe. Il garde le plus grand groupe trouvé :
int group = biggestGroup();if (group >= MIN_GROUP_BLOCKS) {Serial.println("Something moved");} else {Serial.println("Ignored. Probably wind.");}
※ Note:
Cette seule idée élimine la plupart des problèmes de vent. Les feuilles ne forment presque jamais 4 blocs qui se touchent, mais une personne qui passe le fait toujours.
Redemander sur l'image suivante
Les feuilles tremblent d'avant en arrière, donc elles paraissent changées sur une image et normales sur la suivante. Une personne continue de bouger. Le code demande donc la confirmation du mouvement sur plusieurs images d'affilée :
Les arbres, les drapeaux et le ciel se trouvent généralement dans la partie supérieure. IGNORE_TOP_ROWS écarte ce nombre de rangées de blocs :
#define IGNORE_TOP_ROWS 2 // ignore the top 2 rows of blocks
※ Note:
Avec 8 rangées de blocs, IGNORE_TOP_ROWS 2 écarte le quart supérieur de l'image. Utilisez-le quand le problème se trouve toujours au même endroit.
Tous les nombres que vous pouvez changer
Nom
Commencer avec
Ce que cela signifie
Problème qu'il résout
PIXEL_THRESHOLD
30
À quel point un pixel doit être différent
Bruit de la caméra
BLOCK_PERCENT
20
Quelle part d'un bloc doit changer
Petit bruit à l'intérieur d'un bloc
MIN_GROUP_BLOCKS
4
Combien de blocs doivent se toucher
Vent et feuilles
LIGHT_CHANGE_BLOCKS
40
Au-dessus de ce seuil, c'est un changement de lumière
Lampes et nuages
CONFIRM_FRAMES
2
Combien d'images d'affilée
Tremblements et scintillement
IGNORE_TOP_ROWS
0
Combien de rangées de blocs ignorer en haut
Un arbre dans la partie supérieure
SETTLE_TIME
1000
Attente après un changement de lumière
Réexposition de la caméra
QUIET_TIME
5000
Attente avant la prochaine photo
Trop de photos
SHOW_MAP
true
Afficher la carte dans le Serial Monitor
Vous aide à régler les nombres
/* * Ce code ESP32 S3 a été développé par newbiely.fr * Ce code ESP32 S3 est mis à disposition du public sans aucune restriction. * Pour des instructions complètes et des schémas de câblage, veuillez visiter: * https://newbiely.fr/tutorials/esp32-s3/esp32-s3-camera-detect-motion-without-a-sensor*/#include"esp_camera.h"#include"FS.h"#include"SD_MMC.h"// ============================================================// SETTINGS YOU CAN CHANGE// Start with these numbers, then change ONE at a time and// watch the map in the Serial Monitor.// ============================================================// How different one pixel must be before we call it "changed" (0 to 255).// Bigger = less sensitive to camera noise.#define PIXEL_THRESHOLD 30// How much of ONE block must change before the block counts as changed (in %).// Bigger = a block must be really busy before it counts.#define BLOCK_PERCENT 20// How many blocks must be changed AND touching each other.// This is the number that stops wind. Bigger = only bigger objects count.#define MIN_GROUP_BLOCKS 4// When more blocks than this change at once, it is a light change, not a person.#define LIGHT_CHANGE_BLOCKS 40// The movement must be seen in this many pictures in a row before a photo is taken.// Bigger = leaves that shake back and forth are ignored.#define CONFIRM_FRAMES 2// Ignore this many block rows at the TOP of the picture.// Use it when there are trees, a sky or a flag in the upper part.#define IGNORE_TOP_ROWS 0#define SETTLE_TIME 1000 // after a light change, give the camera 1 second#define QUIET_TIME 5000 // wait 5 seconds before the next photo#define SHOW_MAP true// print the map of changed blocks// ============================================================// The picture is cut into blocks. 160 x 120 becomes 8 x 8 blocks// of 20 x 15 pixels each.// ============================================================#define IMG_WIDTH 160#define IMG_HEIGHT 120#define BLOCK_COLS 8#define BLOCK_ROWS 8#define BLOCK_WIDTH (IMG_WIDTH / BLOCK_COLS) // 20#define BLOCK_HEIGHT (IMG_HEIGHT / BLOCK_ROWS) // 15// Camera pins of the ESP32-S3-N16R8 camera board.// The same pins work for the OV2640, OV3660 and OV5640 versions.#define PWDN_GPIO_NUM -1#define RESET_GPIO_NUM -1#define XCLK_GPIO_NUM 15#define SIOD_GPIO_NUM 4#define SIOC_GPIO_NUM 5#define Y9_GPIO_NUM 16#define Y8_GPIO_NUM 17#define Y7_GPIO_NUM 18#define Y6_GPIO_NUM 12#define Y5_GPIO_NUM 10#define Y4_GPIO_NUM 8#define Y3_GPIO_NUM 9#define Y2_GPIO_NUM 11#define VSYNC_GPIO_NUM 6#define HREF_GPIO_NUM 7#define PCLK_GPIO_NUM 13// Pins of the microSD card slot on the board#define SD_CLK_GPIO_NUM 39#define SD_CMD_GPIO_NUM 38#define SD_D0_GPIO_NUM 40camera_config_t cameraConfig; // we keep the settings, because we change them lateruint8_t *lastPicture = NULL; // the picture we saw the time beforesize_t pictureSize = 0;bool blockChanged[BLOCK_ROWS][BLOCK_COLS];int photoNumber = 1;int confirmCount = 0; // how many pictures in a row showed movementunsignedlong lastPhotoTime = 0;// Returns the name of the camera sensor that is installed on the boardconstchar *getSensorName(int pid) {switch (pid) {case OV2640_PID: return"OV2640 (2 MP, max UXGA 1600x1200)";case OV3660_PID: return"OV3660 (3 MP, max QXGA 2048x1536)";case OV5640_PID: return"OV5640 (5 MP, max QSXGA 2592x1944)";default: return"Unknown sensor"; }}// Each sensor needs slightly different settings.// We must call this again every time the camera restarts.void applyCameraSettings() { sensor_t *s = esp_camera_sensor_get();switch (s->id.PID) {case OV2640_PID: s->set_vflip(s, 0); s->set_hmirror(s, 0);break;case OV3660_PID: s->set_vflip(s, 1); // the OV3660 image is upside down by default s->set_brightness(s, 1); // make the image a little brighter s->set_saturation(s, -2); // make the colors a little softerbreak;case OV5640_PID: s->set_vflip(s, 0); s->set_hmirror(s, 0);break;default:break; }}// Starts the camera in the small black and white mode, used for watchingbool initCamera() { cameraConfig.ledc_channel = LEDC_CHANNEL_0; cameraConfig.ledc_timer = LEDC_TIMER_0; cameraConfig.pin_d0 = Y2_GPIO_NUM; cameraConfig.pin_d1 = Y3_GPIO_NUM; cameraConfig.pin_d2 = Y4_GPIO_NUM; cameraConfig.pin_d3 = Y5_GPIO_NUM; cameraConfig.pin_d4 = Y6_GPIO_NUM; cameraConfig.pin_d5 = Y7_GPIO_NUM; cameraConfig.pin_d6 = Y8_GPIO_NUM; cameraConfig.pin_d7 = Y9_GPIO_NUM; cameraConfig.pin_xclk = XCLK_GPIO_NUM; cameraConfig.pin_pclk = PCLK_GPIO_NUM; cameraConfig.pin_vsync = VSYNC_GPIO_NUM; cameraConfig.pin_href = HREF_GPIO_NUM; cameraConfig.pin_sccb_sda = SIOD_GPIO_NUM; cameraConfig.pin_sccb_scl = SIOC_GPIO_NUM; cameraConfig.pin_pwdn = PWDN_GPIO_NUM; cameraConfig.pin_reset = RESET_GPIO_NUM; cameraConfig.xclk_freq_hz = 20000000; cameraConfig.jpeg_quality = 10; cameraConfig.fb_count = 1; cameraConfig.fb_location = psramFound() ? CAMERA_FB_IN_PSRAM : CAMERA_FB_IN_DRAM; cameraConfig.grab_mode = CAMERA_GRAB_WHEN_EMPTY;// GRAYSCALE means black and white. One pixel is one byte, so it is easy to compare. cameraConfig.pixel_format = PIXFORMAT_GRAYSCALE; cameraConfig.frame_size = FRAMESIZE_QQVGA; // 160x120 - small and fastif (!psramFound())Serial.println("WARNING: PSRAM not found. Please set PSRAM to OPI PSRAM in the Tools menu."); esp_err_t err = esp_camera_init(&cameraConfig);if (err != ESP_OK) {Serial.printf("Camera init failed with error 0x%x\n", err);returnfalse; } sensor_t *s = esp_camera_sensor_get();Serial.printf("Camera sensor: %s\n", getSensorName(s->id.PID)); applyCameraSettings();returntrue;}bool initSDCard() { SD_MMC.setPins(SD_CLK_GPIO_NUM, SD_CMD_GPIO_NUM, SD_D0_GPIO_NUM);// true means 1-bit mode. The camera uses the other pins, so we cannot use 4-bit mode.if (!SD_MMC.begin("/sdcard", true)) {Serial.println("SD card not found. Please check the card and push it in again.");returnfalse; }if (SD_MMC.cardType() == CARD_NONE) {Serial.println("No SD card inside the slot");returnfalse; }Serial.printf("SD card size: %llu MB\n", SD_MMC.cardSize() / (1024 * 1024));returntrue;}String makeFileName(int number) {charname[32]; sprintf(name, "/move_%05d.jpg", number);returnString(name);}void findFirstFreeNumber() {while (SD_MMC.exists(makeFileName(photoNumber))) photoNumber++;Serial.printf("The next photo will be move_%05d.jpg\n", photoNumber);}// Works out how much the WHOLE picture became brighter or darker.// A lamp, a cloud or the evening sun moves every pixel by about the same amount.int averageShift(uint8_t *now, uint8_t *before, size_t size) {long total = 0;for (size_t i = 0; i < size; i++) total += (int)now[i] - (int)before[i];return (int)(total / (long)size);}// Looks at every block and marks the ones that changed.// Returns how many blocks changed in the whole picture.int markChangedBlocks(uint8_t *now, uint8_t *before, int shift) {int pixelsPerBlock = BLOCK_WIDTH * BLOCK_HEIGHT;int neededPerBlock = (pixelsPerBlock * BLOCK_PERCENT) / 100;int changedBlocks = 0;for (int by = 0; by < BLOCK_ROWS; by++) {for (int bx = 0; bx < BLOCK_COLS; bx++) {int count = 0;for (int y = 0; y < BLOCK_HEIGHT; y++) {int rowStart = (by * BLOCK_HEIGHT + y) * IMG_WIDTH + bx * BLOCK_WIDTH;for (int x = 0; x < BLOCK_WIDTH; x++) {int difference = ((int)now[rowStart + x] - (int)before[rowStart + x]) - shift;if (difference < 0) difference = -difference;if (difference > PIXEL_THRESHOLD) count++; } }bool changed = (count >= neededPerBlock) && (by >= IGNORE_TOP_ROWS); blockChanged[by][bx] = changed;if (changed) changedBlocks++; } }return changedBlocks;}// Finds the biggest group of changed blocks that TOUCH each other.// Leaves in the wind change single blocks here and there.// A person changes a group of blocks next to each other.int biggestGroup() {bool visited[BLOCK_ROWS][BLOCK_COLS]; memset(visited, 0, sizeof(visited));int best = 0;int stackY[BLOCK_ROWS * BLOCK_COLS];int stackX[BLOCK_ROWS * BLOCK_COLS];for (int startY = 0; startY < BLOCK_ROWS; startY++) {for (int startX = 0; startX < BLOCK_COLS; startX++) {if (!blockChanged[startY][startX] || visited[startY][startX])continue;// Start a new group here and walk to every block that touches itint top = 0;intsize = 0; stackY[top] = startY; stackX[top] = startX; top++; visited[startY][startX] = true;while (top > 0) { top--;int y = stackY[top];int x = stackX[top];size++;// Look at the four neighbours: up, down, left, rightint nextY[4] = {y - 1, y + 1, y, y};int nextX[4] = {x, x, x - 1, x + 1};for (int i = 0; i < 4; i++) {int ny = nextY[i];int nx = nextX[i];if (ny < 0 || ny >= BLOCK_ROWS || nx < 0 || nx >= BLOCK_COLS)continue;if (blockChanged[ny][nx] && !visited[ny][nx]) { visited[ny][nx] = true; stackY[top] = ny; stackX[top] = nx; top++; } } }if (size > best) best = size; } }return best;}// Draws a small map in the Serial Monitor. A # is a changed block.void printMap() {for (int by = 0; by < BLOCK_ROWS; by++) {String line = " ";for (int bx = 0; bx < BLOCK_COLS; bx++) line += blockChanged[by][bx] ? '#' : '.';Serial.println(line); }}// Changes the camera to the big colour mode, takes one photo, saves it,// and changes back to the small black and white modevoid takeAndSavePhoto() { cameraConfig.pixel_format = PIXFORMAT_JPEG; cameraConfig.frame_size = FRAMESIZE_SVGA;if (esp_camera_reconfigure(&cameraConfig) != ESP_OK) {Serial.println("Cannot change the camera to photo mode");return; } applyCameraSettings();delay(200); camera_fb_t *fb = esp_camera_fb_get();if (fb) {String fileName = makeFileName(photoNumber);File file = SD_MMC.open(fileName.c_str(), FILE_WRITE);if (file) { file.write(fb->buf, fb->len); file.close();Serial.printf("Saved %s (%u bytes)\n", fileName.c_str(), fb->len); photoNumber++; } else {Serial.printf("Cannot write the file %s\n", fileName.c_str()); } esp_camera_fb_return(fb); } else {Serial.println("Photo capture failed"); }// Back to watching mode cameraConfig.pixel_format = PIXFORMAT_GRAYSCALE; cameraConfig.frame_size = FRAMESIZE_QQVGA; esp_camera_reconfigure(&cameraConfig); applyCameraSettings();delay(200);// The old picture belongs to the other mode, so we forget itif (lastPicture) { free(lastPicture); lastPicture = NULL; } confirmCount = 0;}voidsetup() {Serial.begin(115200);delay(1000);if (!initCamera()) {Serial.println("Stopped");while (true)delay(1000); }if (!initSDCard()) {Serial.println("Stopped");while (true)delay(1000); } findFirstFreeNumber();Serial.printf("Watching. A photo is saved when %d touching blocks change in %d pictures in a row.\n", MIN_GROUP_BLOCKS, CONFIRM_FRAMES);}voidloop() { camera_fb_t *fb = esp_camera_fb_get();if (!fb) {Serial.println("Frame capture failed");delay(500);return; }// The very first picture has nothing to compare with, so we only keep itif (lastPicture == NULL) { pictureSize = fb->len; lastPicture = (uint8_t *)malloc(pictureSize);if (lastPicture) memcpy(lastPicture, fb->buf, pictureSize); esp_camera_fb_return(fb);return; }int shift = averageShift(fb->buf, lastPicture, pictureSize);int changedBlocks = markChangedBlocks(fb->buf, lastPicture, shift);// 1. Too many blocks at once means the light changed, not a personif (changedBlocks > LIGHT_CHANGE_BLOCKS) {Serial.printf("The light changed (%d blocks). No photo.\n", changedBlocks); memcpy(lastPicture, fb->buf, pictureSize); esp_camera_fb_return(fb); confirmCount = 0;delay(SETTLE_TIME); // let the camera set its brightness againreturn; }// 2. Wind moves single blocks here and there. A person moves a GROUP of blocks.int group = biggestGroup();if (group >= MIN_GROUP_BLOCKS) { confirmCount++;Serial.printf("Something moved: %d blocks changed, biggest group %d (%d of %d pictures)\n", changedBlocks, group, confirmCount, CONFIRM_FRAMES);if (SHOW_MAP) printMap(); } else {if (confirmCount > 0 && group > 0)Serial.printf("Ignored: biggest group only %d blocks. Probably wind.\n", group); confirmCount = 0; }// 3. The movement must be there in several pictures in a rowif (confirmCount >= CONFIRM_FRAMES) {if (millis() - lastPhotoTime >= QUIET_TIME) { esp_camera_fb_return(fb); takeAndSavePhoto(); lastPhotoTime = millis();return; } confirmCount = 0; } memcpy(lastPicture, fb->buf, pictureSize); // remember this picture for the next time esp_camera_fb_return(fb);}
Formatez votre carte microSD en FAT32 sur votre ordinateur.
Débranchez le câble USB, puis insérez la carte dans son emplacement.
Copiez l'exemple 1 et collez-le dans l'Arduino IDE.
Modifiez les réglages dans le menu Tools. Voir le tableau ci-dessus.
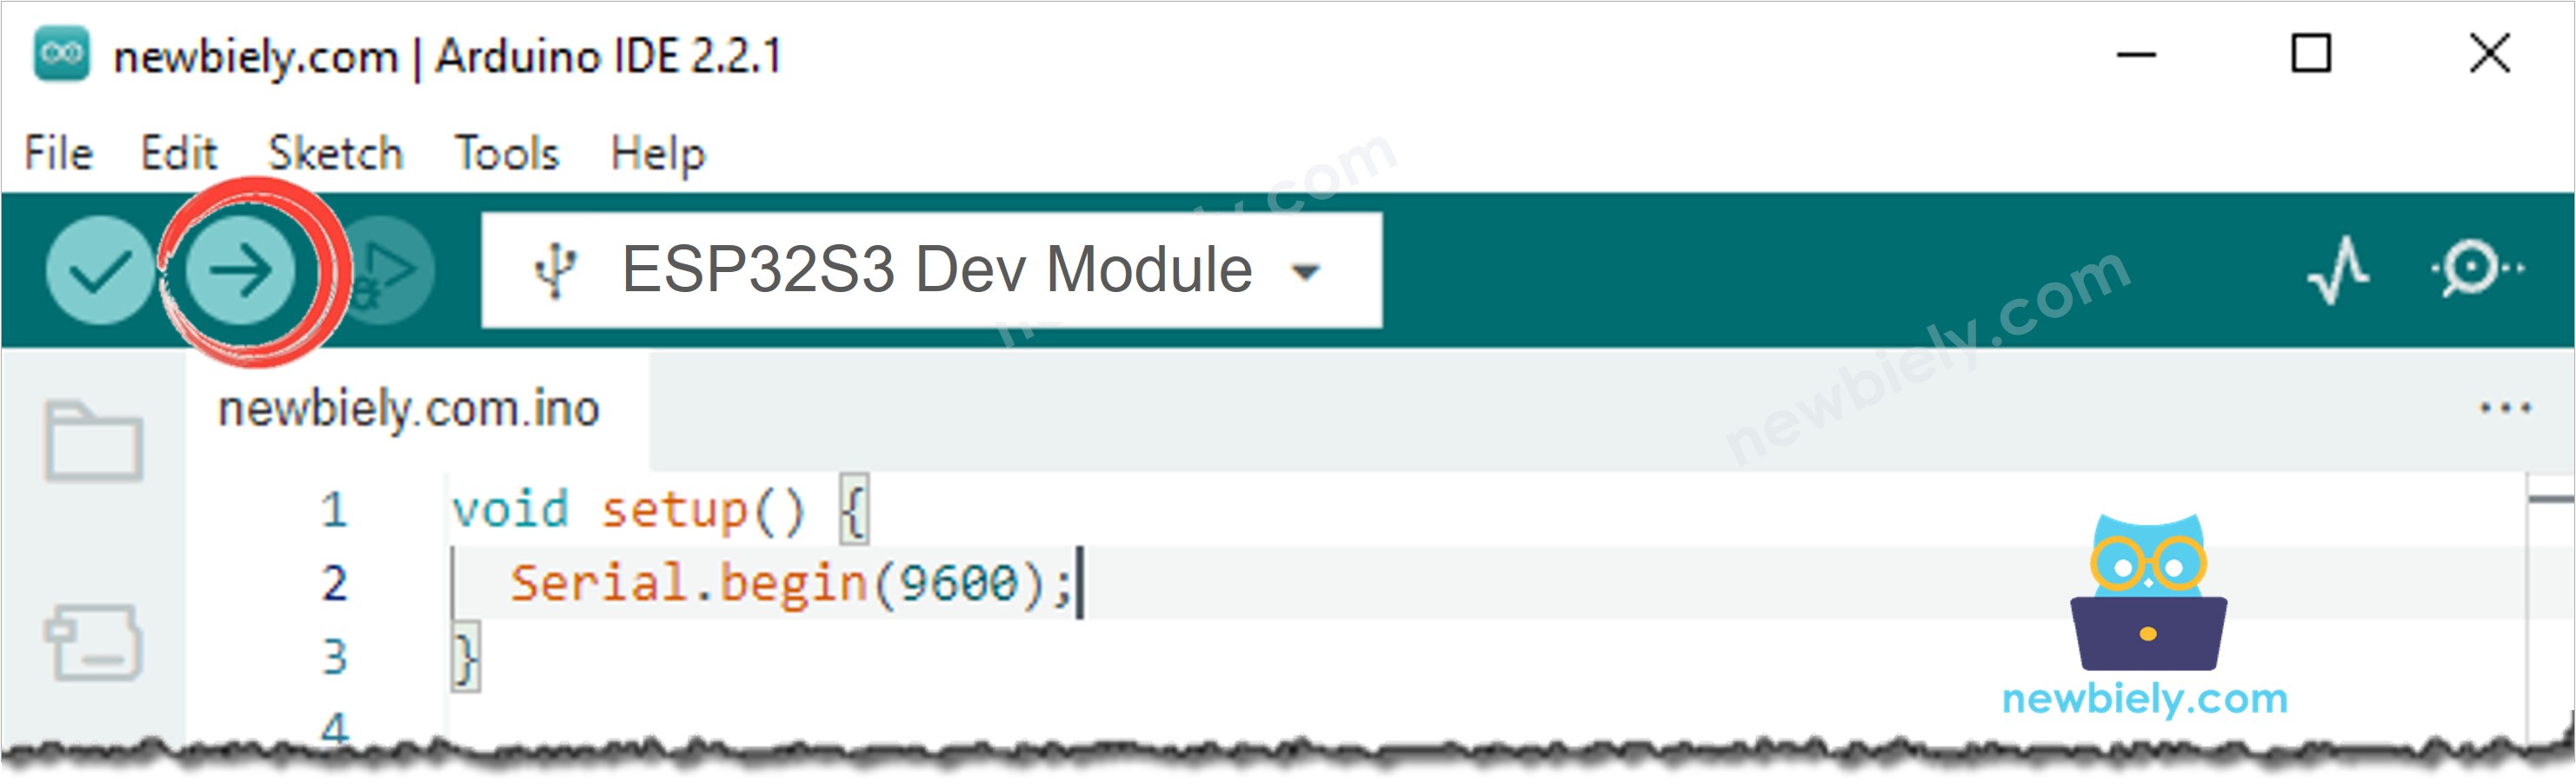
Compilez et téléversez le code sur la carte ESP32 S3 en cliquant sur le bouton Upload dans l'Arduino IDE.
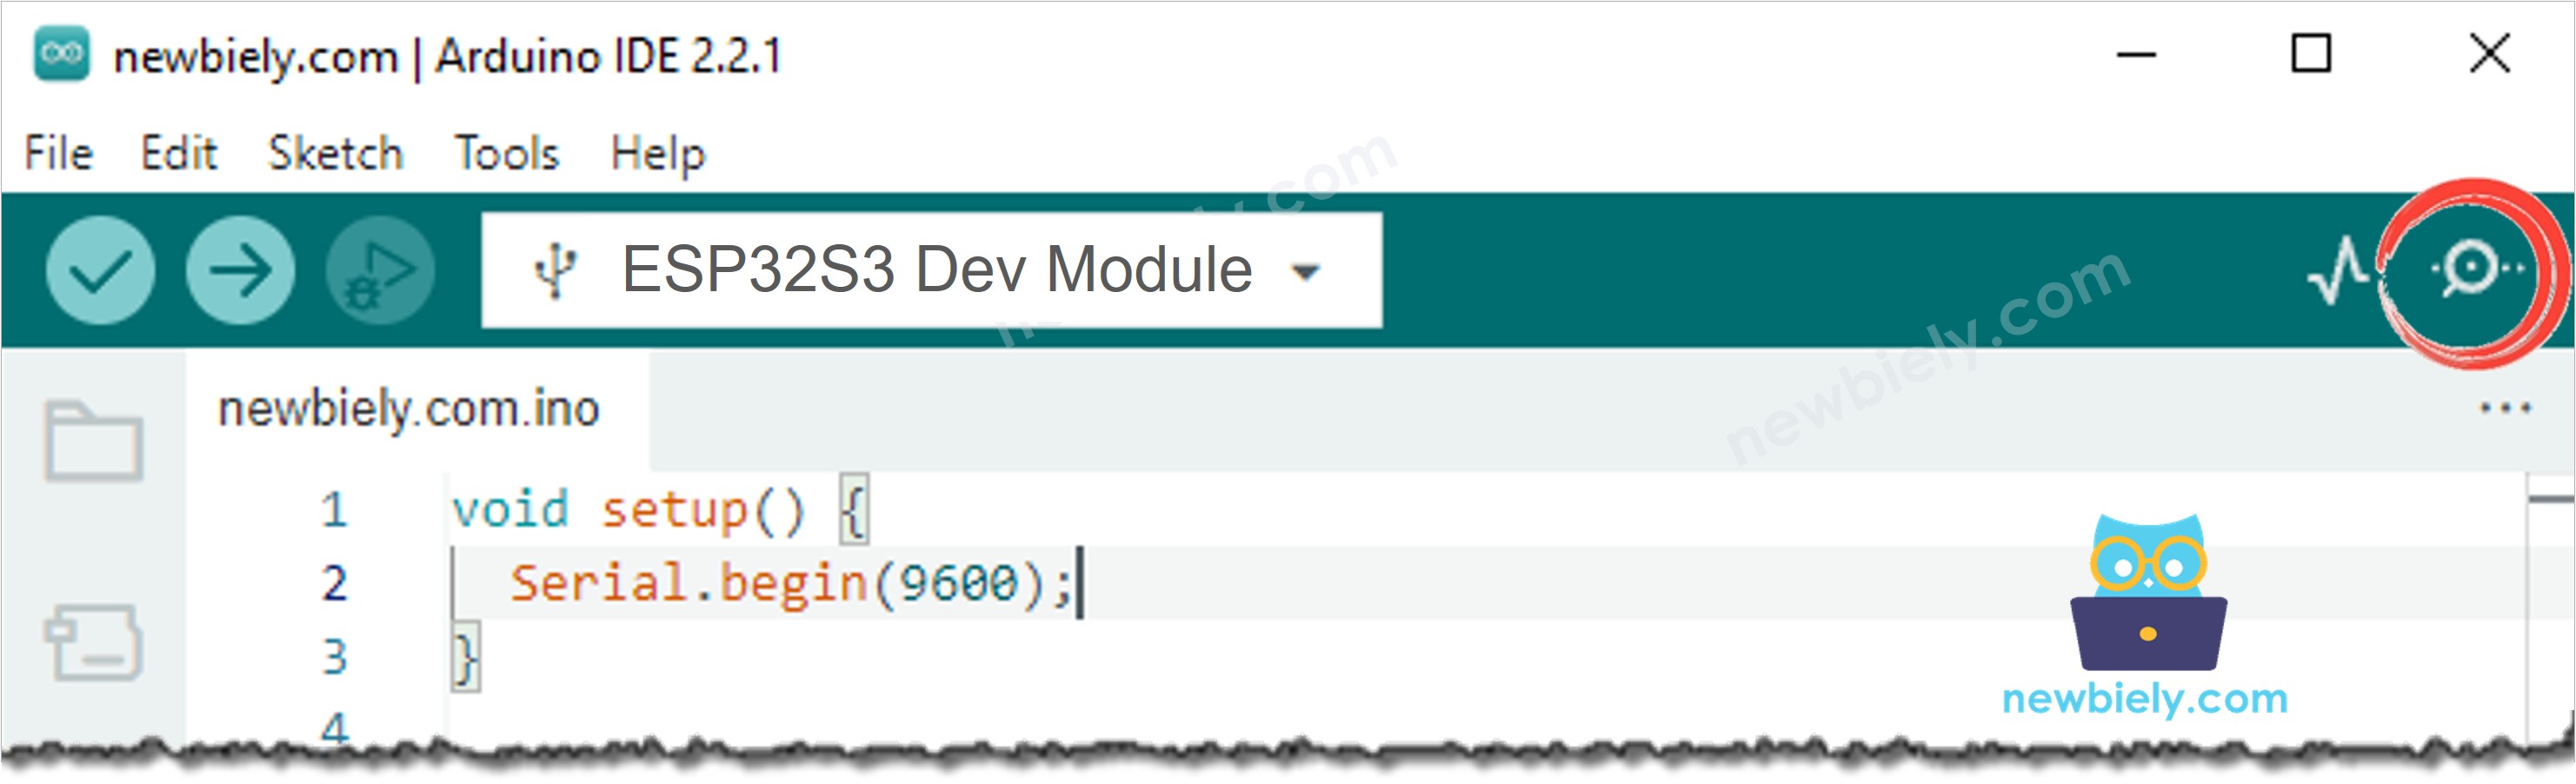
Ouvrez le Serial Monitor dans l'Arduino IDE.
Appuyez une fois sur le bouton RESET.
Agitez la main devant la caméra. Une photo est enregistrée.
Maintenant, allumez et éteignez une lampe. L'exemple 1 enregistre des photos de rien.
Téléversez l'exemple 2. Essayez à nouveau la lampe. Rien n'est enregistré cette fois.
Placez la caméra devant une fenêtre avec un arbre, ou devant un rideau qui bouge. L'exemple 2 enregistre des photos de rien.
Téléversez l'exemple 3. Regardez la carte dans le Serial Monitor, et changez les nombres jusqu'à ce qu'elle soit calme.
Astuce pro : Posez la carte sur quelque chose de solide. Si la carte bouge, toute l'image change, et chaque petite secousse ressemble à un mouvement.
Serial Monitor
L'exemple 3 dessine une petite carte, afin que vous puissiez voir exactement ce que la caméra a vu. Les relevés suivants ont été capturés en 2026 :
Newbiely | Arduino IDE 2.3.8
──
☐
✕
File
Edit
Sketch
Tools
Help
ESP32S3 Dev Module
Newbiely.ino
···
8Serial.println("Hello World!");
Output
Serial Monitor
Message (Enter to send message to 'ESP32S3 Dev Module' on 'COM15')
New Line
9600 baud
[2026-09-28 13:00:01] Camera sensor: OV5640 (5 MP, max QSXGA 2592x1944)
[2026-09-28 13:00:01] SD card size: 15193 MB
[2026-09-28 13:00:01] The next photo will be move_00001.jpg
[2026-09-28 13:00:01] Watching. A photo is saved when 4 touching blocks change in 2 pictures in a row.
[2026-09-28 13:00:38] Ignored: biggest group only 2 blocks. Probably wind.
[2026-09-28 13:00:42] Something moved: 9 blocks changed, biggest group 7 (1 of 2 pictures)
[2026-09-28 13:00:42] ........
[2026-09-28 13:00:42] ...##...
[2026-09-28 13:00:42] ..###...
[2026-09-28 13:00:42] ...##...
[2026-09-28 13:00:42] ........
[2026-09-28 13:00:42] ........
[2026-09-28 13:00:42] ........
[2026-09-28 13:00:42] ........
[2026-09-28 13:00:42] Something moved: 11 blocks changed, biggest group 8 (2 of 2 pictures)
[2026-09-28 13:00:43] Saved /move_00001.jpg (51353 bytes)
[2026-09-28 13:01:09] The light changed (58 blocks). No photo.
Ln 11, Col 1
ESP32S3 Dev Module on COM15
2
※ Note:
La carte est le meilleur outil dont vous disposez. Observez-la pendant une minute sans rien qui bouge dans la pièce. Si vous voyez des marques # en permanence, vos réglages sont trop sensibles.
Comment régler les nombres
Changez un nombre à la fois, et observez la carte après chaque changement.
Problème
Que changer
Des photos alors qu'il n'y a rien dans la pièce
Augmentez PIXEL_THRESHOLD (30 à 40 ou 50)
Une lampe déclenche toujours la caméra
Diminuez LIGHT_CHANGE_BLOCKS (40 à 25)
Les feuilles et le vent la déclenchent toujours
Augmentez MIN_GROUP_BLOCKS (4 à 6 ou 8)
Un rideau la déclenche toujours
Augmentez CONFIRM_FRAMES (2 à 4)
Un arbre dans la partie supérieure
Augmentez IGNORE_TOP_ROWS (0 à 2)
Une personne passe et rien ne se passe
Diminuez MIN_GROUP_BLOCKS (4 à 2)
Seuls les très grands mouvements sont vus
Diminuez BLOCK_PERCENT (20 à 10)
Beaucoup de photos de la même personne
Augmentez QUIET_TIME
※ Note:
Voulez-vous éliminer complètement le problème de lumière ? Désactivez la luminosité automatique de la caméra avec s->set_gain_ctrl(s, 0) et s->set_exposure_ctrl(s, 0). L'image ne change alors plus jamais d'elle-même. Le coût est que la caméra ne peut plus s'adapter, donc elle ne fonctionne que dans une pièce où la lumière reste toujours la même.
Ce qui la trompe encore
Situation
Exemple 1
Exemple 2
Exemple 3
Une personne passe
Oui
Oui
Oui
Une lampe s'allume ou s'éteint
Non
Oui
Oui
Un nuage passe devant le soleil
Non
Oui
Oui
Des feuilles bougeant dans le vent
Non
Non
La plupart du temps
Un rideau qui bouge
Non
Non
La plupart du temps
De la pluie ou de la neige qui tombe
Non
Non
La plupart du temps
Une ombre se déplaçant sur un mur
Non
Non
Non
Une lampe qui scintille ou une télévision
Non
Non
Non
La carte elle-même qui tremble
Non
Non
Non
※ Note:
Aucune caméra n'est parfaite. Même une caméra du commerce très coûteuse a ces problèmes. La bonne réponse pour un endroit difficile est souvent d'utiliser les deux méthodes ensemble : un Caméra ESP32 S3 - Enregistrer une photo sur carte SD lors d'une détection de mouvementet ce code, et n'enregistrer une photo que lorsque les deux sont d'accord.
Dépannage
Des photos sont enregistrées en permanence, même dans une pièce vide.
Augmentez PIXEL_THRESHOLD, par exemple 40.
Assurez-vous que la carte ne peut ni bouger ni trembler.
Une pièce avec une lampe qui scintille ou une télévision change tout le temps. Éloignez la caméra de ces sources.
Rien n'est jamais détecté.
Diminuez MOTION_PERCENT, par exemple 1.
La pièce est peut-être trop sombre. Cette méthode a besoin de lumière, car la caméra doit voir le changement.
Le Serial Monitor affiche cam_hal: FB-OVF.
La taille de l'image a été modifiée quelque part avec s->set_framesize(). Utilisez plutôt esp_camera_reconfigure(), comme le fait le code.
Les photos sont enregistrées, mais la surveillance s'arrête après la première photo.
La caméra n'est pas revenue au petit mode noir et blanc. Vérifiez que le second esp_camera_reconfigure() est bien appelé après la photo.
Le Serial Monitor affiche SD card not found.
Formatez la carte en FAT32, utilisez une carte de 32 Go ou moins, et repoussez la carte dans son emplacement.
Le Serial Monitor n'affiche rien après les messages de démarrage.
Si votre câble USB est branché sur le port nommé UART, réglez USB CDC On Boot sur Disabled. S'il est branché sur le port nommé USB, réglez-le sur Enabled.
Applications
Cette caméra n'a besoin de rien d'autre qu'elle-même, elle peut donc aller n'importe où et ne coûte rien de plus. Voici des projets pratiques que vous pouvez construire avec ce code :
Caméra de sécurité sans pièce supplémentaire : La façon la moins chère de surveiller une pièce.
Caméra de surveillance des colis et livraisons : Un capteur PIR ne voit pas un colis froid posé au sol, mais cette caméra si.
Surveillance de voiture et d'allée : Une voiture est froide, donc seule une caméra peut voir son arrivée.
Surveillance de vitrine : Un capteur PIR ne fonctionne pas à travers le verre, mais une caméra si.
Détecteur de panne de machine et d'imprimante 3D : Enregistrez une photo dès que l'image change de manière étrange.
Caméra de mangeoire à oiseaux : Les petits animaux sont souvent trop petits pour un capteur PIR.
Surveillance du niveau d'eau et des fuites : Enregistrez une photo quand l'image d'un sol ou d'un réservoir change.
Expérience en classe : Montrez aux élèves comment un ordinateur « voit » le mouvement avec des nombres simples.
Surveillance de porte et de portail : Fonctionne même quand la porte est derrière du verre.
Renfort pour une caméra PIR : Faites fonctionner les deux méthodes en même temps, et comparez laquelle est la meilleure dans votre pièce.
Vidéo
Regardez le tutoriel vidéo étape par étape pour ce projet ESP32 S3 ci-dessous.
Défis
Débutant : Changez MOTION_PERCENT de 2 à 5, et voyez à quel point un mouvement doit être plus important.
Intermédiaire : Affichez le nombre de pixels changés chaque seconde, même sans mouvement, et observez comment cela se comporte dans votre pièce pendant la journée.
Avancé : Regardez seulement le milieu de l'image, et ignorez les bords. Ainsi, un arbre qui bouge sur le côté de l'image ne déclenche plus la caméra.
N'hésitez pas à partager le lien de ce tutoriel. Cependant, veuillez ne pas utiliser notre contenu sur d'autres sites web. Nous avons investi beaucoup d'efforts et de temps pour créer ce contenu, veuillez respecter notre travail !